When you are just getting started with archery, the most difficult part of getting the right bow is finding the right draw weight. Although there are a bunch of recommendations based on your length age and body type, the best option will not always be the recommended one. If you are skinny and long for example, you might have issues with a 26 LBS bow. A small person, on the other hand, might even start with a 30 LBS bow. This is due to the difference between the actual draw weight and the draw weight of the limb. We will discuss this in more detail later.
So the best way to find the right draw weight is to test it. Therefore, I will discuss a simple test, which you can use to find the right draw weight at home. We will also explore some alternatives. At the end of this article, I will explain in more detail the idea behind the test.
Testing at home (5-step test)
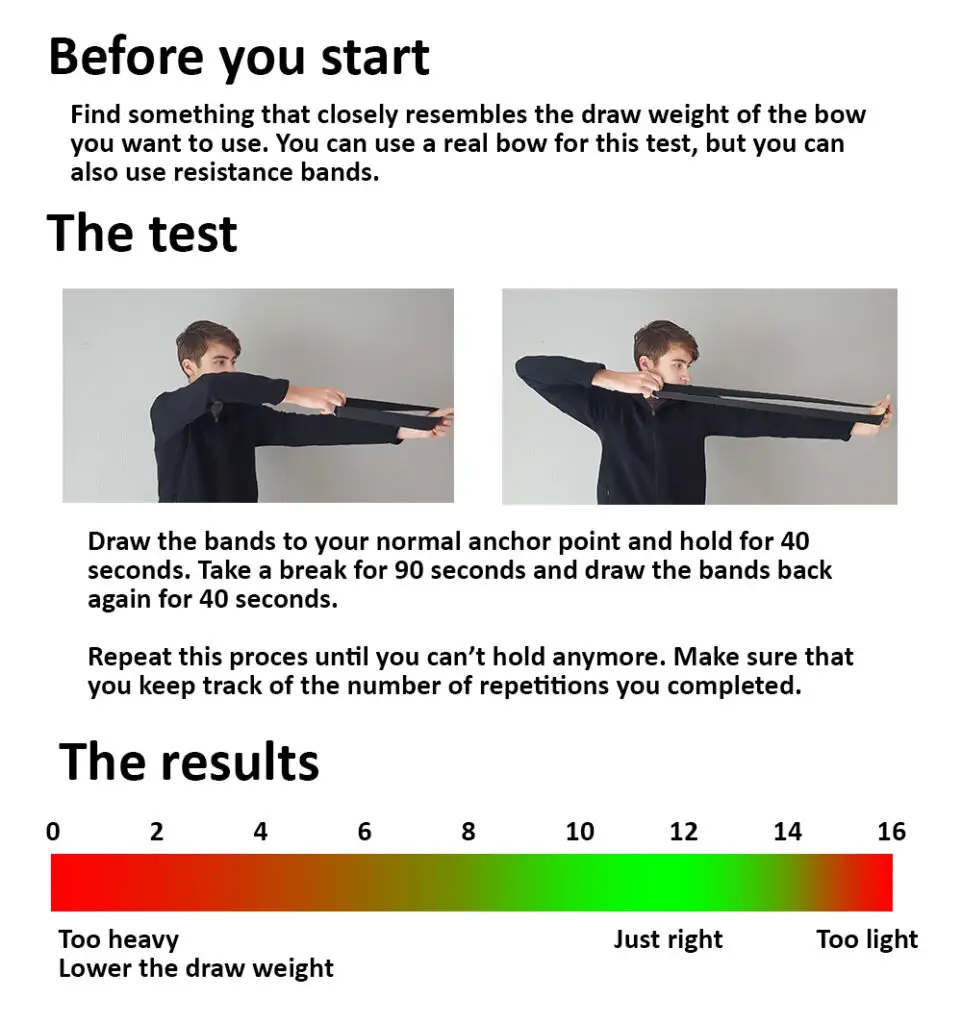
Follow the five steps below, to find the draw weight that best fits you. This method is a lot more precise than those recommendation charts and other techniques. It will involve more work, but it will give you actual results based on your strength. If you already have bought a bow, you can also use this exercise to test whether you are currently shooting with the right draw weight. In the infographic below, you can read a short summary of the 5-step test. I will discuss the 5-step process in more detail and give some additional tips below the infographic.
Step 1: Choosing the right day
The test you are about to do is an endurance and strength test. Your muscles should, therefore, be fully rested for the best results. We try to find the limits of your strength so even minor exercising can have a big impact. So when you do this exercise you shouldn’t have done these things in the past 24 hours:
- Any exercises in the upper body
- Physical work (especially when heavy lifting is involved)
- Any endurance exercises
Additionally, you should have had a good night’s sleep and had no muscle strain for the past 3 days. If any of the conditions are not met, the test will predict a lower draw weight than necessary.
Step 2: Preparing your gear
For the exercise, we need something that can simulate the draw weight that you want to test. Let’s say for example that you would like to test if you can comfortably shoot bow a 26 LBS draw weight. We then need something that can simulate that draw weight. Read this section, if you don’t know at what draw weight to start.
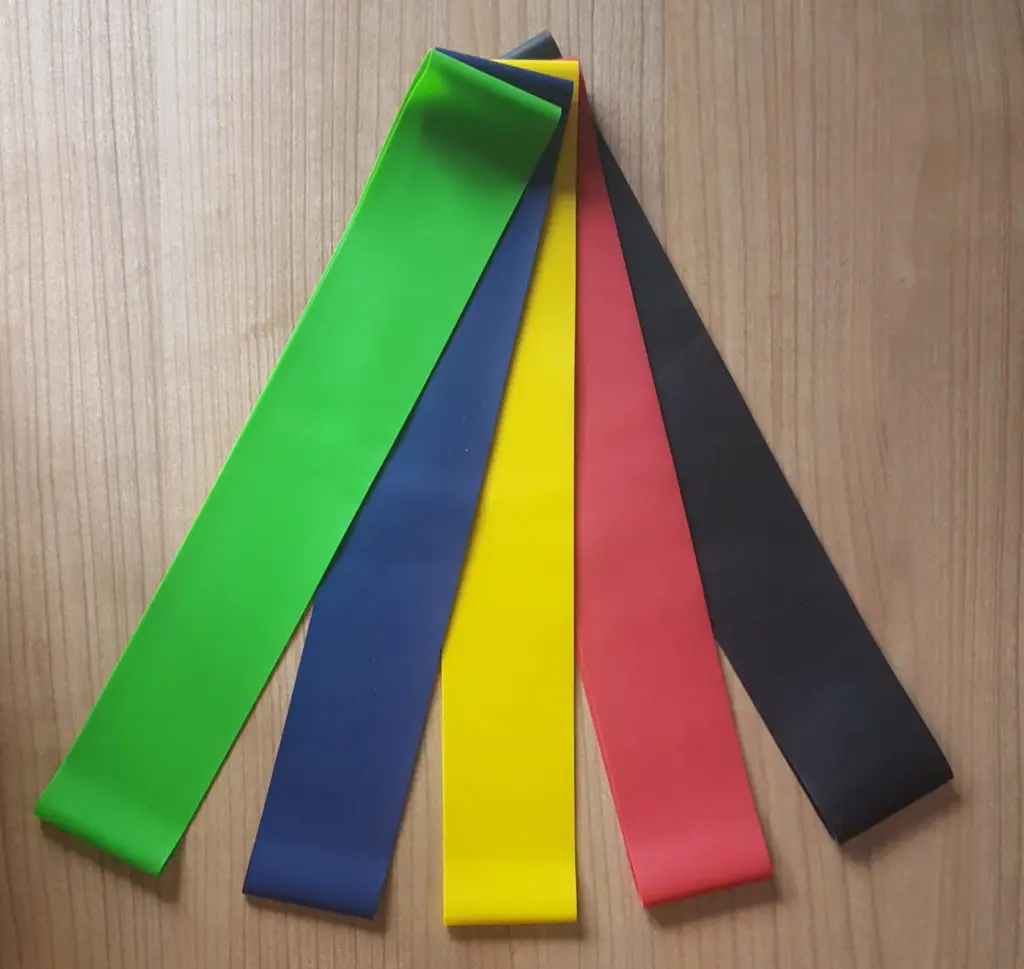
If you already have a bow, you can use that, of course. But if you don’t, you can use some resistance bands. If you don’t already have some resistance bands, I recommend this pack of 5. These bands are also very useful to train your back muscles as you can read in this article.
When you are using resistance bands, you still have to measure the standard draw weight. The standard draw weight is measured at 28 inches. So pull the bands back 28 inches and measure the draw weight. You can either use a bow scale (a specialized device to measure draw weight) or a luggage scale. The benefit of a bow scale is that it has a peak lock function. This means that it captures the maximum draw weight, which makes measuring bows extremely easy.
When you are using a bow, you need protection for your fingers. Since you will be holding the string in your fingers for a long time, it will hurt if you do it without any form of protection. If you don’t have a tab, you can also use a thick sock.

Step 3: Take the test
You are now ready to take the test. Depending on your abilities this test will take at least 10 minutes, so make sure that you have enough time to complete the test. Okay, let’s go!
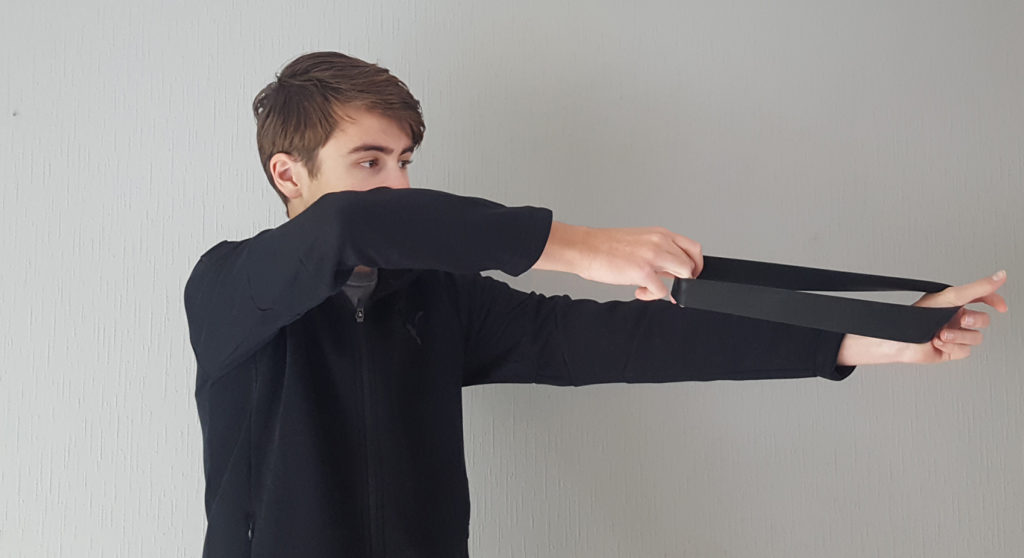
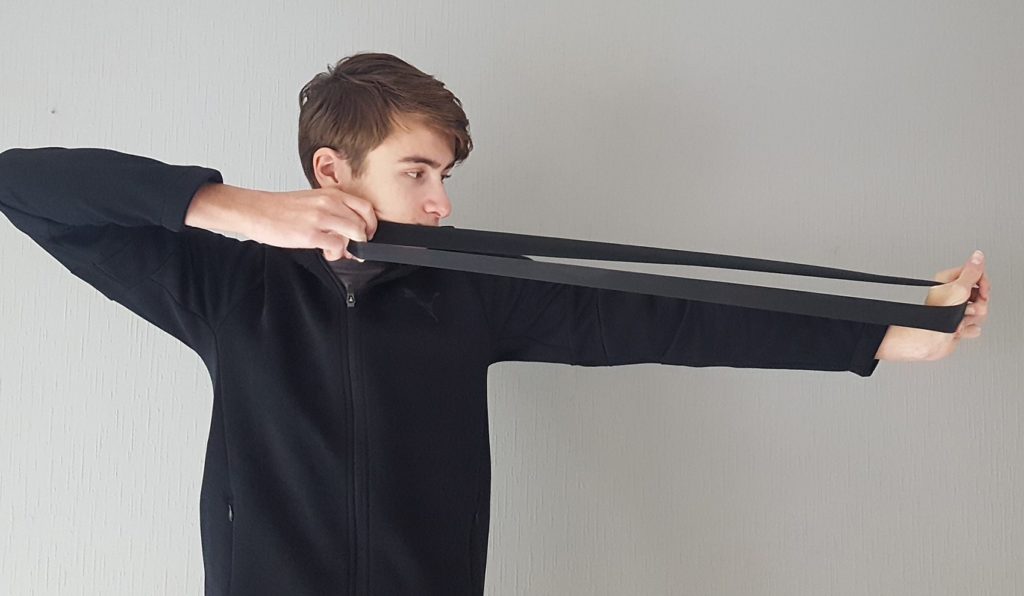
Stand with your feet at should width, just like you would if you draw a bow. Raise your arm and draw the band/string to your normal anchor point. Hold this pose for 40 seconds. You can either ask someone to time this for you, or you can add 5 seconds to your timer (to account for getting the bow ready) and time it yourself.
When the time is up you can take a break for a maximum of 90 seconds. You can use a different timer to measure the time of the brakes or you can reset the timer two times. When the 90 seconds are over, repeat the entire process from the start. Make sure to either count or write down the number of reps you completed, we will need that in step 4.
This is an endurance test, so continue doing this exercise until you can’t pull the bow/resistance band anymore. You will feel that your muscles are starting to get tired, but try to go as far as you can. If you have reached 15 repetitions you can also stop the exercise.
Step 4: Check the chart
Alright, the hard part is over now. It might be a really annoying and boring exercise to do; it’s really helpful to determine the right draw weight. You can now use the information below; to check whether the chosen draw weight is right for you.
| 1-5 reps | 6-8 reps | 9-12 reps | 13+ |
| This draw weight is clearly too heavy for you. | This draw weight might be too heavy for you. | This draw weight seems to be sufficient for your strength. | You are probably able to draw a heavier bow. |
| Shooting with this draw weight will probably result in poor form and decreased accuracy. | Choosing a lower poundage bow will probably result in higher scores and allow you to train your archery skills more on one day. | Shooting a heavier bow has some accuracy benefits. Therefore, you might want to consider shooting a heavier bow |
You might think that my recommendations are quite rigorous, but you have to know the idea behind them. With these recommendations, I try to provide you with the draw weight that allows you to shoot the most accurately. Although there are some benefits of shooting with a heavier bow, there are way more drawbacks of shooting with a too-heavy bow.
Professional archers do this exercise for 1 minute with at least 10 repetitions as part of their training. Shooting with a bow that is a bit too light isn’t that much of a problem, shooting a bow that is a bit heavy is. Please read this section if you want to know more about the test and my recommendations.
Step 5: Retest (if necessary)
The test essentially has three possible outcomes; the draw weight is too heavy, too light, or just right. When the tested draw weight was too heavy or too light, you should take the test another time and decrease/increase the poundage. Here are my recommendations on how much I would change the poundage based on the previous test. I will illustrate the calculations with an example of 30 LBS.
| 1-5 reps | 6-8 reps | 9-12 reps | 13+ |
| 40%-30% LBS decrease Example 30 LBS * 40% = 12 LBS 30 LBS * 30% = 9 LBS The new test should have a draw weight between 18 and 21 LBS | 20%-10% LBS decrease Example 30 LBS * 20% = 6 LBS30 LBS * 10% = 3 LBS The new test should have a draw weight between 24 and 27 LBS | The draw weight fits your strength | 10% LBS increase Example 30 * 10% = 33 LBS The new test should have a draw weight of at least 33 LBS |
You should continue lowering the poundage until you can hit 9 reps. If you can just get to 13 reps you might want to stick with the current draw weight. Although you could technically go heavier, you can also use that extra strength to increase the length of your training. Therefore, that is a more personal consideration you have to make.
If you are using resistance bands, you might need to mix and match and use multiple bands at the same time to get the right draw weight. Make sure to measure the draw weight of both bands before you start.
Testing at the club
Although the test we discussed above is really effective at finding the right draw weight. The best way to find what draw weight fits you best is to try it out on the field. I believe you should be able to shoot at least 60 arrows without having shaky shots in the last few sets. This doesn’t mean that you have to fire 60 shots in rapid succession but it should be doable within 2 hours.
If you can only fire 30 arrows per training, you will have less time to train your technique. Additionally, in many archery competitions, you shoot 2 rounds of 30 arrows. If you can’t comfortably shoot 60 arrows in one training session, I would highly advise decreasing the draw weight.
Using the recommended draw weight chart
When you don’t know where to start testing, you can use the recommended draw weight chart below. Although some archers tend to recommend higher draw weights, I tend to be more conservative. As a starting archer, learning the right technique and form is very important. This is impossible to do when you have a too-heavy bow, therefore it’s better to stay on the safe side.
| Archers profile | Draw weight |
| Small children | 16 LBS or less |
| Larger children | 16 till 18 LBS |
| Teenage female | 18 till 22 LBS |
| Teenage male | 20 till 24 LBS |
| Female | 20 till 26 LBS |
| Male | 22 till 30 LBS |
If you are quite tall, I would stay with a lower poundage limb than if you are shorter. This is due to the difference between actual and standard draw weight, which we discuss in the next section.
Actual vs. standard draw weight
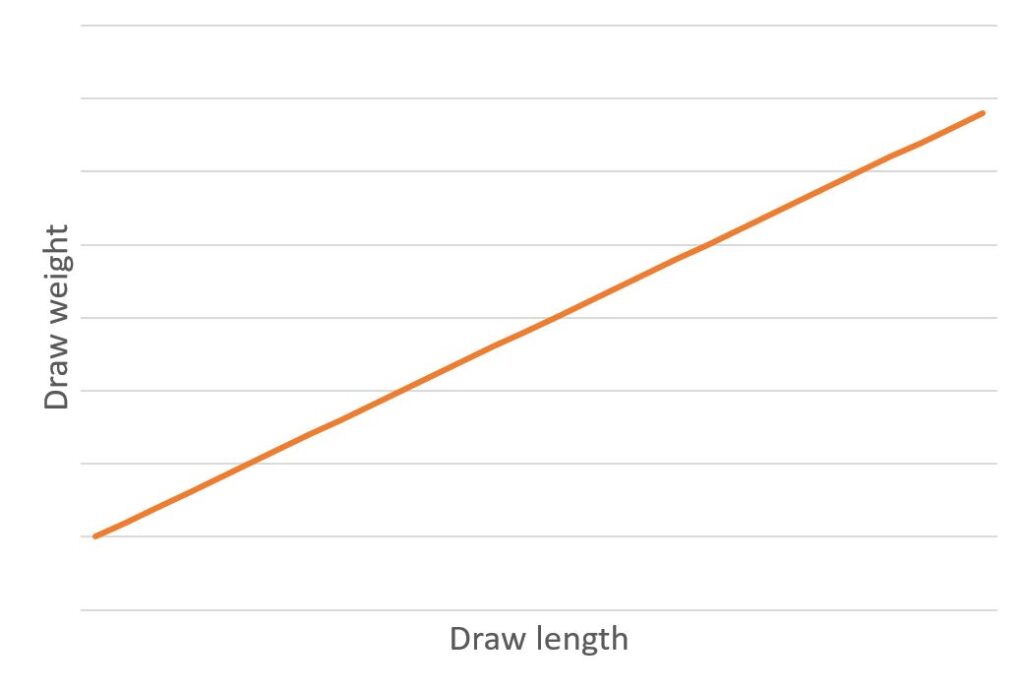
In the test, I said that you had to measure the draw weight at 28 inches, regardless of your actual draw length. The reason behind this is that the draw weight of all bows is measured at 28 inches. This is the standard draw weight and allows you to compare the stiffness of limbs.
Although this is a great measure to compare the stiffness of limbs, it’s a horrible way to compare the draw weight among archers. If you, for example, have a draw length of 30 inches, you will have a heavier draw weight than indicated on the limbs. The reverse is true for a 26-inch draw length.
Every inch you pull your bow back, the draw weight will increase by a few pounds. Therefore, there is a linear relationship between draw weight and draw length. But even if you would compare two archers with the same draw length, the tiller can significantly influence the draw weight.
If you want to make a proper comparison, you have to measure the actual draw weight at your draw length with your bow. Any other comparison would be meaningless. The standard draw weight is only used for an archer to identify if the limb has higher or lower poundage than the limb you are currently shooting with.
Shooting with a light vs. a heavy bow
I already mentioned a few times, that there are a lot of negatives to shooting a too-heavy bow. But I haven’t mentioned any negatives of shooting a ‘’too light bow’’. Although we can discuss this in more detail another day, I quickly want to mention the most important pros and cons.
Benefits of a heavy bow
The primary benefit of shooting a heavier bow is that you can shoot longer distances. Arrows will start to drop over long distances, which means that you might have to bottom out your sight. When this happens, you can’t shoot any further because the sight won’t go any lower. Luckily there are solutions for these issues, which we discuss in the article below:
Fixing a sight that won’t go any lower
Heavy bows perform better outdoors and at long range because the arrow will be shot with more speed. This makes the arrow less vulnerable to wind resistance, which can be a major pain at long distances. Increasing the arrow speed will also have accuracy benefits indoors, but they tend to be very minor and in my opinion don’t outweigh the benefits of a lighter bow.
Benefits of a light bow
Shooting with a too-heavy bow will cause a lot of issues. The first issue is that you will start to shake which makes shooting accurately impossible. Another drawback is that your body often starts to compensate for the heavy draw weight, which often comes at the cost of your form. The worst-case scenario is that you will even experience muscle pain or a muscle-related injury.
So to keep on the safe side, especially if you are new to archery, it might be wise to choose a lighter bow. The last benefit of a lighter bow is that it allows you to practice more. The best way to improve your archery is to shoot more arrows, so anything that allows you to do that is very valuable.
The verdict
Although having a heavy bow has advantages, mainly at long range; it also has some disadvantages. Therefore, it would be best to find a draw weight that is just the weight you can comfortably draw. This sweet spot can be very hard to find though, so it’s a good idea to just go a little bit lower than necessary to prevent issues.
FAQ about the test
The 5 step test I presented at the beginning of this article was developed by me. For new archers, it’s very difficult to choose the right draw weight. As a result, many archers start with a too-heavy draw weight, which will cause a lot of issues later on. Although you can use a recommended draw weight as a starting point, you never know whether that’s actually the right one.
I noticed that there was little information available about how you can test your draw weight, which inspired me to write this article. I will discuss a few questions about this test in more detail. But if you have any that I didn’t discuss please leave them in the comment section down below.
Is the test an accurate representation of archery?
The best way to test something is to replicate the process as much as possible. Therefore you must choose the right resistance bands to replicate the draw weight. But you may wonder whether there is an exercise that more closely resembles the shooting process.
You can, of course, draw the bands back 60 times and hold for 7 seconds (the average time at full draw). If you would notice any shaking you would know that the draw weight is too heavy for you. But there is one flaw in this test. Since you take a lot of breaks between shots in archery; to retrieve the arrows and to prepare for the next shot; you will also have to take these breaks in your test. This means that it would take about one and a half hours to test this. I think that is a bit extreme and most people are not willing to do that since it will be very boring.
So, the test is a compromise, it takes about 10 minutes. If you have taken the test, you might already think that it was really boring. So doing that for one and a half hours is just not feasible.
How was the test developed?
Although I discuss this exercise as a test with recommendations, I didn’t make this exercise up by myself. The actual exercise is based on endurance exercise from a professional training drill called SPT. Professional archers do this exercise with about 10 repetitions with about 30 to 60 seconds per draw. Read the article below, if you want to learn more about these exercises:
How to practice archery without shooting – SPT
It’s a really solid exercise to train your back muscles; therefore, I used this exercise a lot. I also tried this exercise with multiple limbs to increase the draw weight. That’s when I noticed that I could only fully complete the exercise with limbs that were the right draw weight for me.
Therefore, I started developing the test. I tried the test with multiple archers and found that the results were replicated. That made me confident that completing the exercise with 10 repetitions would mean that you can comfortably shoot with that bow.
Does the test also work for traditional and compound archers?
No, this test only works for recurve archers. The SPT drill is created for recurve archers, which shoot with a sight and without let-off. If you don’t shoot with a sight, like traditional archery, you hold the bow shorter at full draw. This would mean that you grossly underestimate the draw weight. The same is true for compound archers, the let-off makes holding the bow at full draw less of an issue. Therefore, you would again underestimate the draw weight. Therefore, I don’t recommend doing these tests to determine the draw weight for a traditional or compound archer.
I might develop a test for compound archers in the future, but that would be more difficult since different let-offs allow for different draw weights.

Tim van Rooijen
For as long as I can remember, I have always been fascinated by archery. First due to its historic significance but later because I like being outdoors. With this blog, I share my knowledge about Archery and how you can improve your shot. More about author…
This seems a pretty accurate test.
As a newbie, I ordered a 35# bow, and it arrived before my arrows. I therefore took this test. While I made it through 7 40-second draws and frankly could have continued, I was shaking a bit and could feel the strain in my back muscles. I decided to stop before I hurt myself and concluded that a 35# bow was on the high side for me.
Later, after my arrows arrived, I shot a few dozen only to suspect that I was sometimes subconsciously drawing less than my full length to compensate for the heavy draw. Oops, bad form. Again, 35# seemed on the high side.
Since I’m close to capable of managing a 35# bow out of the gate, I’m sure that with a little practice I’ll be fine. However, I know myself–I won’t practice–so I ordered 30# limbs.
Good test. I just wish I had taken it before I bought my bow with 35# limbs.
Hi Ken,
I am happy to hear that the test is quite accurate in your case. Of course, it’s difficult to design a test that works 100%, there is simply no substitute to actually shooting a bow. Since the hold time per archer differs significantly, there will always be some variation.
I believe you made the right choice to lower the draw weight. Shooting with a too heavy draw weight can cause a lot of issues, such as bad form, as you mentioned!