Configuring a drop-away arrow rest is probably the most difficult part of setting up a compound bow. The problem is that there are multiple mechanisms and bow configurations. This means that there are many ways to set up a drop-away arrow rest, depending on the bow and arrow rest you are using.
There are many videos online that try to explain how to set up a drop-away arrow rest. But the problem is that they all show how it works with one specific arrow rest. That is great if you have the same equipment, but what do you do if you have a different bow or arrow rest?
Therefore, I will discuss in this article all the different configurations and give you tips on setting up the drop-away arrow rest.
Before we start
In this article, I will focus on setting up the arrow rest cord. Which makes sure the arrow rest drops away at the correct time. Before you can configure this, you must center the arrow rest. This is a relatively straightforward procedure, so I don’t cover that in this article.
If you still must center your arrow rest, I recommend reading the article below:
Once you have centered the arrow rest, you can return to this article to configure the drop-away feature of the arrow rest.
How a drop-away arrow rest works
Before we start configuring the drop-away arrow rest, it’s very important that we understand what we try to achieve. Therefore, I will quickly explain how a drop-away arrow rest works.
The main benefit of the drop-away arrow rest is that the rest provides support during the launch of the arrow while causing minimal interference. The arrow rest stays up during the launch of the arrow to guide the arrow, but once the vanes are close to the rest the rest drops down.
Since the vanes protrude from the arrow, they often collide with the arrow rest during the flight. By dropping the arrow rest, the vanes will have a clear path which improves overall accuracy. So, our aim is to configure the arrow rest as follows:
The arrow rest should be down when the bow is not drawn. But once the bow is drawn the arrow rest should pop up to guide the arrow.
This is extremely important to remember. If you configure this the wrong way around, the benefit of the drop-away arrow rest will be completely undone, and it will severely decrease your accuracy.
Default up vs default down drop-away arrow rest
There are roughly two types of drop-away arrow rests. Although there are no official names for them, I am going to name them as follows:
- Default down arrow rests: when you do not pull the cord, the arrow rest will be down. The spring pulls the arrow rest down. Therefore, the cord needs to be pulled near the end of the draw.
- Default up arrow rest: when you do not pull the cord, the arrow rest will be up. Therefore, to keep the arrow rest down when the arrow has been shot, the cord needs to be pulled. When the bow is drawn, the cord will be loosened which allows the arrow rest to go up.
So, checking which kind of arrow rest you have is very easy. Do not pull the cord and check whether the arrow rest is up or down. If it’s down, it’s a default down arrow rest. If it is up, it’s a default up arrow rest.
You need to know the difference because the arrow rests need to be activated in reverse. With the default down arrow rest, you must pull the cord while drawing. With the default down arrow rest, you need to release some of the cord to activate the arrow rest. Therefore, it needs to be attached to a different part of the bow.
Where to connect the drop-away arrow rest cord
Depending on how your arrow rest functions we need to attach the cord to different parts of the bow. To make it easier for you, I have added them in a grid below, so you can see which attachment point you can use depending on your arrow rest.
| Attachment point | Default up | Default down |
| Cable rod slider | X | |
| Cable itself | X | |
| Cable splitter | X | |
| Bow limb | X |
By the way, if you are not familiar with the terminology of the bow parts used above. You can get a quick overview here: the parts of a compound bow.
There is not one good way here, as it also depends on your bow. Some compound bows do not have a solid method to attach the cord to the cable splitter or the cable rod slider. Also, for some bows, it is difficult to add the cord to the bow limb or cable, as it can collide with other bow parts. That is why it is important to check if your setup works before you cut your cord.
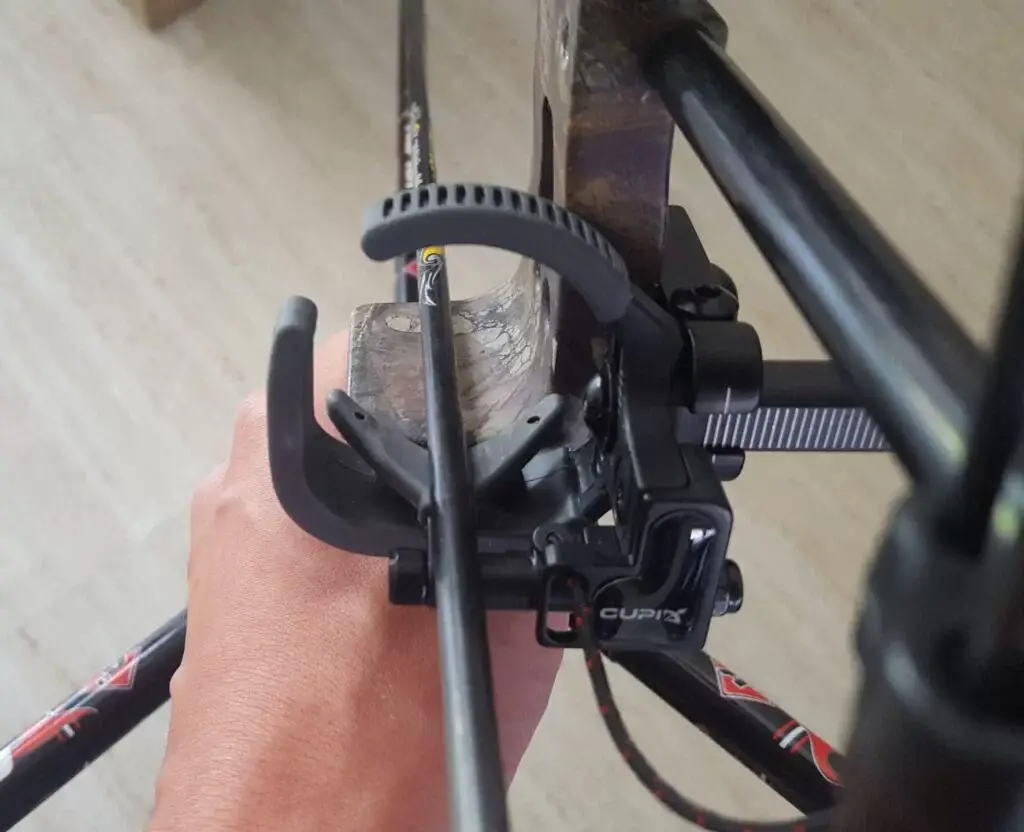
Cable rod slider
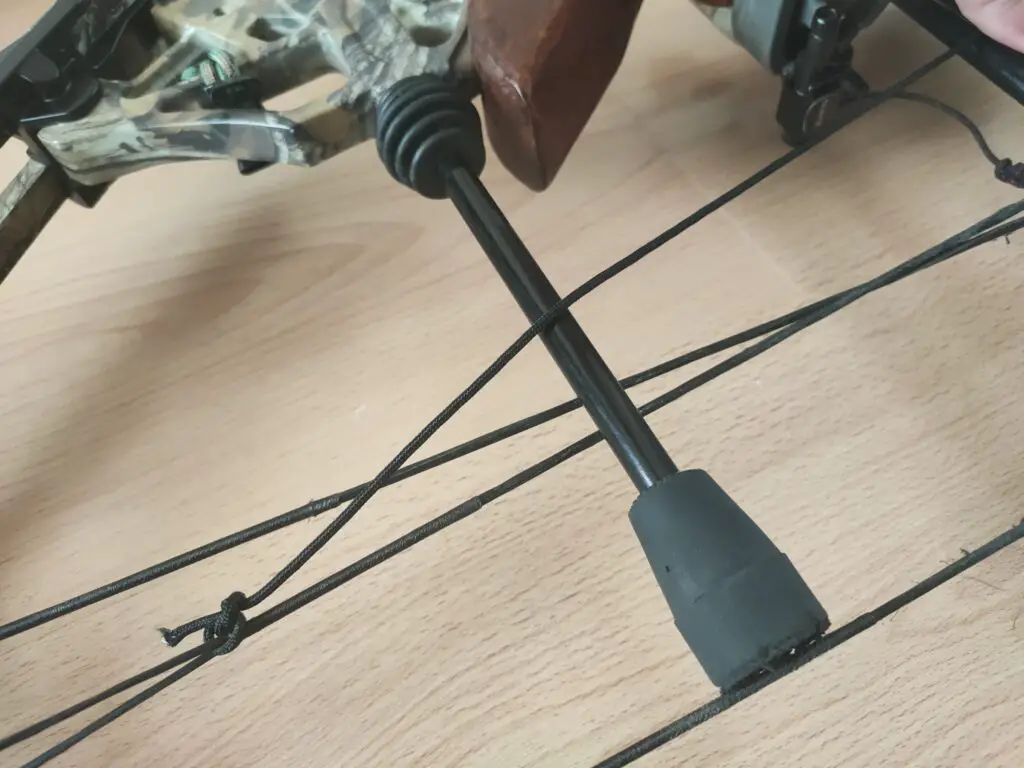
This is how I currently run my compound bow. Some compound bows have dedicated hooks or eyes, where you can attach your cable. If it is possible, I can highly recommend this method. I have also experimented with attaching it to the cable itself, but that is much more complicated.
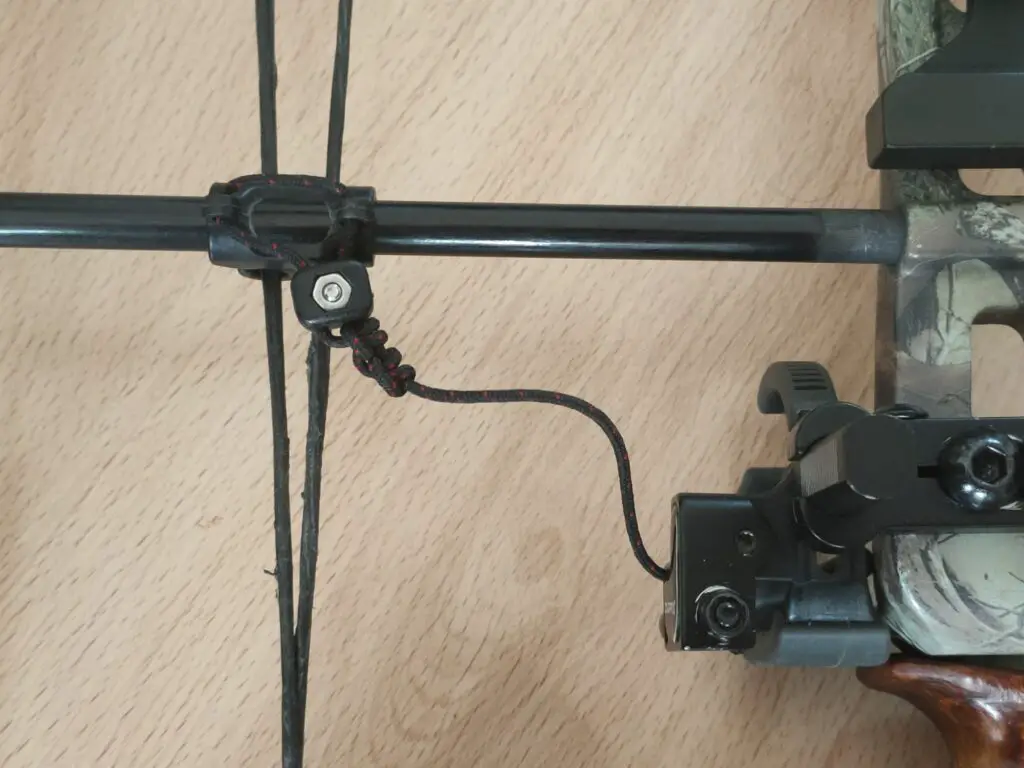
If you attach it to the cable rod slider you just pull it through one of the eyes and tie a knot. My bow came with a clip that allows you to easily add it to the cable, but it also works fine to add it as you see in the picture below.
To the cable itself
As mentioned earlier, I believe this method is more difficult than attaching it to the cable rod slider, it is especially difficult to get the timing correct. But on some bows, this is the only way you can get a default down arrow rest to work.
Make sure that you attach the arrow rest cord to the cable that goes down when drawing the bow. The cord should always be pulled down. If the cord were to be pulled up, it could interfere with the arrow.
To make it more complicated, there are 3 different ways you can attach the cord to the cable:
- Attaching it with a clip: this is a small device that allows you to clip the cord onto your compound bow cable. To secure the clip you tighten a small screw which tightens both sides. If your rest comes with a clip, I highly recommend using this method, as it is the easiest way to secure it.
- Making a knot with serving wire: if you use this method you will need to have some serving wire. If you do not have any serving wire, I highly recommend this spool of serving wire from Bohning. This method is relatively sleek and adjustable, so if you do not have a clip this would be a great option.
- Weaving it into the cable: this method is quite difficult because you need to get the arrow rest cord through the stands of your cable. To do this, you need to have a bow press. Also, this method is almost permanent, as it will be difficult to adjust it once you have cut the cord.
For some detailed guides on how to attach the arrow rest cord to your cable, please see the videos below:
Attaching it with a clip
Make a knot with serving wire
Weaving it into the cable
Cable splitter
Near where the cable is attached to the bow limb the cable is split in two. This is to evenly distribute the pressure of the cable of the two parts of the bow limb. Some compound bows have a piece of plastic that is known as a limb splitter. This device makes sure that the cables go around the cam.
The limb splitter is a perfect place to attach the arrow rest cord if you have an arrow rest that is up by default. Since this piece stays away from the cams it will not interfere with the normal functioning of the bow.
You can see how an archer attaches the arrow rest cord to the limb splitter in the video below:
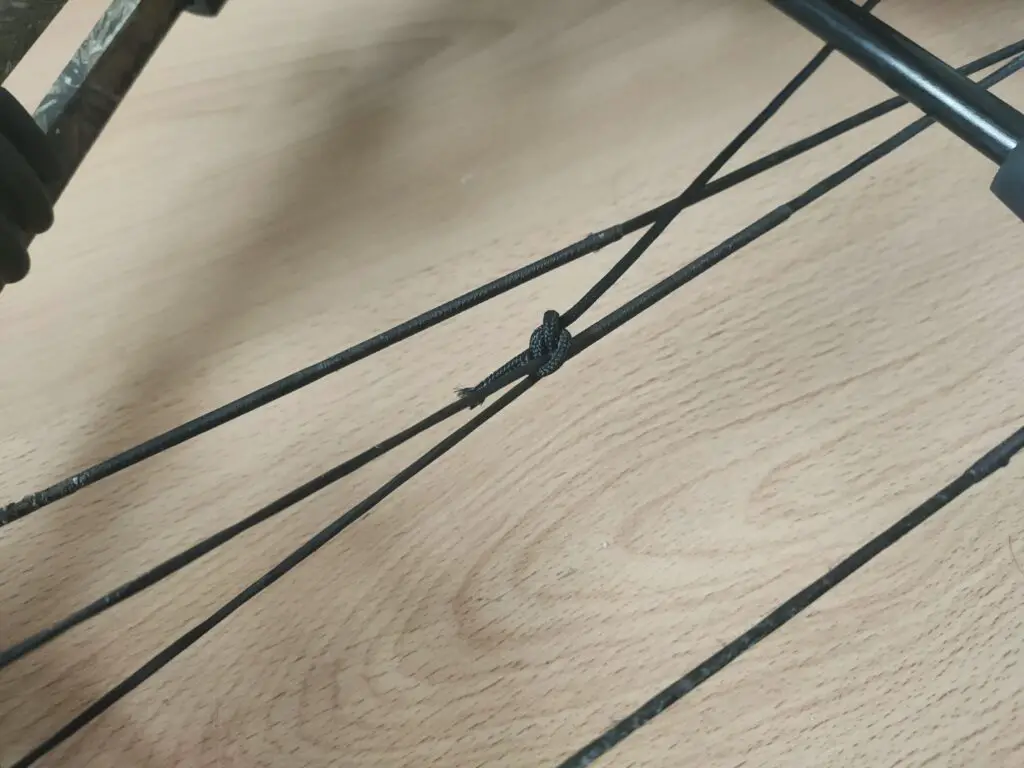
If you do not have a limb splitter, you can also use the Y-corner that is created where the cable splits in two, as you can see below:
To the limb
Another option is to tie the arrow rest cord to the limb. I generally do not recommend this option as you need a longer arrow rest cord, and it can cause interference issues. For example, the cam, a bow-mounted quiver or the cables can all get in the way of the arrow rest cord.
Therefore, I prefer to attach the cord to the cable splitter. But if that is not possible on your bow, you can always consider this option. Just be very careful that you do not cause any interference issues when you draw the bow.
Additional tips for attaching the arrow rest cord
Before you attach your arrow rest cord, I would like to give some recommendations:
- Make sure that you can configure the length of the cord: if you make a permanent knot, or if you glue the cord down, it can be very difficult to adjust the tension. When you are using the bow, the cord can stretch, which means that you must adjust the tension to get the correct timing.
- Check if the cord interferes with the bow: before you shoot your bow for the first time, make sure to check if the cord touches any bow part at full draw. It should not run along bow parts when you draw the bow.
- Tie a secure knot: make sure that the knot doesn’t slip when you activate the arrow rest. Give it a good pull to check if it’s secure. Weak knots can slip little by little, which can mess up your arrow rest timing.
How to set the timing on the arrow rest cord
Now you know how to attach the arrow rest cord, you need to experiment with the timing. You need the arrow rest to go up to guide the arrow, but also to drop down when the vanes are nearby. I will discuss the ideal timing later in the article. But in most cases, you don’t have to be extremely precise about it. The arrow rest just needs to be up at full draw and down when you don’t draw the bow.
Setting the timing is different for the two types of arrow rest. So, make sure to read the section that fits your rest.
Default down arrow rest
To setup the timing of a default down arrow rest, follow these steps:
- Attach the arrow rest cord to the cable or cable rod slider with a generous amount of slack.
- Draw the bow and check how much the cord has been pulled in.
- Reduce the slack a little and check again.
- Repeat the previous steps until the cord is tight at the end of the draw.
- Check the arrow rest and see if it goes up, and how far.
- Tighten the arrow rest cord with very small increments (at most ¼ of an inch; 0,5 cm), until the arrow rest goes up at the end of the draw.
You must be very careful with the default up arrow rest. If the cord is set too tight you will pull the arrow rest to its end point. If you pull past this, you can damage the arrow rest or your bow. That’s why I recommend going very slow once you see that the cord loses its slack when the bow is at full draw.
Default up arrow rest
Compared to the default down arrow rest, setting the timing on a default up arrow rest is a lot easier. Make a knot and tighten the cord little by little until the arrow rest goes down fully when not drawn.
Make sure to test if the arrow rest goes up when you draw the bow. If you haven’t overtightened it, it should work fine immediately.
Why the timing of the arrow rest is very important
Setting up the arrow rest timing correctly is vital. If the arrow rest stays up too long, the vanes can hit the rest which can cause major issues. On the other hand, if your arrow rest drops down too fast, the arrow can drop with the rest, which can cause clearance issues.
In all honesty though, for most archers, this is not a huge deal. If you set up the arrow rest as I discussed above, in 99,9% of cases, it will work fine. But if you do experience any issues with clearance, you might want to check your arrow rest timing.
Final words
As you have learned in this article, drop-away arrow rests are quite complicated. There are simply a lot of different configurations possible and what works on one bow may not work on another bow. With this article, I tried to make it as simple as possible.
Please let me know if you are still having issues setting up your drop-away arrow rest. I would be glad to help you!

Tim van Rooijen
For as long as I can remember, I have always been fascinated by archery. First due to its historic significance but later because I like being outdoors. With this blog, I share my knowledge about Archery and how you can improve your shot. More about author…