If you are interested in archery and you like to DIY, making your own bow will be a lot of fun. You can easily make a bow from inexpensive materials such as bamboo or a PVC pipe, but that just doesn’t look right. If you want a traditional-looking bow, you need to carve one from wood. That will be a lot more difficult, but the end result will be much nicer and shoot better.
Making your own bow from wood isn’t easy, it requires a lot of skills, tools, and information. Therefore, I will explain how you can make your first bow. At the end of this article, I will also give you some tips on how you can perfect your craft!
Step 1: preparation
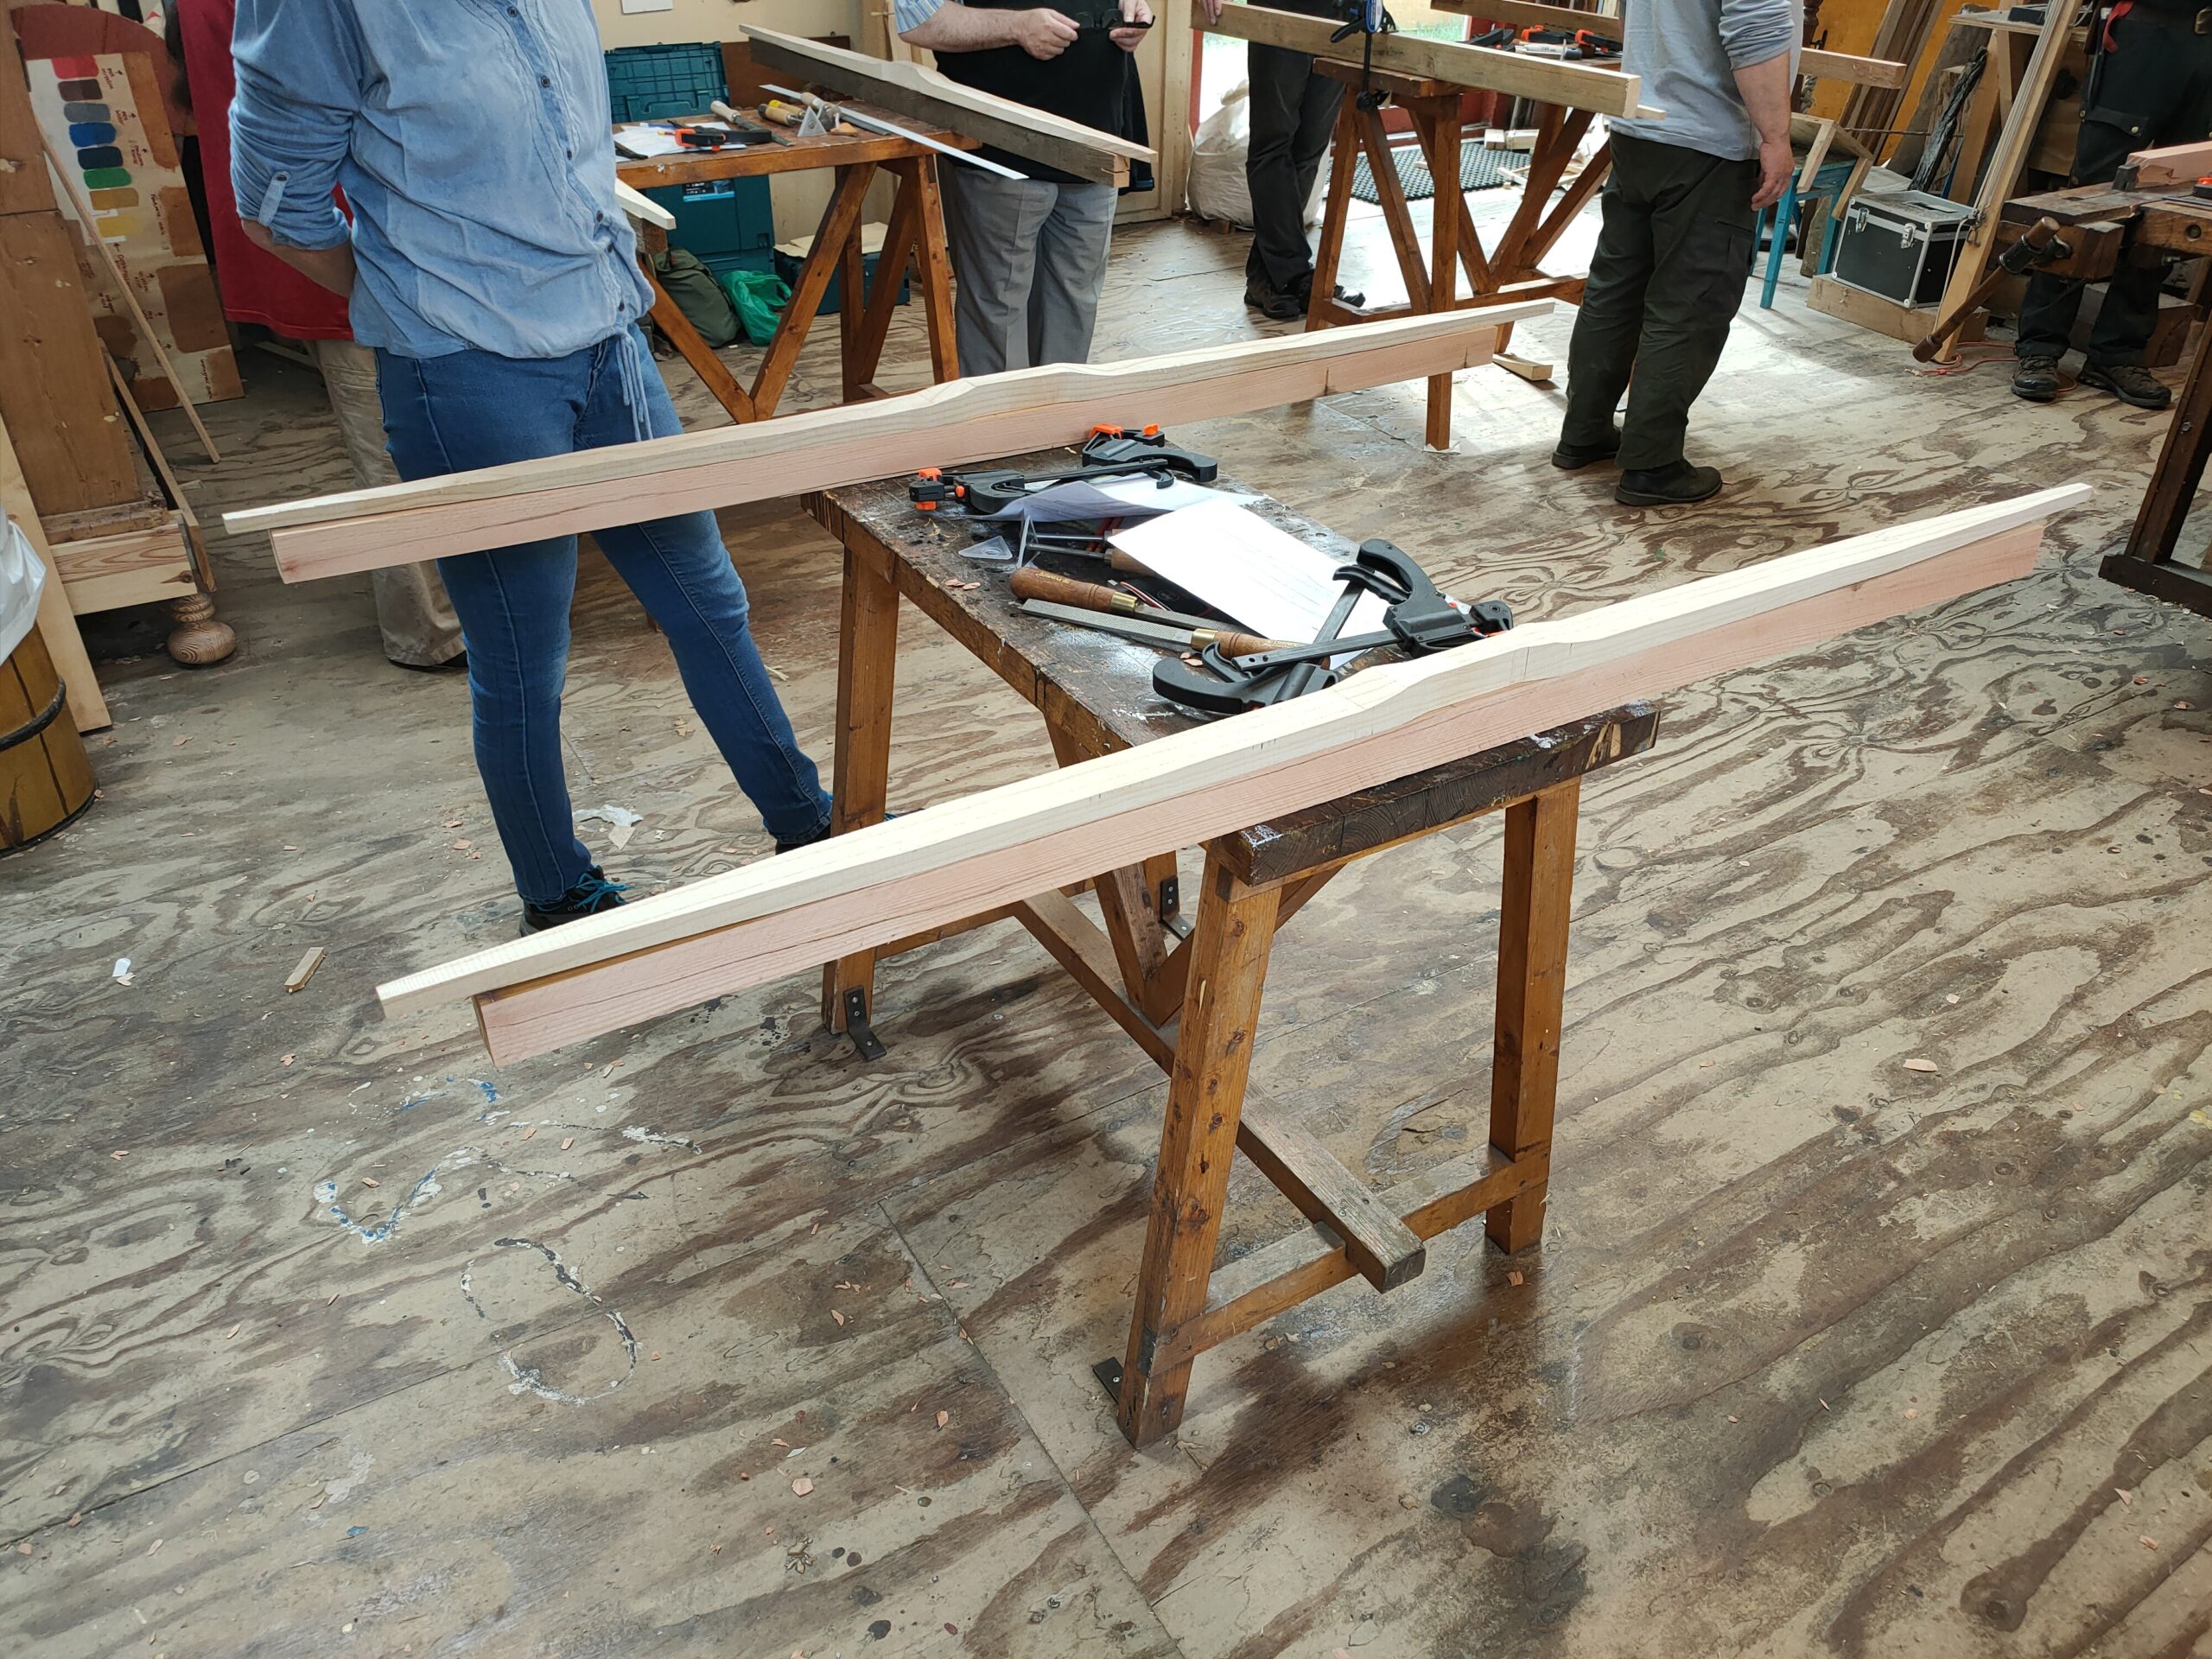
As with any DIY project, you will first have to gather supplies and create a proper working environment. Let’s first discuss the workbench you need.
Workbench/workplace
For any woodworking project, you need a sturdy table that doesn’t shake when you are working on the wood. It’s important that you can clamp a piece of wood down and that you can walk around your table. If you don’t have such a worktable, I recommend getting a portable workbench (workmate). Apart from bow making, these workbenches are convenient for all types of projects.
Tools
To make your bow, you need the following tools:
Although you don’t need a spokeshave, I recommend buying one if you don’t have one already. It is a very useful woodworking tool, and it has many benefits over a wood rasp or file. It cuts the wood more evenly and is less tiresome than a wood rasp.
That doesn’t mean that you don’t need a wood rasp though. You still need this tool to round off the handle, which isn’t possible with a spokeshave.
Step 2: get a bow stave
Before you can start carving your bow, you need to get some wood. Technically, you can make a bow out of almost all wood types if it’s dried correctly and correctly carved. But some wood types are more forgiving than others. This means that there is a smaller chance that the bow breaks. There is also a big difference between the efficiency of different wood types. But that is too detailed for this guide.
The following wood types are recommended for bow making:
- Hickory
- Osage orange
- Ash
- Yew
- Black lotus
The bow I made for this tutorial is made from ash, but any of these wood types are perfect for making your first bow. Wood that is purposely milled and dried for bow making is called a bowstave. I recommend buying a bowstave because regular wood might feature irregularities or might be speed dried, which will cause issues.
Click here to see the bow stave I recommend.

Step 3: saw out the shape of the bow
Once your bow stave has arrived the first step is to saw out the shape of your bow. There are multiple shapes to choose from, but I followed the guide you see below. The bow should narrow near the tips for an even bend.
First, create a centerline on the wood. From this line, you will take all your measurements. Once you have all your measurements, you can connect these points with a ruler. Then, carefully saw the wood, making sure to leave some extra wood for error.
Our bow staves came precut; therefore, you won’t see these steps in pictures, but it’s relatively straightforward. Don’t worry if your cuts aren’t perfect, in the next step we will smoothen our saw work.
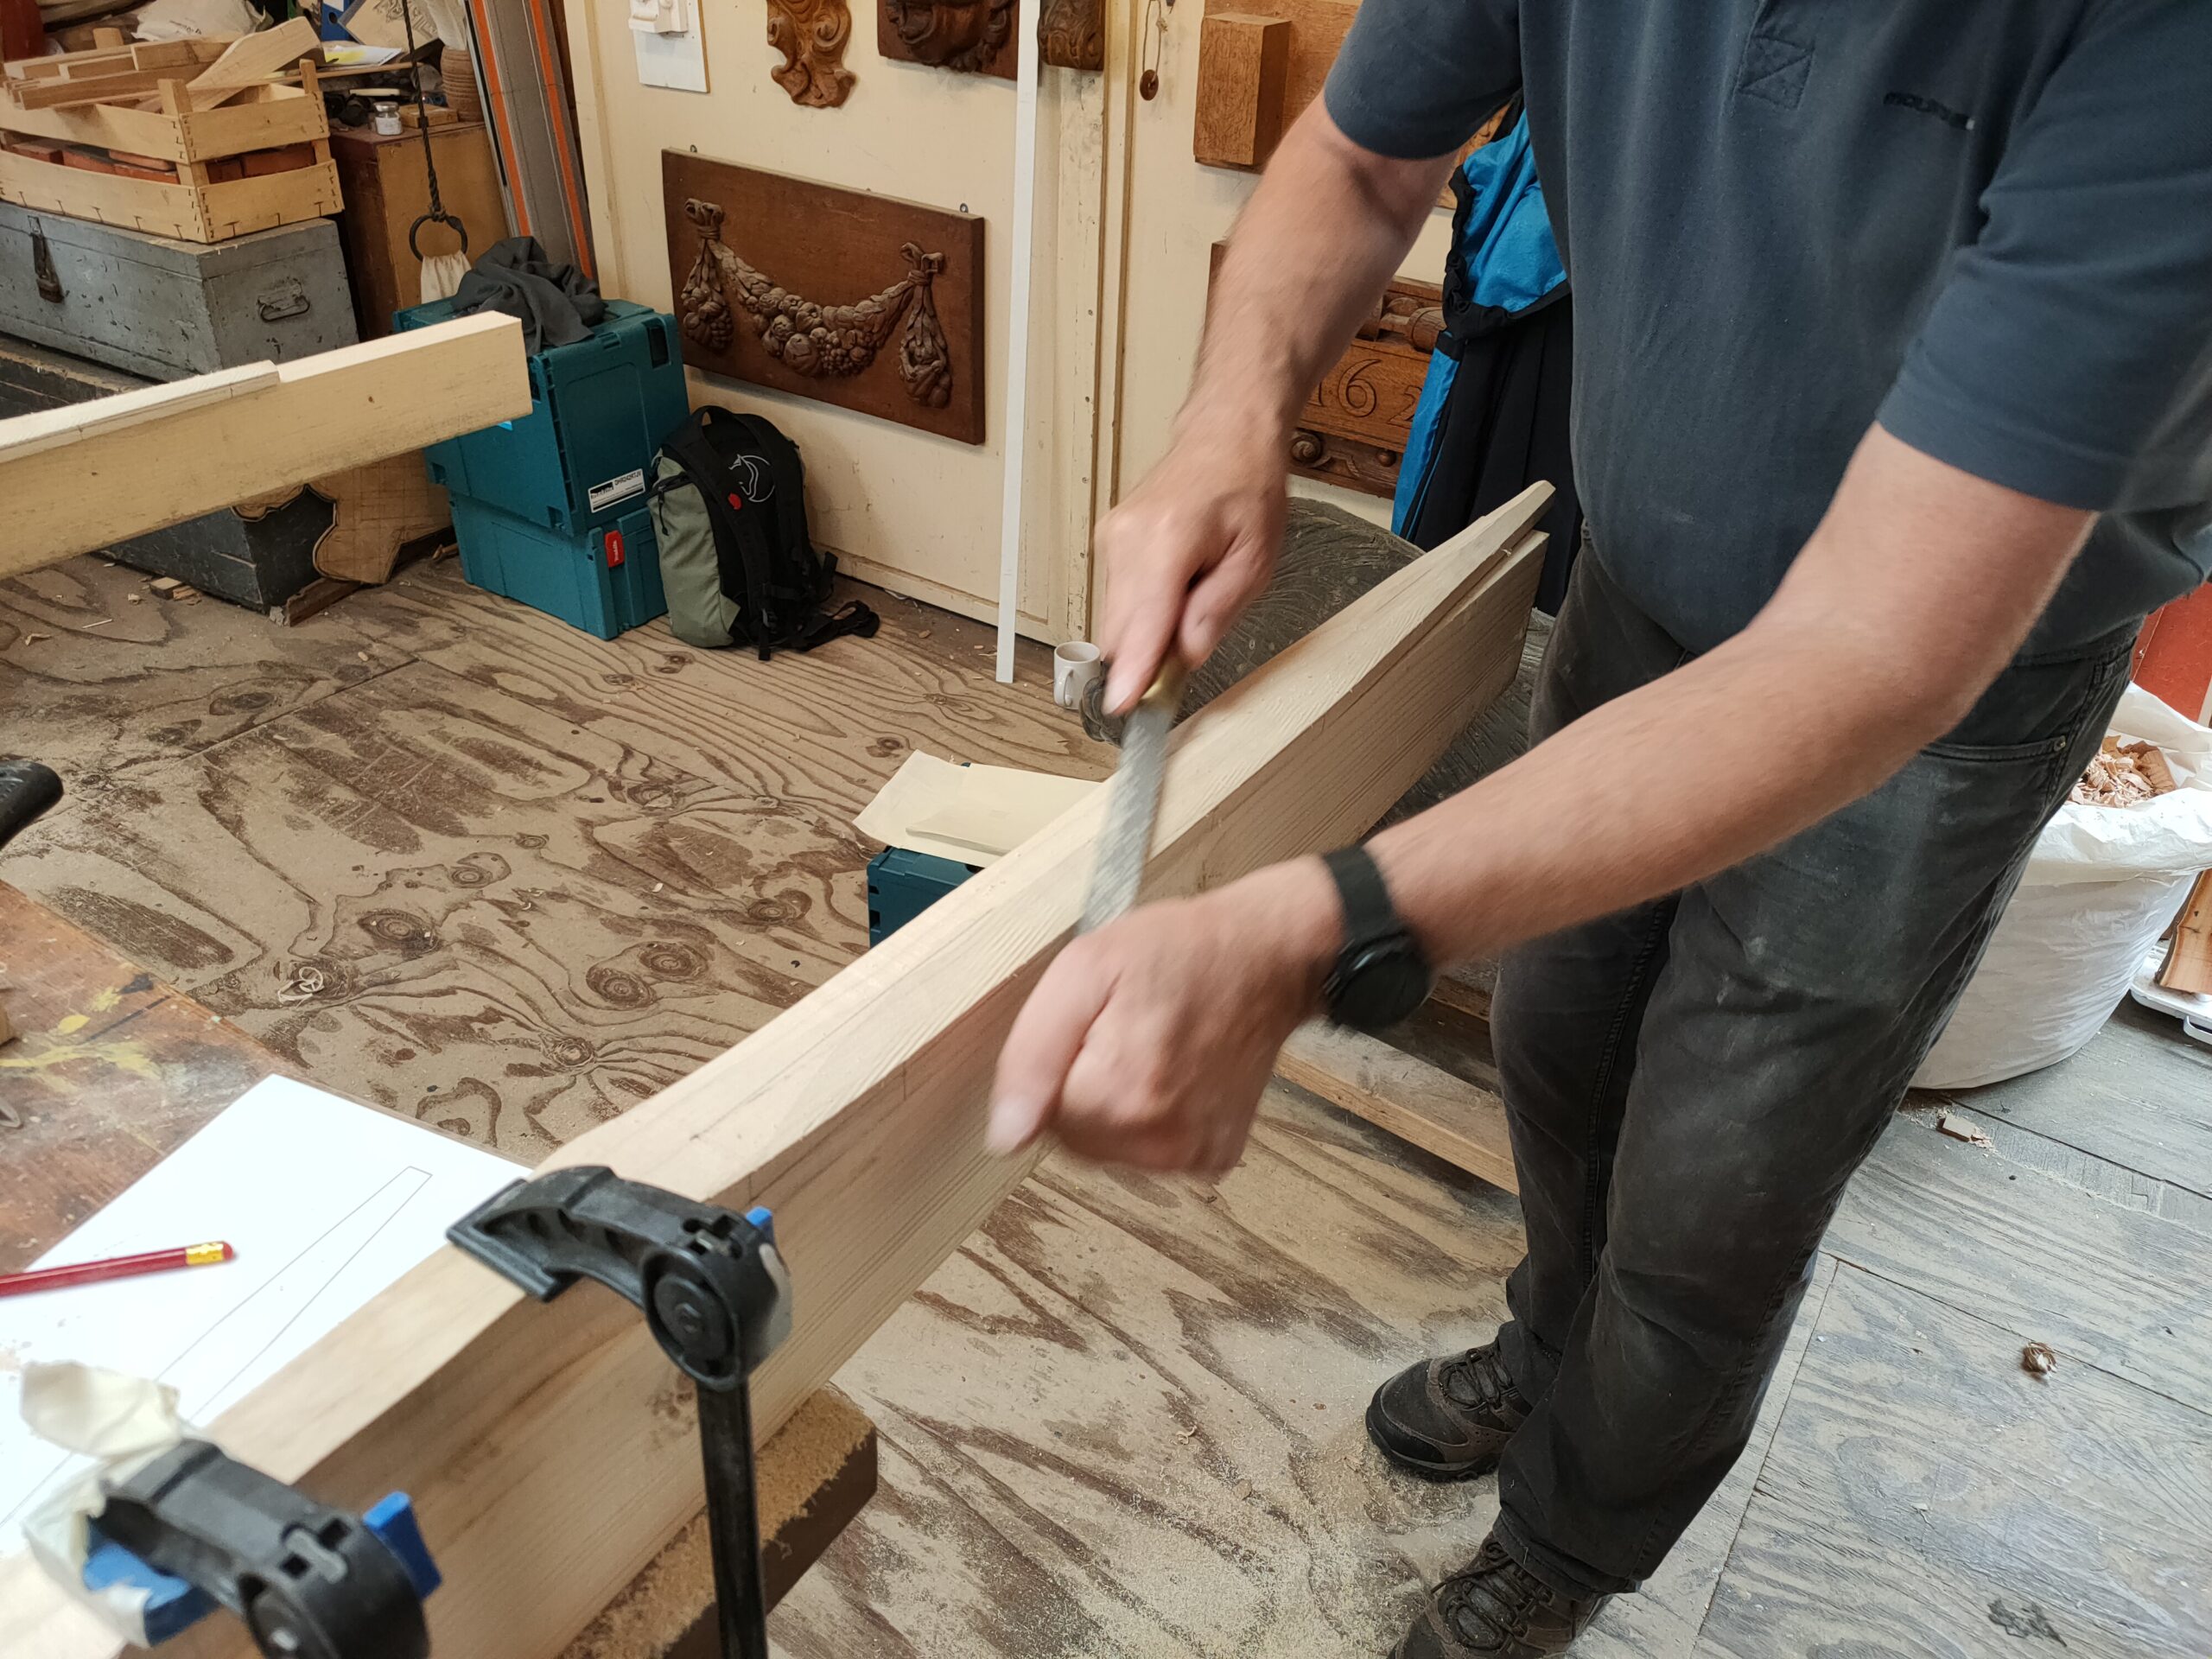
Step 4: smoothening the edges
The next step is to smoothen the edges of your saw work. If you removed more wood from one side than the other, now is the time to correct it. You should use a wood rasp for this job because you must be very careful that you don’t remove too much wood.
Once you are happy with the edges, you can start on the next step. Make sure that the edges are straight and smooth. If you have issues, it will be very difficult to correct them later.

Step 5: create a V-shape on the belly of the bow
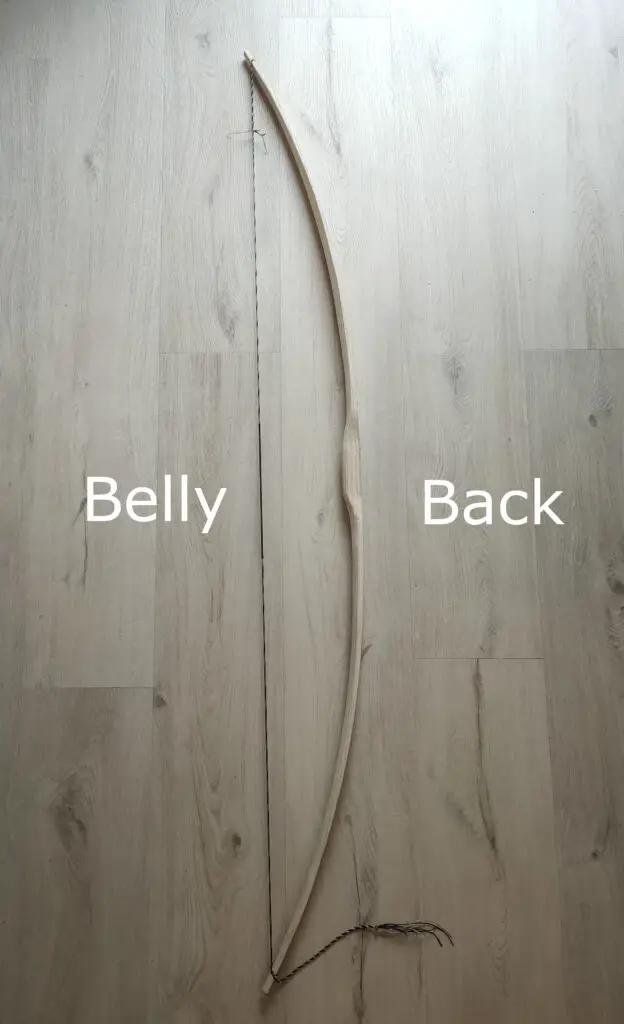
The next step is to create the basic V-shape on the belly of the bow. The belly of the bow is the side that faces you when you shoot. We only remove large amounts of wood from the belly of the bow. Therefore, you shouldn’t touch the back of the bow (the side that faces away when you shoot) for the next few steps.
Marking the V-shape
Before we can start working on the V-shape, we need some markings. The first marking is on the belly of the bow on the center of the limb from the tip to the handle on both limbs. We use this to keep our V-shape symmetrical.
The next marking indicates how deep the V-shape will be. Since we only remove wood from the belly of the bow, you should take this measurement from the back towards the belly. Take your measurements following the guide below and use a ruler or plank to draw a straight line.

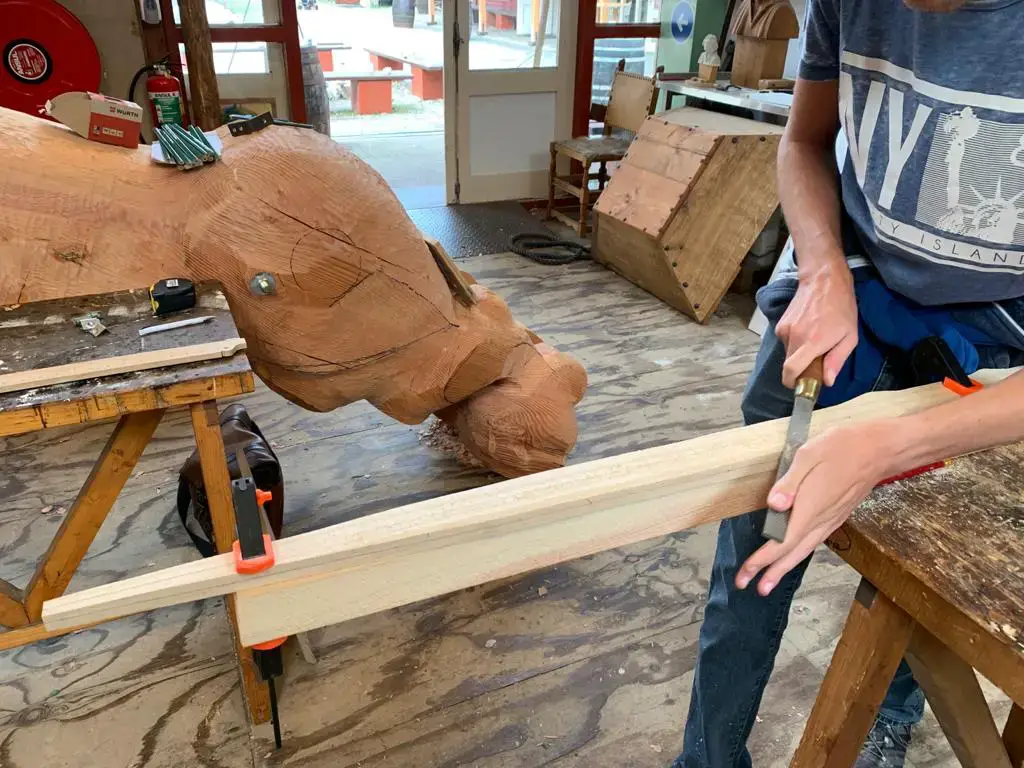
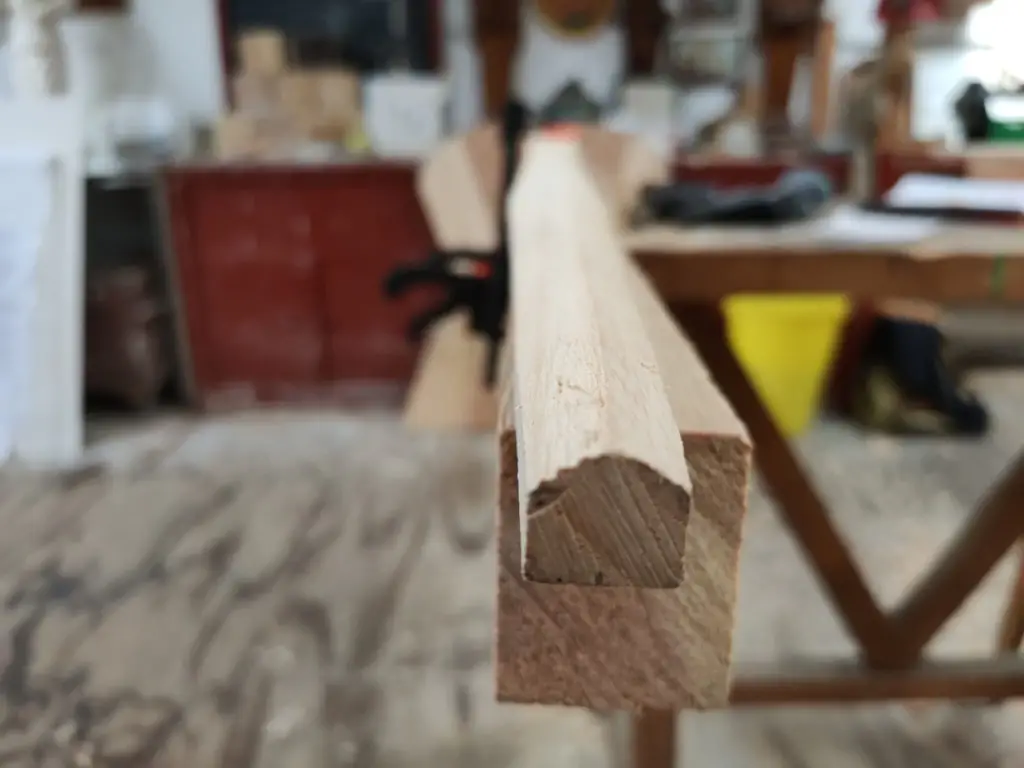
Creating the V-shape
Now you can start to create the V-shape on the belly of the bow. Use your rasp or spokeshave and remove wood at an angle from the bowstave. Make sure to leave both the center and thickness markings in place until you have finished both sides. These markings will help you to keep the V-shape consistent.
This part requires some elbow grease especially if you are using a rasp. With a rasp, this can easily take 4 to 8 hours, depending on the thickness of the wood. With a spokeshave, it shouldn’t take more than 2 hours.
When you have an even V-shape on both limbs, you can continue to work toward the markings until they disappear. Do this very carefully though because you want to keep the V-shape as consistent as possible.
Step 6: tillering
Tillering is the most essential part of bow making. Tillering means that we make sure that both limbs bend correctly. This is more difficult than it might seem. Both limbs need to bend the same amount and the entire limb should bend. The final bow should have the shape of a moon while at full draw.
Check the tiller of the bow
During the tillering process, we are looking for parts of the limb that bend less (stiff points) and parts of the bow that bend more (weak points). To make stiff points more bendable we need to remove wood from that spot.
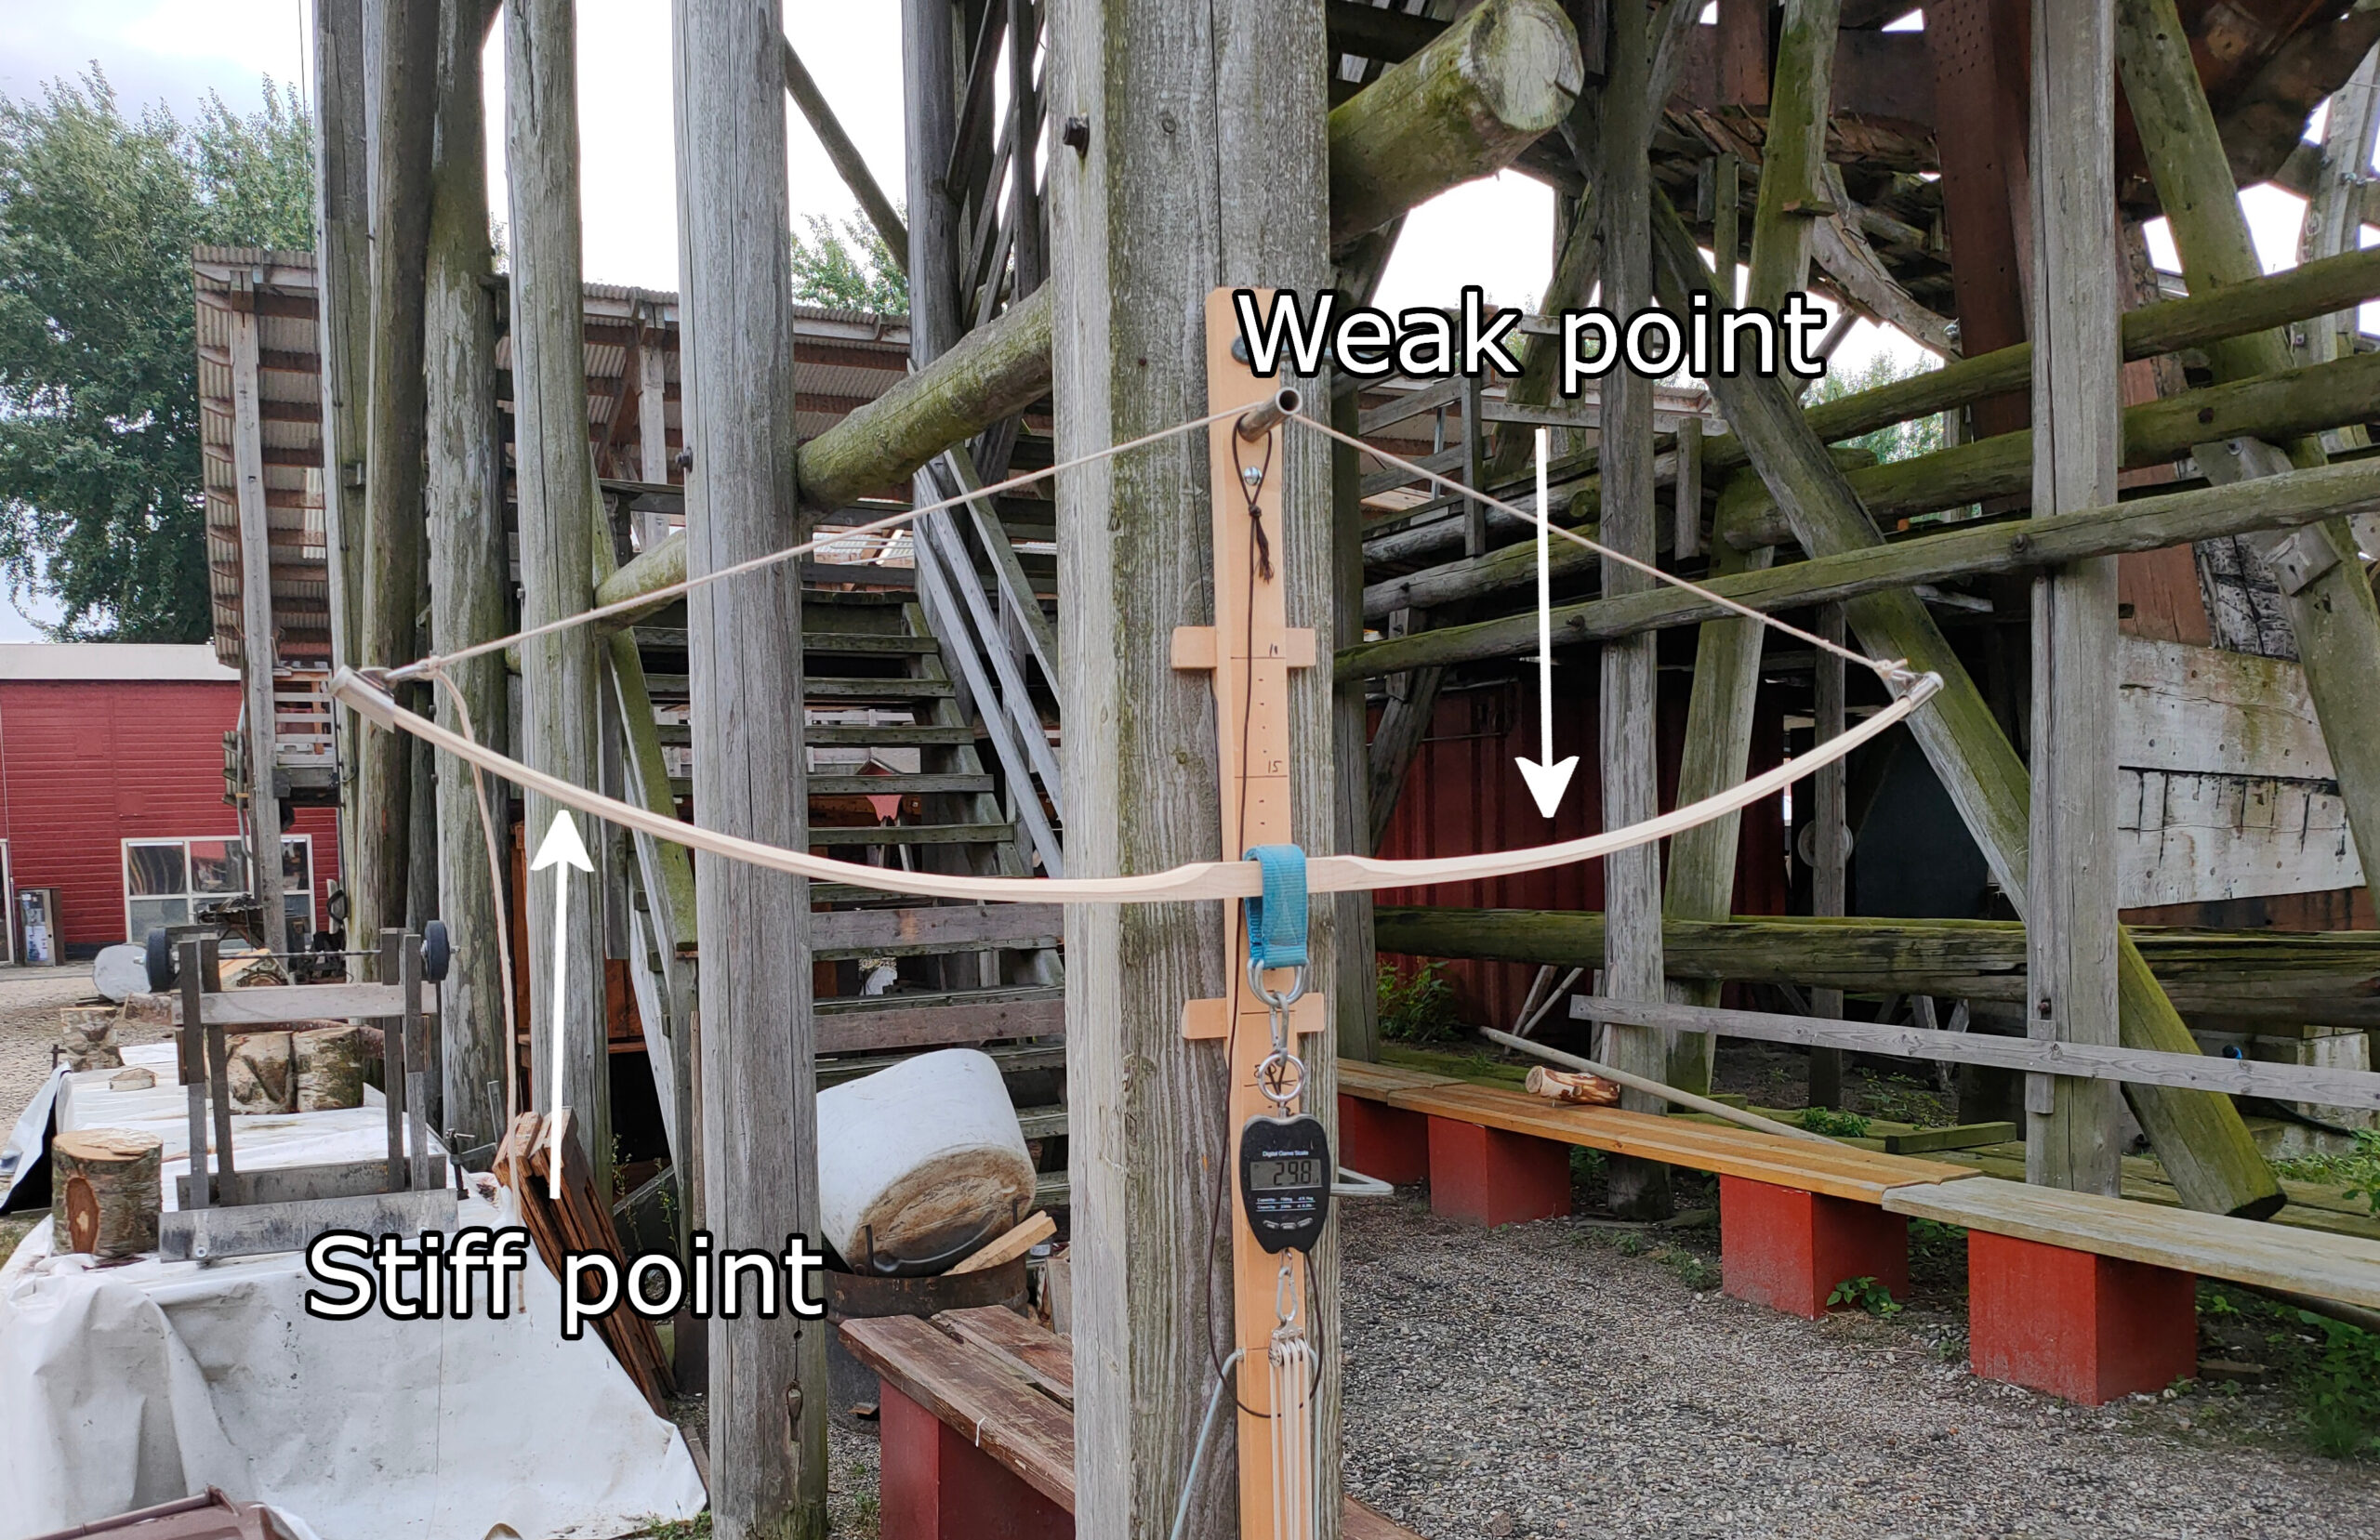
To check the tillering of the bow, experienced bowmakers use a tiller tree. This is a device that holds the bow under tension which allows you to take a few steps back and look at how the limbs bend. The video below shows you how to make a tiller tree.
You can also tiller a bow without a tiller tree. Attach a piece of string to the ends of your limbs and ask a friend to pull. Take a few steps back and look at the bend of the bow limbs. Do this very carefully, if an incorrectly tillered bow is drawn too far, it will break. Therefore, only draw the bow a few inches for the first few sessions.
Tillering the bow
Once you have identified stiff points, mark these clearly. On these spots, you carefully want to remove some wood on the belly of the bow. You do this by removing wood from both sides of the V-shape with a spokeshave or wood scraper. You can also use a wood rasp, but it is more difficult to keep it even because the rasp can dig too deep into the wood.
Don’t remove too much wood, you don’t want to create a weak point. It can take a few times until you finally removed the stiff point, but it’s better to be safe than sorry.
You will have to check the tiller at least 20 times or more. Therefore, this process can easily take a day, but it’s important to do this correctly. As mentioned earlier, a bow that isn’t tillered correctly will break at full draw. Especially if you have a long draw length (more than 28 inches), you must get your tiller near perfect.
Practice makes perfect
It can take a while before you can easily identify stiff points. At first, it’s rather difficult to see, but the more you practice and the longer you look, you will start to see them. It can also be helpful to mark the weak points. You want to make sure that you don’t remove any wood from that point.
If you have a weak point in your bow, you need to remove wood from the entire bow, except for that point. That’s why I emphasized being very careful earlier.
Step 7: tune the draw weight
The next step is to tune the draw weight. If you are new to traditional archery, I recommend tuning the bow to a draw weight of 30 LBS. You can measure the draw weight with a bow scale or alternatively a luggage scale.
Checking the draw weight
If you don’t have a specific draw weight in mind, just pull the bow till full draw and check whether it feels right. If it gets tough, you might want to decrease the draw weight. A too heavy bow will cause you to hurry your shots and can lead to poor form. Therefore, it’s better to stay on the safe side. For more guidance, read the article below:
How to choose the right draw weight for your recurve bow
Changing the draw weight
If you want to reduce the draw weight, you need to remove some material from the limbs. Make sure to remove the material as equally as possible, because you don’t want to lose all your tiller work. Once you removed some material, check the draw weight again and see if you need to make additional changes.
Tillering the limbs again
Once you are done tuning the draw weight, you must check the tiller of your bow again. Especially if you have removed a lot of material. Therefore, you must repeat the process of step 6 to check whether your bow is correctly tillered. In most cases, you only must make minor adjustments.
You might wonder, why don’t we tune the draw weight before tillering? Wouldn’t that be easier? Well, the problem with tillering is, that you need to remove large amounts of wood to get the tiller just right. If you would do step 6 and 7 in reverse, you might end up with an extremely lightweight bow.
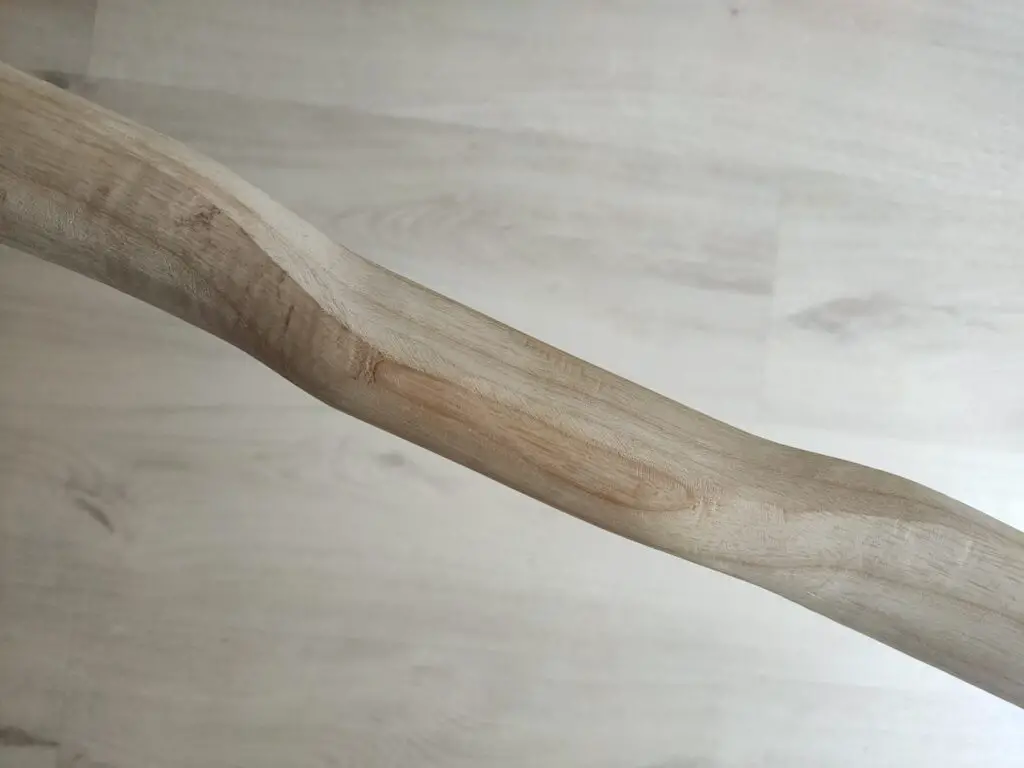
Step 8: make the handle
The next step is to round off the handle. We mainly used the rasp for this process, but if you have one ready a belt sander can get this done way faster. You just want to make sure that the handle is nice and smooth to make sure that it doesn’t cut in your hand while drawing your bow.
Some people like to create an indentation for the webbing of their hand. But if you are not sure I recommend staying safe and only round of the edges. If you don’t like the grip, you could always change it later.
Step 9: make the sting groves
Before we can sand the bow and apply some finish, we need to make the nock groves. The string groves should be about ½ to an inch (1,5 – 3 cm) from the tip of the limbs. The groves should be at a 45-degree angle. You can see in the pictures below how the string groves should look:
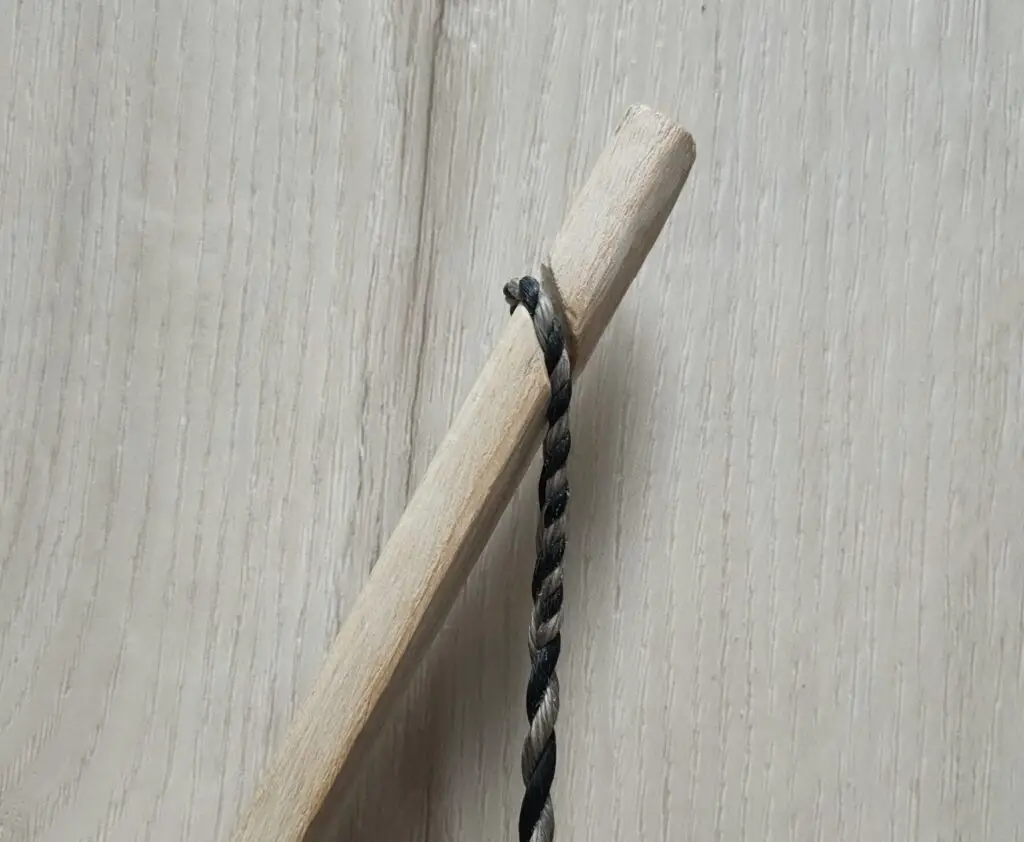
You can use a needle wood file but if you don’t have any, you could also use the sides of a wood rasp or even a pocket knife. The groves should be deep enough that the string is flush with the wood. But make sure there is enough wood left to support the tip.
Step 10: sand the bow
Once you are happy with the look and feel of your bow, you can go to the next few steps to finalize the bow. First, you must sand all sharp edges from the bow. We do this to not only make the bow feel smooth but also to prevent splintering.
First, sand the bow with some coarse sandpaper. After everything is relatively smooth you can switch to finer sandpaper.
You don’t have to work your way down to extremely fine sandpaper. If you make the bow extremely smooth, it will not absorb as much finish, which means that it will be less weather resistant.
Step 11: apply a finish
If you don’t intend to use your bow out in the elements, you don’t need to apply finish to your bow. We mainly apply a coating of finish to make the bow waterproof and to accentuate the colors of the wood.
There are multiple products that you can use on your bow, but what you can and can’t use largely depends on the type of wood you are using. If you are not sure what oil to use, I recommend using some Linseed Oil. This oil works with all wood types.
Step 12: buy or make a bowstring
To finalize your bow, you need to buy or make a bowstring. If you want to make your own bowstring, I recommend watching this video for more info. If you want to buy a bowstring, I recommend this Flemish Twist bowstring from Southland Archery Supply.
To check what size you need, you need to measure the distance between the two string groves, this is known as the AMO bow length. The string should be 4 inches shorter than the AMO bow length.
Once your string is ready, you can string your bow as you see in the video below. This does require a considerable amount of strength. If you can’t get your bow strung with this method, you might want to buy a bow stringer and watch this video for a demonstration.
Shooting and tuning brace height
Before you can shoot your bow, you will need to buy a set of arrows. This set of wooden European-style arrows will fit most bows with a draw weight of 30 LBS or more. Don’t worry about the arrow specs too much for now.
When you are just getting started, it isn’t important to get the arrow specs 100% right. When you get more experienced you might want to read my detailed article on how to choose the perfect arrows:
How to choose the right arrows for your bow
Apart from arrows, I also recommend buying some finger and arm protection. Without finger protection shooting your bow will be painful after a few shots. An arm protector will protect your arm from string slap which can cause nasty bruises. Below I have listed some protectors I bought when I was just getting started:
Perfecting your craft
Although I have explained a lot of principles about bow making there is much more to learn. Think for example of how to choose the correct wood, how to make arrows and, how to tune your bow. If you want to learn more, I this book called ”Traditional Bowyers Bible”. This book explains everything there is to know about traditional archery. From learning the proper technique and form to making your own bow.

The book ”Traditional Bowyers Bible” is quite a technical book. If you want a more lighthearted book, I recommend Archery answers. This book covers a lot of topics in archery and has a big focus on DIY. Therefore, this is a great book for archers that want to take the sport a bit less seriously. It’s also extremely easy to read and suitable for kids! You can read my in-depth review of this book, here.

Final words
I hope this article enticed you to make your own bow. I have been into archery for at least 7 years now and I only recently got interested in bow making. Therefore, I joined a bow-making workshop taught by experienced bowmakers.
The result of this workshop is what you read in this article. Therefore, I do not claim to be an experienced bowmaker. I am also just getting started, so please let me know if you believe I need to revise anything.
If you have any questions, comments, or feedback. Please leave it down in the comments, I will reply to your comment as soon as possible and send you an email notification once I have replied.

Tim van Rooijen
For as long as I can remember, I have always been fascinated by archery. First due to its historic significance but later because I like being outdoors. With this blog, I share my knowledge about Archery and how you can improve your shot. More about author…