An inevitable step of setting up your bow is positioning your nocking points. Although it’s relatively simple you should set them up correctly. If you misplace your nocking point it can cause your bow to shoot less accurately. That’s why I have written a complete guide on how to set up your nocking points.
I will first discuss where you should place your nocking points. Next, I will discuss how to attach your nocking points and how you can finetune them. At the end of this article, I will discuss some frequently asked questions and explain in more detail why it’s important to set up your nocking points correctly.
Where your nocking points should be
If you shoot your bow with a release, the upper nocking point should be .2 inches (6 mm) above the arrow rest. If you shoot a bow with your fingers, you should place the upper nocking point .4 inch (10 mm) above the center of the arrow rest.
If you are setting up your nocking points for the first time, make sure to read on for more guidance. I know a lot of archers forget these recommendations. Therefore, I prefer to give a short answer upfront, in case you are looking for a short answer.
Using a bow square
If you haven’t bought a bow square (also known as T-square) yet, I highly recommend you do so. A bow square is an essential piece of equipment if you work on your bow, especially for setting up your nocking points. You can also improvise with a measuring square, but I don’t recommend it. Attaching your nocking points is very precise work, so it’s important to use the right tool for the job.
I recommend this T-square from Easton because you can use it both on right and on left-handed bows.
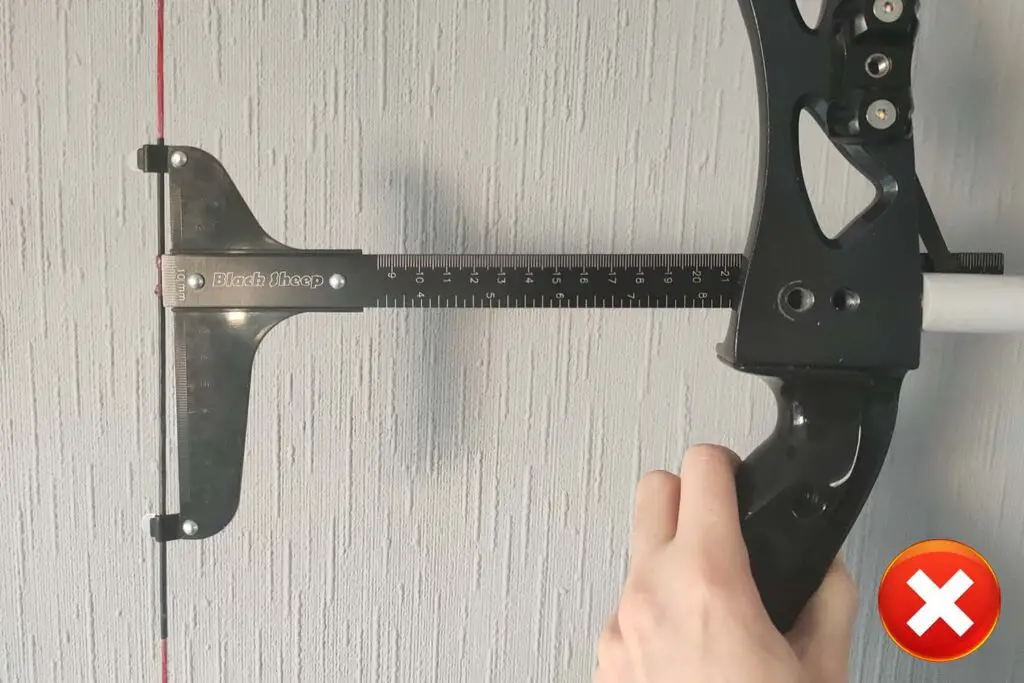
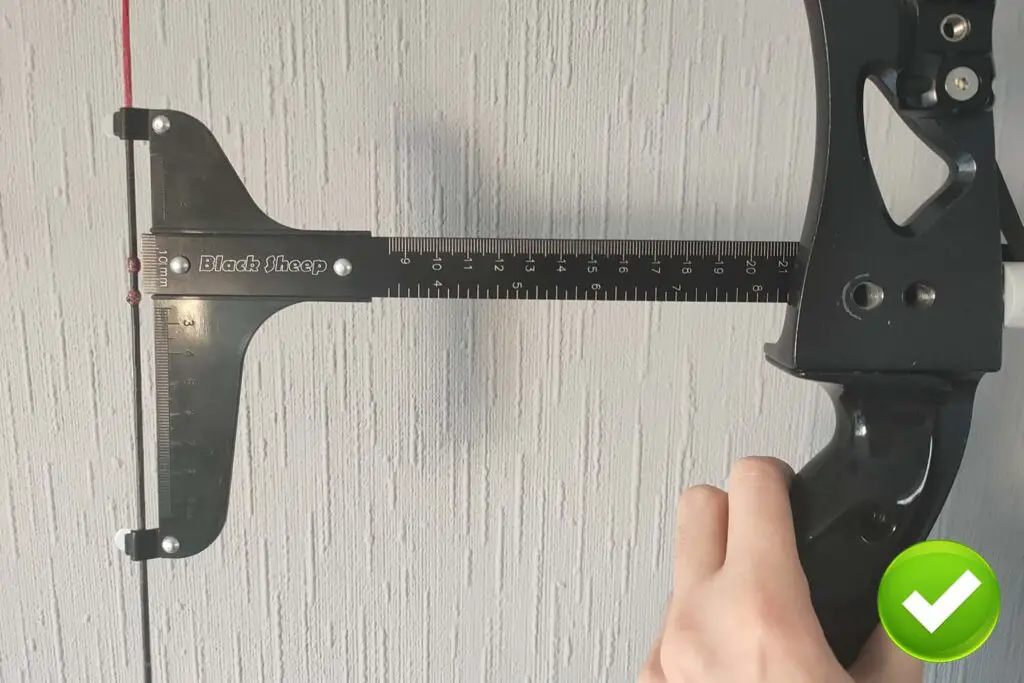
To use a bow square, you simply attach it to the string with the two hooks and place the long ruler on the arrow rest. Make sure that the T-square stays perpendicular to the string. Especially on lower-end bow squares the clamps sometimes don’t grip the string correctly.
Now we measure from the bottom up to locate our upper nocking point. We don’t worry about the lower nocking point for now. Use the information below to find the correct position for your upper nocking point.
Recurve
If you shoot a recurve bow with your fingers, you have to follow this part of the guide. On a recurve we want the arrow to point slightly down while the bow is at rest. I explain why later in the article. Therefore:
The upper nocking point on a recurve bow should be between .2 inches (5 mm) and .6 inches (15 mm) up from the arrow rest. The recommended distance is .4 inches (10 mm).
Once you get more experienced you can analyze the flight of your arrow and start finetuning the nocking points. Therefore, you could choose to lower or raise your nocking points a bit. But I don’t recommend tinkering with this when you are just getting started.
Compound – the easy way
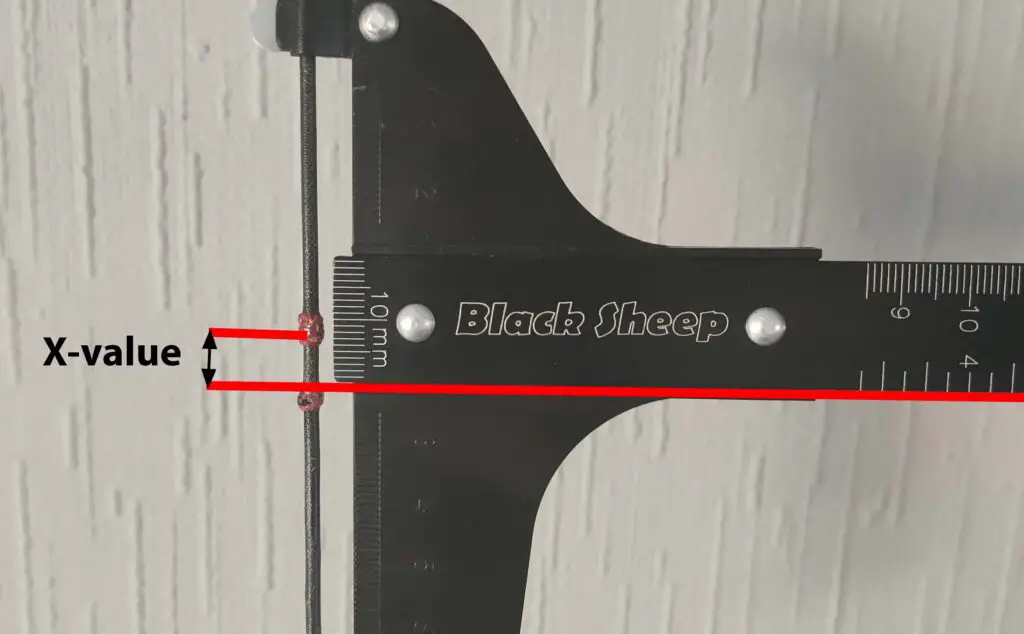
On a compound bow, we want the arrow to be perpendicular to the bow. This means that the arrow should not tip down, like on recurve bows. You might think that you should have an X value of 0 because you want it completely in the middle.
Although that might make sense, you should also account for the thickness of the arrows and the width of the nocking points. Therefore:
The upper nocking point on a compound bow should be .2 inches (6 mm) for normal arrows, .15 inches (5 mm) for thin arrows, and .3 inches (7 mm) for thick arrows away up from the arrow rest.
Compound – the precise way
For most archers, .2 inches (6 mm) is the right choice. If you are a bit of an archery nerd like me, you might want a precise number. Luckily, I have a formula that you can use to calculate the exact measurement, which takes the width of the arrow and the nock into account.
Simply plug in your measurements in millimeters and it will recommend the exact measurement for you in millimeters.
A – (( A – N) / 2) = nock location (x-value)
A = Arrow diameter in mm
N = Nock diameter in mm (measured as you see in the photo)
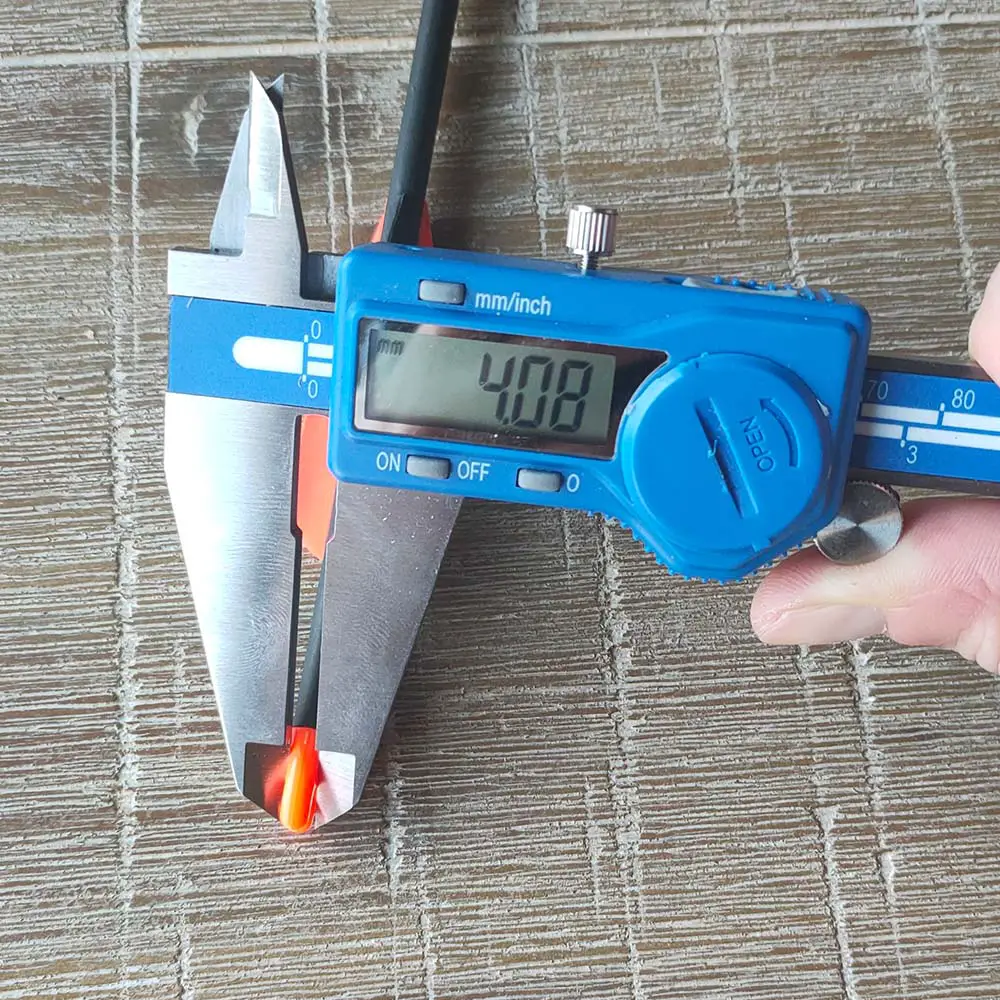
The correct nocking point location (x-value) for this arrow is:
5.70 – ( ( 5.70 – 4.08 ) / 2 ) = 4.89 mm
Attaching a lower nocking point
Now you have your upper nocking point, setting your lower nocking point is pretty easy. You simply place the lower nocking point about .4 inch (10 mm) below the upper nocking point. This will keep plenty of room to avoid arrow pinch. Technically it’s not essential to attach a lower nocking point. I will discuss this in a bit more detail, later in the article.
How to tie nocking points
If you have some serving wire laying around you can tie your nocking points. If you don’t have any serving wire, I recommend buying this serving set. This set also includes a serving jig, which you need if you ever want to replace your serving.
To tie your nocking points cut about 15 inches (40 cm) of serving wire. Place the wire around the string and check whether you are in the right position. If you are in the right position you can make your first knot.
Move your two ends to the other side of the string and make a second knot. Repeat this process about 7 or 8 times. This makes your nocking points thicker and more secure. Make sure that all of your knots are as tight as possible.
Once you have made your final knot, cut off the excess, but leave about ¼ of an inch (5 mm) of the ends. Use a lighter to scorch the ends. This will melt the wire onto the nocking point. For added durability, I also like to apply a generous amount of superglue onto the ends. This does make it harder to remove it though. So don’t do this if you want to tune your nocking point position.
How to install brass nocking points
Installing brass nocking points is very easy if you have the right equipment. You simply place the nocking point in the right spot and use the crimping pliers to crimp it on. If you didn’t buy crimping pliers you can also use some regular pliers, but you will need to press it multiple times around the brass.
How to tie a D-loop
Tying a D-loop is relatively straightforward, just follow the guide in the video below. You may think that you could use any type of wire to make a D-loop, but that is not the case. The wire should be the appropriate thickness and should not stretch. Therefore, you cannot use some paracord for your D-loop, it will stretch too much. If you don’t have any D loop wire, I recommend this wire from Southland Archery Supply.
Finetuning your nocking points
To finetune your nocking points we use a method called bare shaft tuning. We also use this tuning method for tuning your plunger (recurve bows) or arrow rest (compound bows). Let me discuss the basics first.
The basics of bare shaft tuning
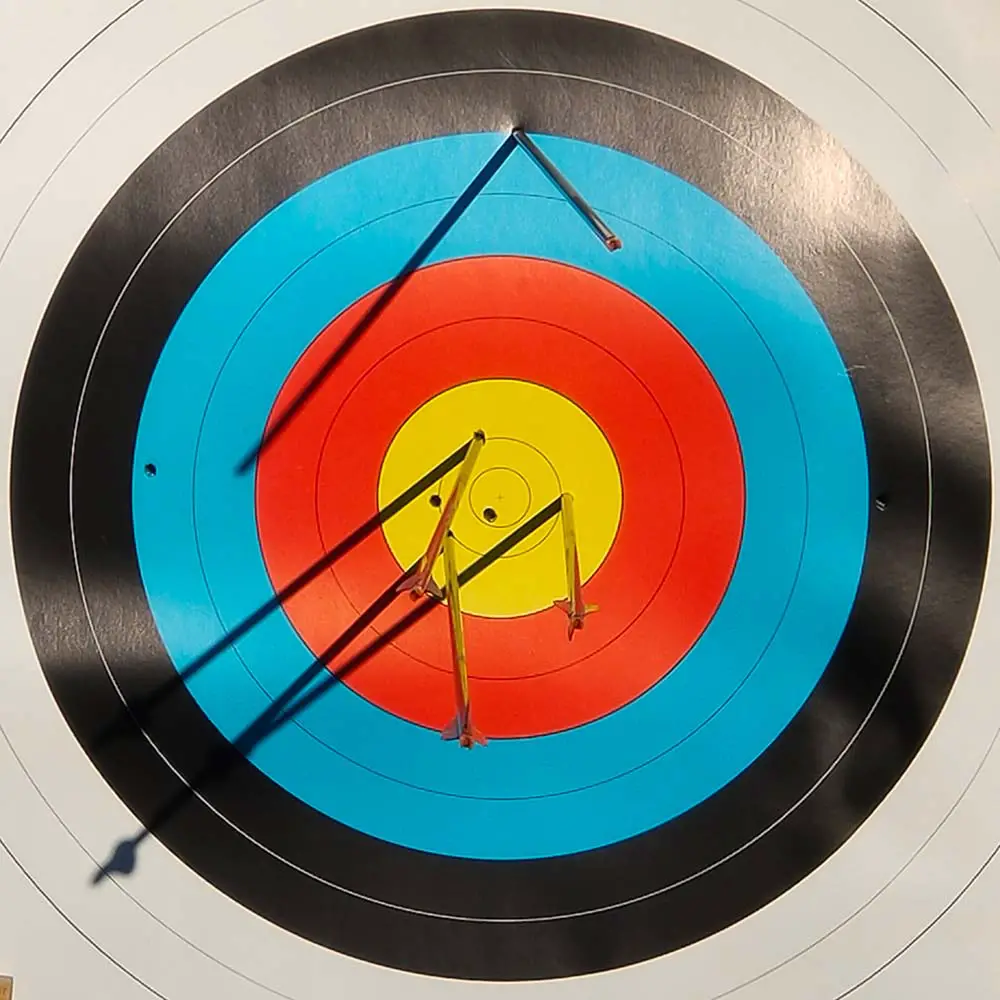
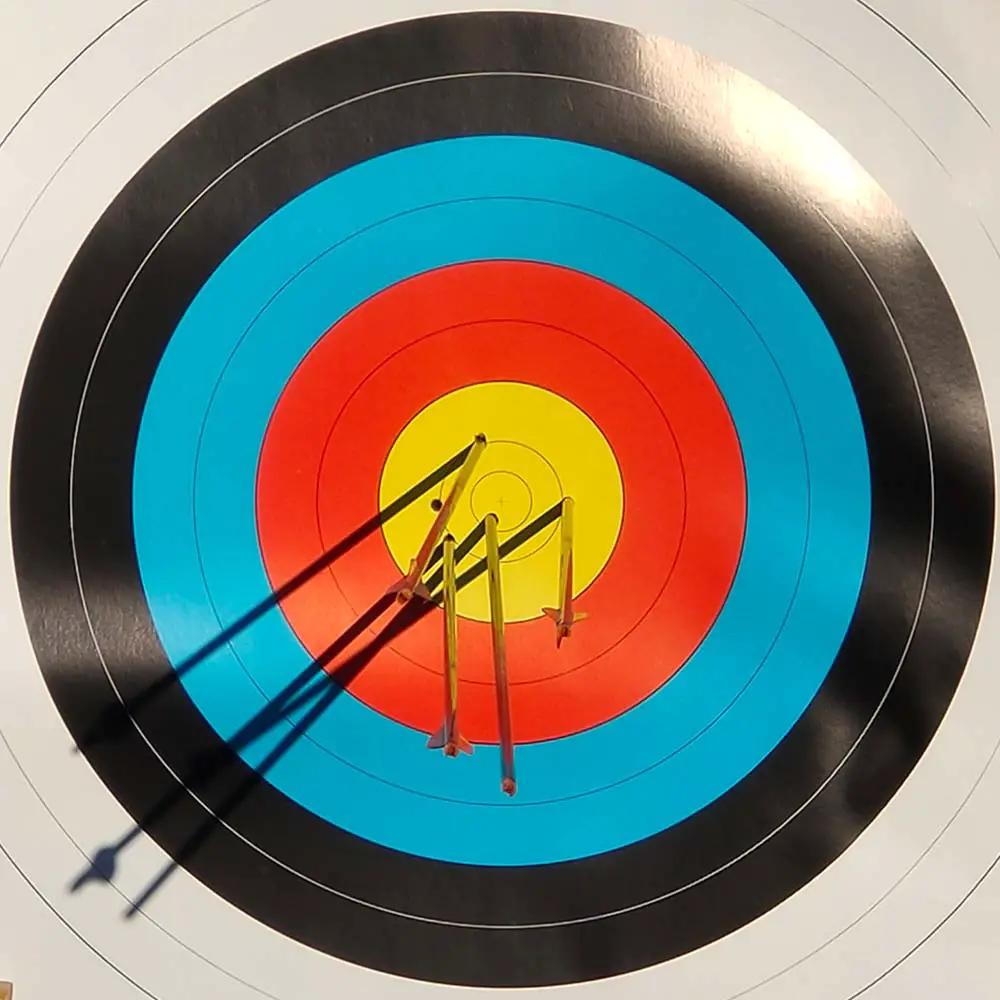
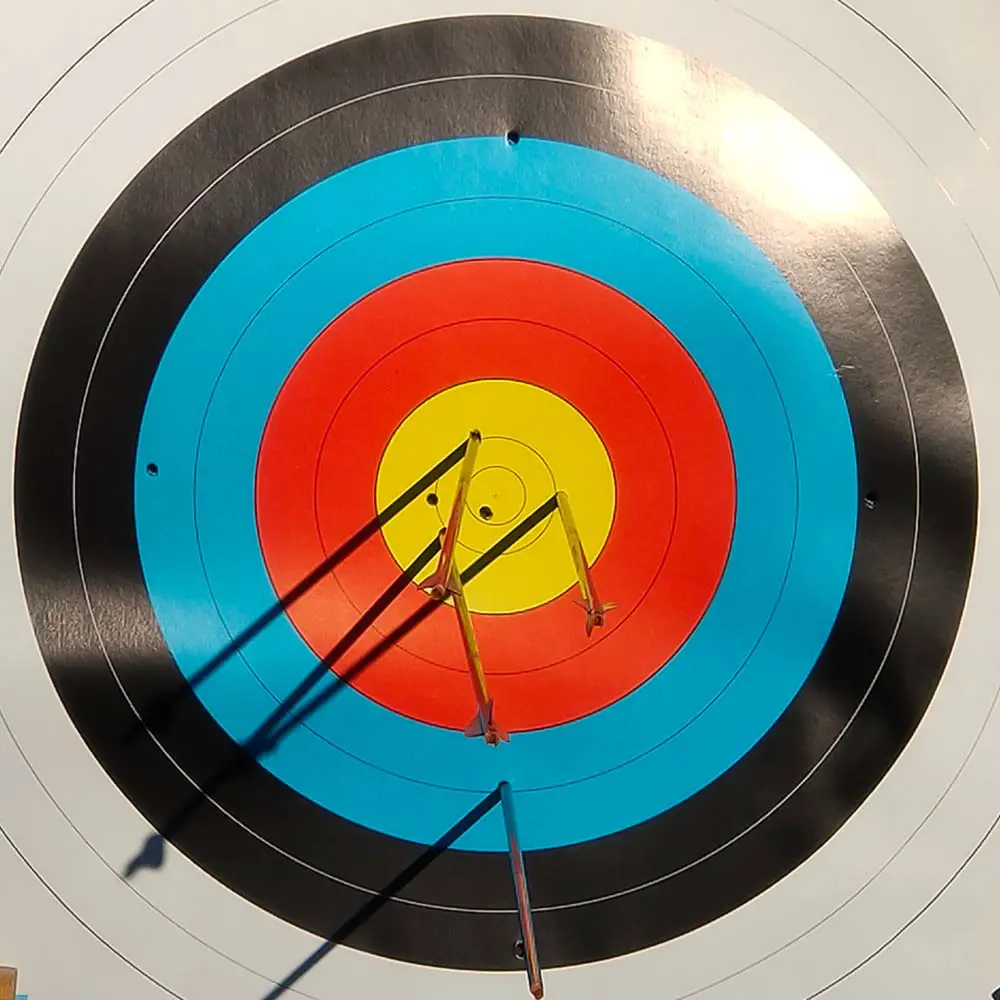
With bare shaft tuning, you shoot 4 arrows. 3 arrows will have vanes and 1 arrow is bare (has no vanes). When the arrows are shot, we analyze how the arrows have landed on the target. If the bare arrow is inside of the group with the three fletched arrows, no adjustments have to be made. This means that the arrow is shot optimally from the bow.
The idea of this technique is to remove the stabilizing effect of the vanes. The vanes stabilize the arrow a lot, by providing resistance at the rear of the arrow, the arrow will straighten out faster and fly more straight. By removing the vanes, we can see how the arrow would fly without stabilization.
How to adjust your nocking points
Now you got the basics down, tuning your nocking point is relatively straightforward. Just check where the bare shaft landed in relation to your other arrows. If the bare shaft is above the group, you should move your nocking points up. If the bare shaft is below the group, you should move the nocking points down. You can easily remember this as follows:
‘’you have to change your nocking points towards the error of the bare shaft, just like with tuning the sight’’.
Some comments for bare shaft tuning
When you are going through this tuning process, you might notice that your arrows go to the left or the right of the group. If this is the case, you might want to check out the following articles first before you continue tuning:
- How to tune the plunger [article is not finished yet] (if you shoot a recurve bow)
- How to tune an arrow rest (if you shoot a compound bow)
It’s better to first tune your plunger or arrow rest and later tune your nocking points. Tuning your arrow rest and plunger can also change how you have to tune your nocking points.
You must be already quite accurate when you want to tune your nocking points. If you have still troubleshooting 10’s or 9’s at 20 yards (18 meters) on a 40 cm (15 inch) target, you have too much variance in your shots to tune your bow.
Therefore, I don’t recommend it to beginners or intermediate archers. This is definitely a tuning technique you have to keep for when you are experienced and want to squeeze every single error out of your bow.
Also, since the fletching can compensate for a lot of error, bare shaft tuning isn’t that important for most hobbyist archers. It will only slightly increase your accuracy and it will be hardly noticeable if you are not already a very good shot, to begin with. That is why I haven’t bare shaft tuned my bows for a while, I train too little to make it worth my time.
1 vs 2 nocking points
Within the archery community, there is a big discussion about whether you should have two nocking points or only one nocking point. Only the upper nocking point is essential while the lower nocking point is more of a preference thing.
I generally recommend also attaching a lower nocking point when you are getting started. It is a bit more intuitive while shooting and helps you to place your fingers correctly. But in the end, it’s not a big deal if you choose to only add the upper nocking point. Read my article below for my in-depth analysis of these two options:
1 vs 2 nocking points – what is better?
Brass vs tied nocking points
Just like the 1 vs 2 nocking point discussion, the brass vs tied nocking points discussion is also largely based on preferences. Both are decent options and have their own set of pros and cons.
If you are just getting started and need to make this decision, I recommend tied nocking points. Tied nocking points are cheaper and feel a bit more comfortable. But if you already have brass nocking points I wouldn’t bother removing them if you don’t experience any issues. Learn more about the pros and cons in the article below:
Brass vs tied-on nocking points
Why setting up your nocking points is so important
Although you don’t have to obsess over your nocking points, it’s important to keep them within acceptable margins. You don’t have to work with nanometers, but if they are ½ inch (1 cm) from the recommended values the arrow can fly rather erratically.
You need to equalize the pressure below and above the arrow, otherwise, the arrow will flex more which can cause major variance in your shots. That’s why I recommend buying a bow square, without it, you will be very prone to making large errors.
Why the arrow points slightly down on recurve bows
Since I have just told you that we need to equalize the pressure above and below the arrow, you might wonder why the arrow should point slightly down on a recurve bow. We don’t do this for compound bows, so what’s the difference?
A major difference between compound bows and recurve bows is where we hold the bow in our bow hand. On a compound bow, we hold the bow slightly below the center of the bow, the arrow in turn is in the center of the bow.
You might think that this is the same for recurve bows, but it’s a bit different. On a recurve bow, we hold the bow in the center of the bow, while the arrow is slightly above the center. Go ahead and measure it on a recure bow if you don’t believe me!
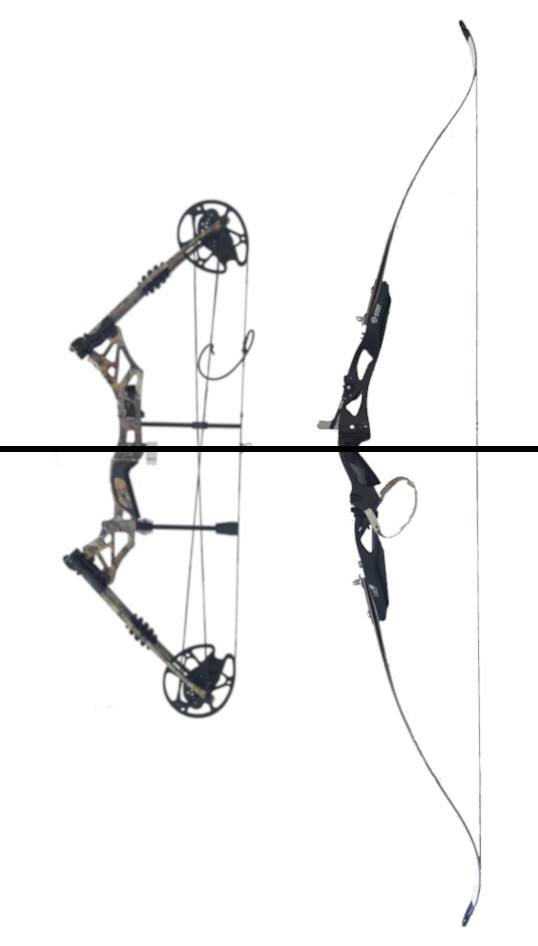
Since the arrow is shot from the center of the compound bow, the arrow should be level when it’s not drawn. On a recurve bow, however, since the arrow is slightly above the center, the arrow should tip slightly down while the bow is not drawn.
Since there is more string below the arrow than above it, if we wouldn’t do this the arrow would actually be pointing slightly up. Therefore, by letting the tip forward before we draw, the arrow is straight at full draw.
The length of the bow, your finger position, and your technique all slightly change the ideal nock position. That’s why we have bare shaft tuning. In most cases, however, the difference between different archers and bows is quite minimal
Learn more about tuning
In this article, we have discussed one part of the bow that can be tuned. But shooting well will still be challenging if your other bow parts are not correctly configured. Therefore, make sure to tune your entire bow by following the guide below:
Also, make sure to read my in-depth articles on tuning the individual bow parts:
Final words
I hope this article helped you to both tune your nock and understand the idea behind nocking point placements. I always like to explain why we set up our bow a certain way because this helps you to remember the information better. It also helps you to troubleshoot issues if you ever experience clearance or accuracy issues.
If you have any comments, suggestions, or questions, please leave them in the comment section down below. I read all my comments and reply to each and every one of them. Once I replied, I will also send you an email!

Tim van Rooijen
For as long as I can remember, I have always been fascinated by archery. First due to its historic significance but later because I like being outdoors. With this blog, I share my knowledge about Archery and how you can improve your shot. More about author…
First of all, thank you so very much in helping me end the search for answers for several weeks…… I am glad I come across this article by you on today.
I am new to archery and just started learning the knowledge since January and started first shooting in May.
I started with recurve bow (American hunting riser) and just started touching a lever-action bow that is set up like using a compound bow. Therefore, I now have to learn and understand basic compound bow string related things and none of the online sources could give me information I need to know about, and I want to know about, until your writing.
About the knocking on a recurve bow, I would like to get some more information from you. Majority sources about recurve bow nock set up for beginners all mentioned to start with 4/8″ for split finger and about 5/8″ for three under. Yet, they still say it also depends on personal style and condition….. as a beginner, there is nothing set yet and we know nothing about what and how to start before we even have our “style” and “preference.” Hense, what is the general foundation for nock set up for beginners? Because the different location of the nock set up also give different shooting result and also affect the adjustment of finger position……..
And, are these set up all talked when not using arrow rest? Or using an arrow rest? I know it should be a simple topic and just use where the arrow is shot off as the base line (0 line)….nonetheless, I noticed when I shoot from shelf compart to when I shoot from an arrow rest, even if I set the same nock at 5/8″~6/8″ from where I shoot, I can put my index finger right next to the arrow knock and shoot, but I need half~full thumb gap space below the arrow knock to just have the same shooting result. What causes this? According to your writing, does that mean due to the arrow rest further raised the position of the arrow so I actually should set the nock to even higher place in order to put my index finger right under the arrow knock to shoot without string walking technique?
And for the compound bow, how to actually set the arrow perpendicular? from the arrow rest….right? Can I shoot a compound bow form the shelf just like a recurve bow and set up the D-loop according to that? Or does a compound ALWAYS use an arrow rest so it is ALWAYS pull up the stage to fine the horizontal position to set up the D-loop?
And, how close should the actual stage be installed on a compound bow when using self-dropping arrow rest? Should I set it as close to the shelf as possible? Or should I have how much space/gap to it?
Thank you