A bow sight makes aiming a lot easier, but to aim well you need to tune and adjust it. This might be challenging, especially when you do it for the first time. Therefore, in this article, I will explain in detail how you tune and adjust your bow sight. No time to read this entire article. Read at least the bold section below for the short answer.
To adjust your bow sight, you must first unlock it, by loosening the locknut. When unlocked, you move the sight towards the error on the target. If you shoot to the right, you move your sight to the right. If you shoot too low, you move your sight down.
The short answer from the bold paragraph might help you out in a pinch, you should learn how your sight works in more detail. Generally, we don’t recommend adjusting the sight to the right or left, for example. Therefore, keep reading for more information. I will first discuss some terminology and how a bow sight works. Next, I discuss how to adjust, align, and center your sight. At the end of this article, I will discuss the idea behind the sight more technically.
Some terminology
Before we can discuss how a bow sight works, I must discuss some terminology:
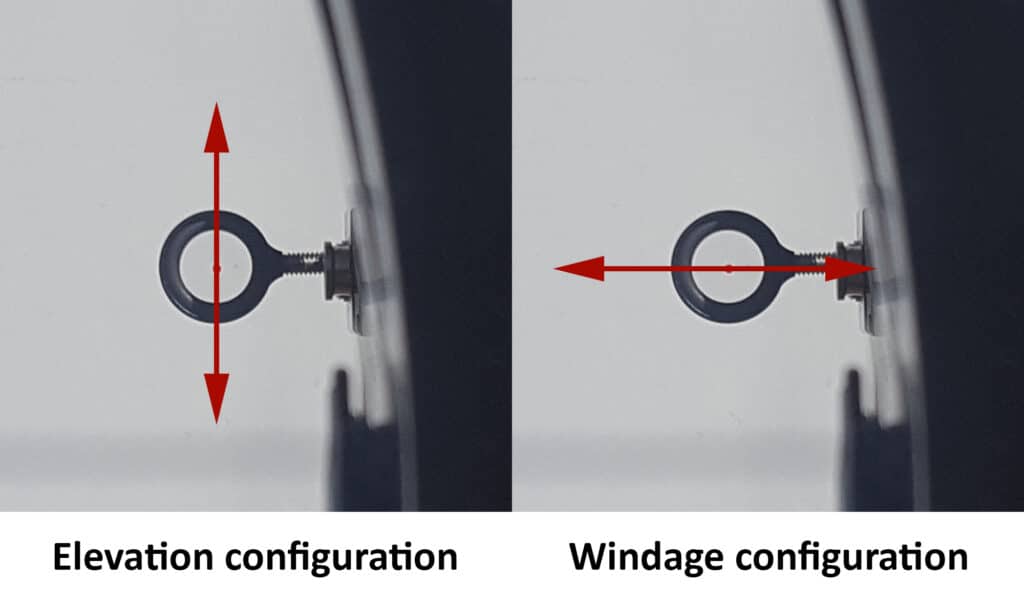
- Elevation: how far the sight is up or down. We also often call this the distance setting because we only change this to accommodate longer distances. At longer distances, the arrow drops more, therefore, we must lower our sight.
- Windage: how far the sight is left and right. The idea behind this is that you can accommodate the wind. Most archers don’t do that, however. Most archers just aim a bit to the right or left to accommodate the wind.
If you are not familiar with the parts of the sight, you might want to read this article. I won’t discuss what the different parts of a sight are in this article.
How a sight works
When you are adjusting your sight for the first time, it might take a while before you figure out how it works. In this section, I will explain how your sight works. Since not all sights work the same, I will discuss them in groups. You can compare your sight with the pictures to see which kind of sight you have.
Beginners / cheap sight
Most beginners that shoot with a recurve bow will have this sight. These sights often cost less than $20 so they are great options for beginners. Luckily, these sights are relatively simple to adjust.
Elevation: to adjust the height of your sight, you must first unscrew the thumbscrew on the side of the windage module. This screw locks the windage module on the sliding bar. When the screw is loose, you can slide the entire assembly up or down.
Windage: you have two options to adjust the left-right alignment of your sight. The first option is to use the windage knob on the side of your sight. The second option is to twist the aperture of the sight. If you twist the aperture, you will see that the sight moves either inwards or outwards. In most cases, you must first untighten the thumbscrew in the front to twist the aperture.
Generally, we twist the aperture to make large adjustments and use the windage knob to make small adjustments. When you twist the windage knob, the locking mechanism will slide to one side. Therefore, you can’t keep twisting the windage knob. It will either get stuck or slide out of the housing if you turn it too much.
Target / advanced sight
Most recurve archers will switch to a more advanced sight, after one or two years of shooting. The advantage of these sights is that they are more adjustable, allowing you to tune your sight more precisely.
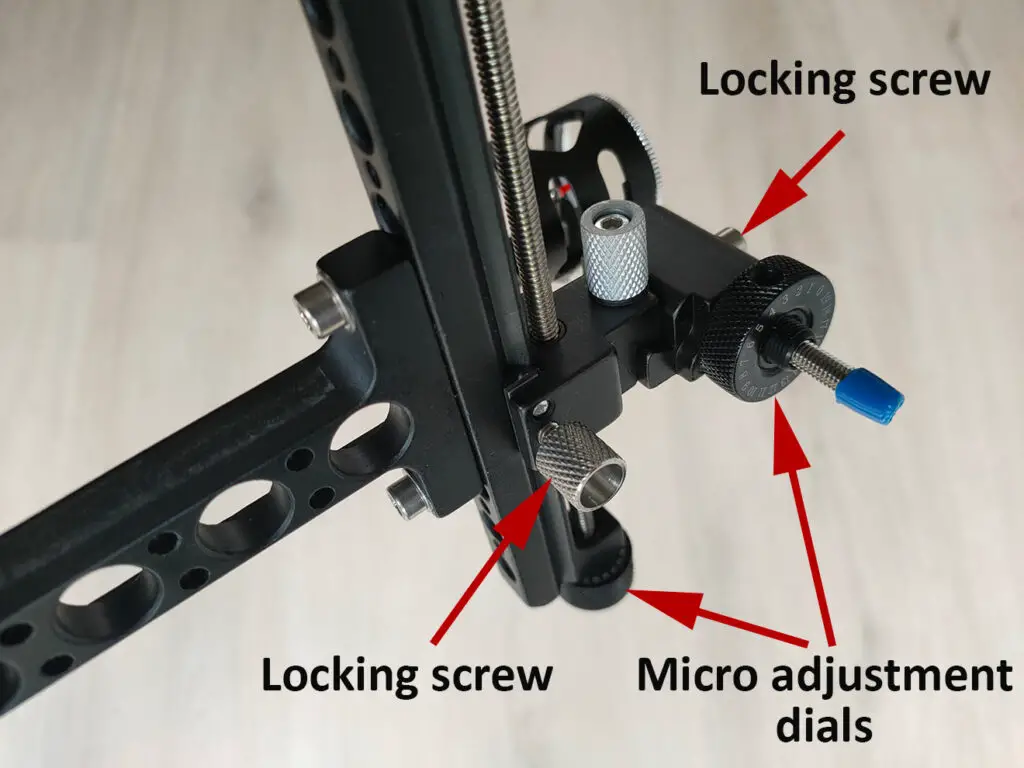
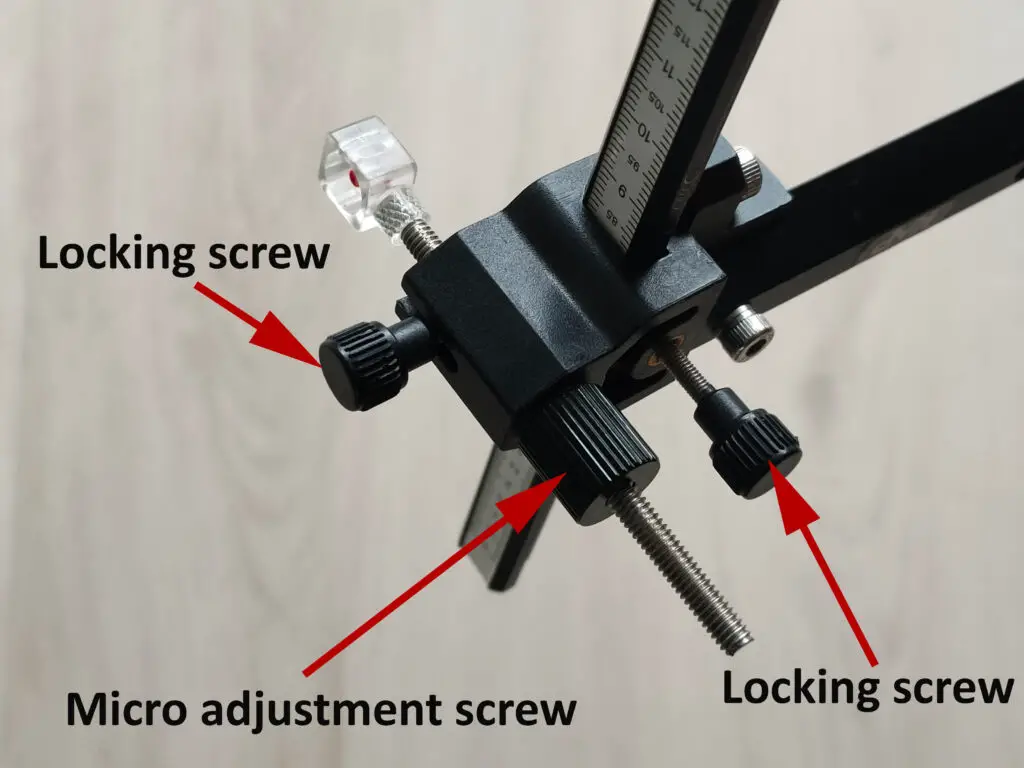
Elevation: some advanced sights will have a small thumbscrew that you have to loosen first. You have two options to adjust your sight, you can make small adjustments with the turning knob or large adjustments by unlocking the windage module.
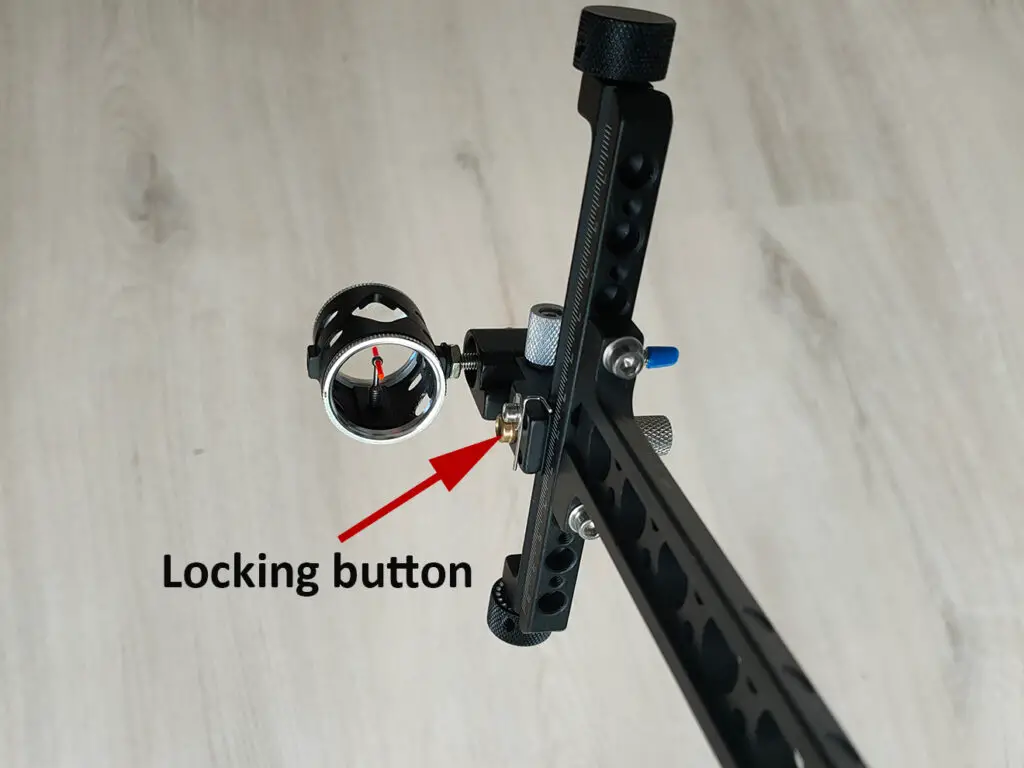
To make large adjustments, you must push a button on the side of the windage module. While pushing the button, you should be able to slide the module up and down. In most cases, you need two free hands to do this.
To make small adjustments, you simply start turning the elevation knob, which is on top of the windage module. In some cases, this knob is on the bottom of the elevation module and sometimes there are even two knobs.
Using the last method will make small adjustments to your sight. So generally, we use the first method to make large adjustments. You can later fine-tune these adjustments by using the elevation knob.
Windage: the windage configuration works largely the same as on cheaper sights. To adjust the windage settings you have two options. You can use the knob on the side or twist the aperture.
To make large adjustments you must twist the aperture. In most cases, you need to loosen a locking screw. This can either be a hex or the thumbscrew. Once you untightened these screws, you can twist the sight inwards or outwards.
To make small adjustments, you can use the screw on the side. Just as with the cheap sight, you can’t do this forever. Otherwise, it will either get stuck or slide out of the housing. Therefore, you only want to use this to make small adjustments.
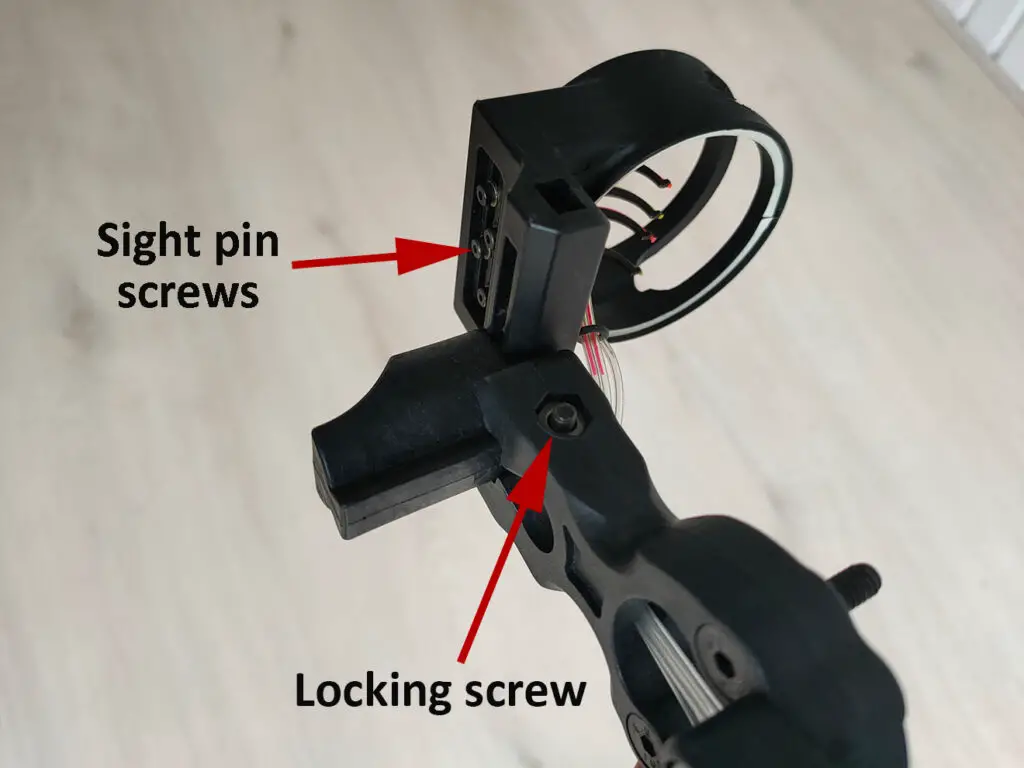
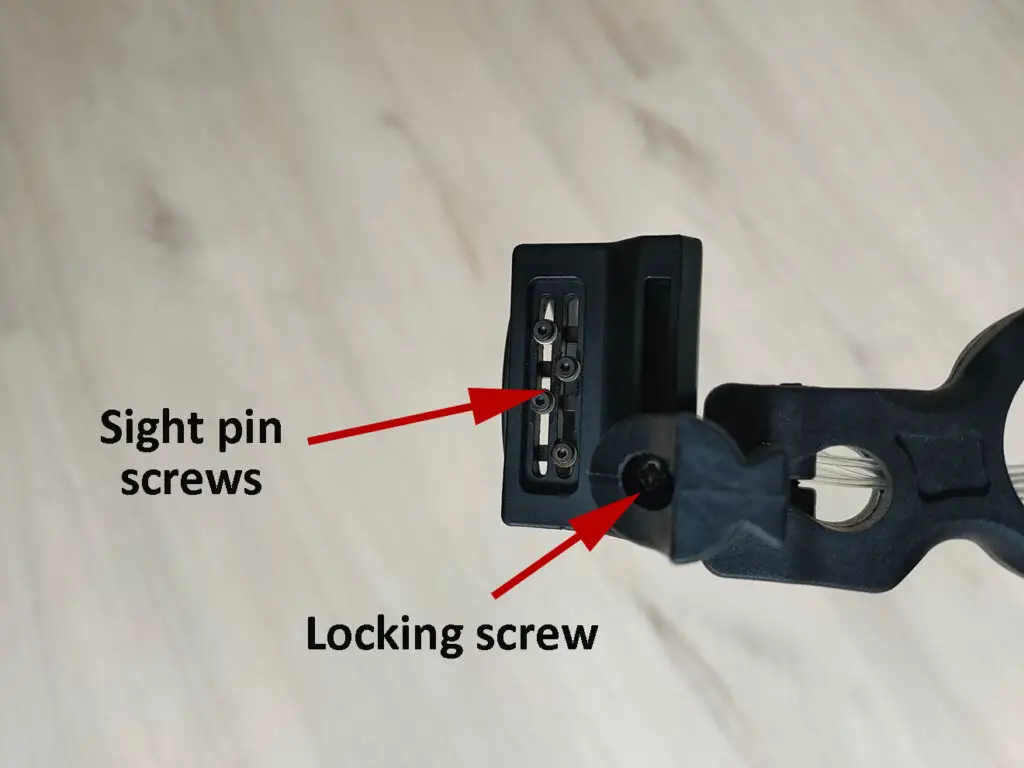
Multipin sights
The advantage of multipin sights is that you can store multiple elevation settings in one sight. Therefore, you can use the sight at different distances without changing the configurations of the sight. You just pick another pin to aim your bow.
Elevation and windage: cheap multipin sights often have a locking thumb or hex screw. When you loosen this screw, you can change the settings by hand. With more expensive multipin sights the windage and elevation are changed similarly to advanced target sights. You should note, however, that when you change these settings all your pins will move.
Change the elevation of one pin: loosen the small hex screw on the side of your sight that corresponds to the sight pin you want to change. When this screw is loosened you can change the elevation of the sight pins by hand. When you retighten the locking screw, make sure to keep the sight pin in place. The sight pin sometimes moves due to the torque of the locking screw.
You use the most upper pin for the shortest distance, 20 yards for example. Place this pin almost in its highest position. This gives you more space to lower your other pins for shorter distances.
You do want to keep some room to move your upper pin slightly. In some cases, you might need to move your sight pin up due to minor changes in your technique or shooting setup. Otherwise, you will need to configure all your pins again, since you need to move the full aperture up.
The basics of adjusting your sight
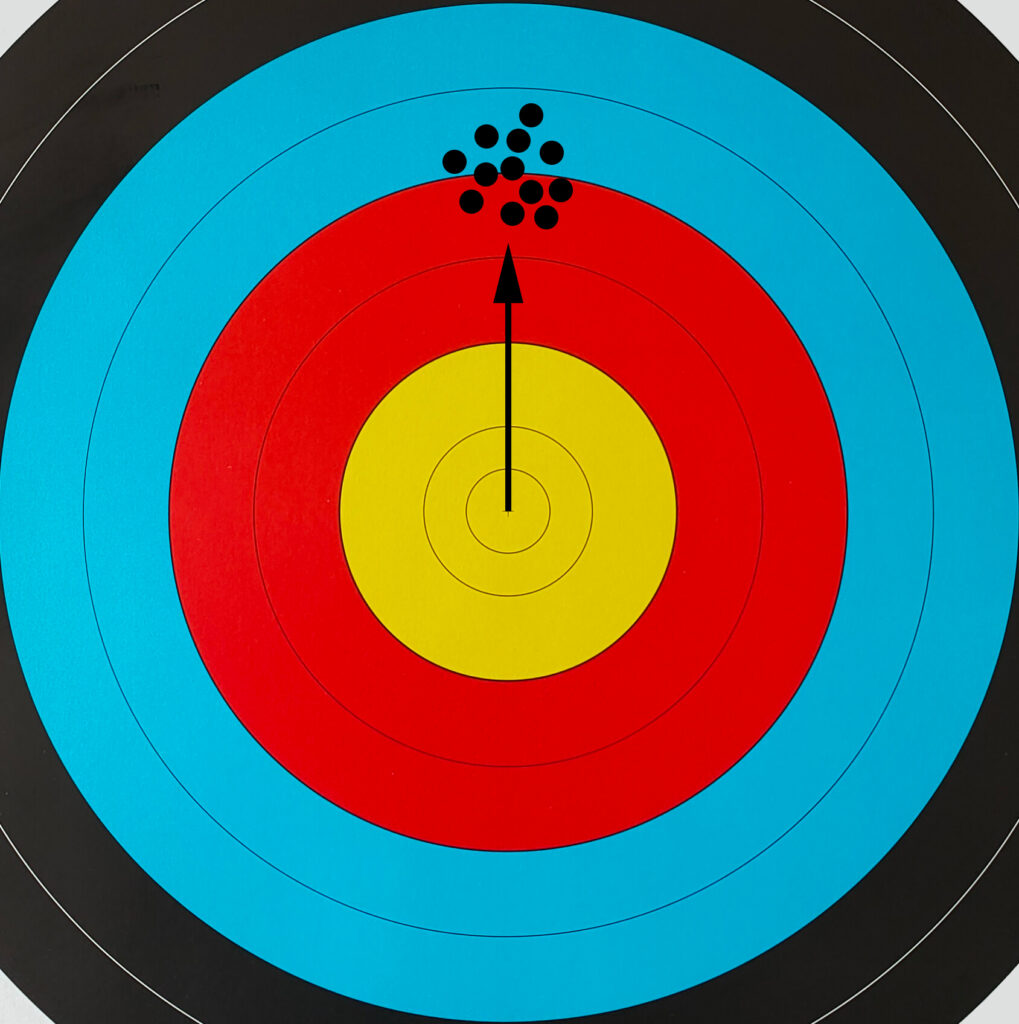
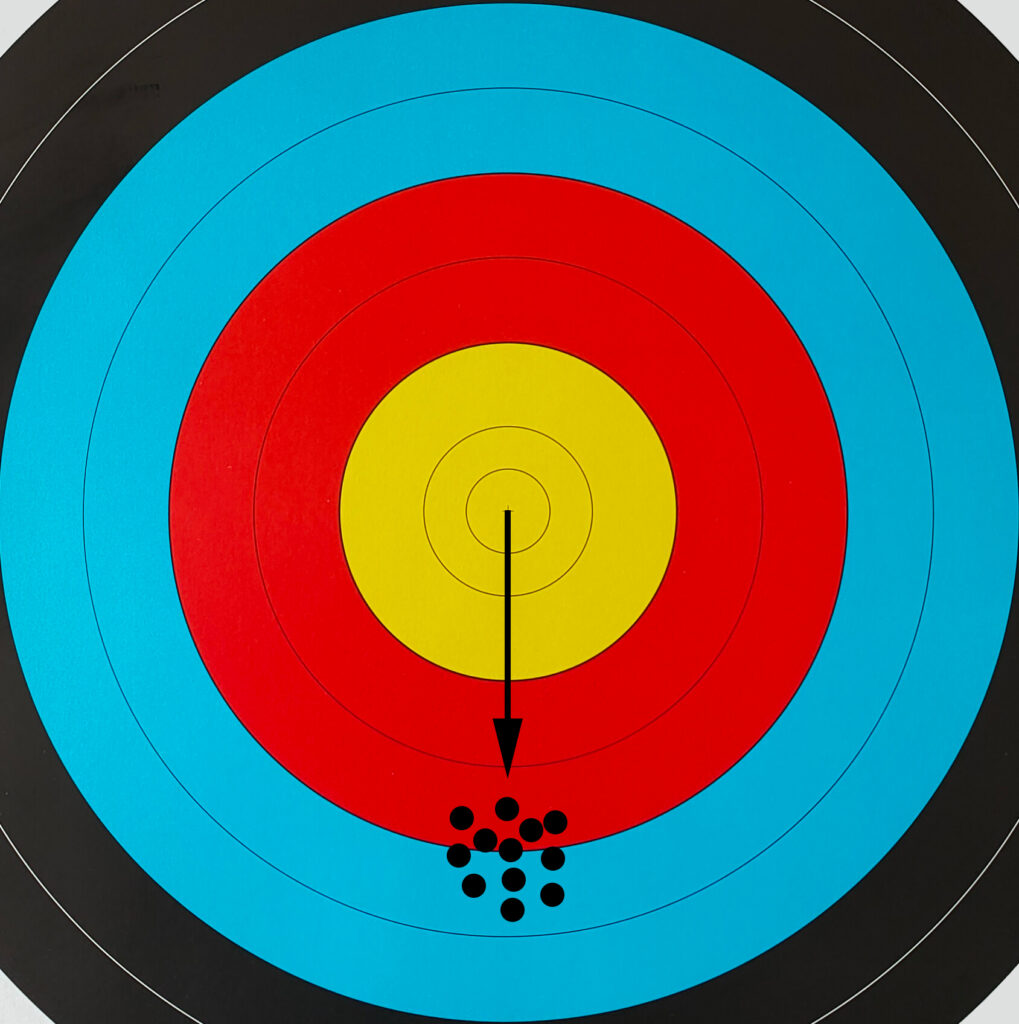
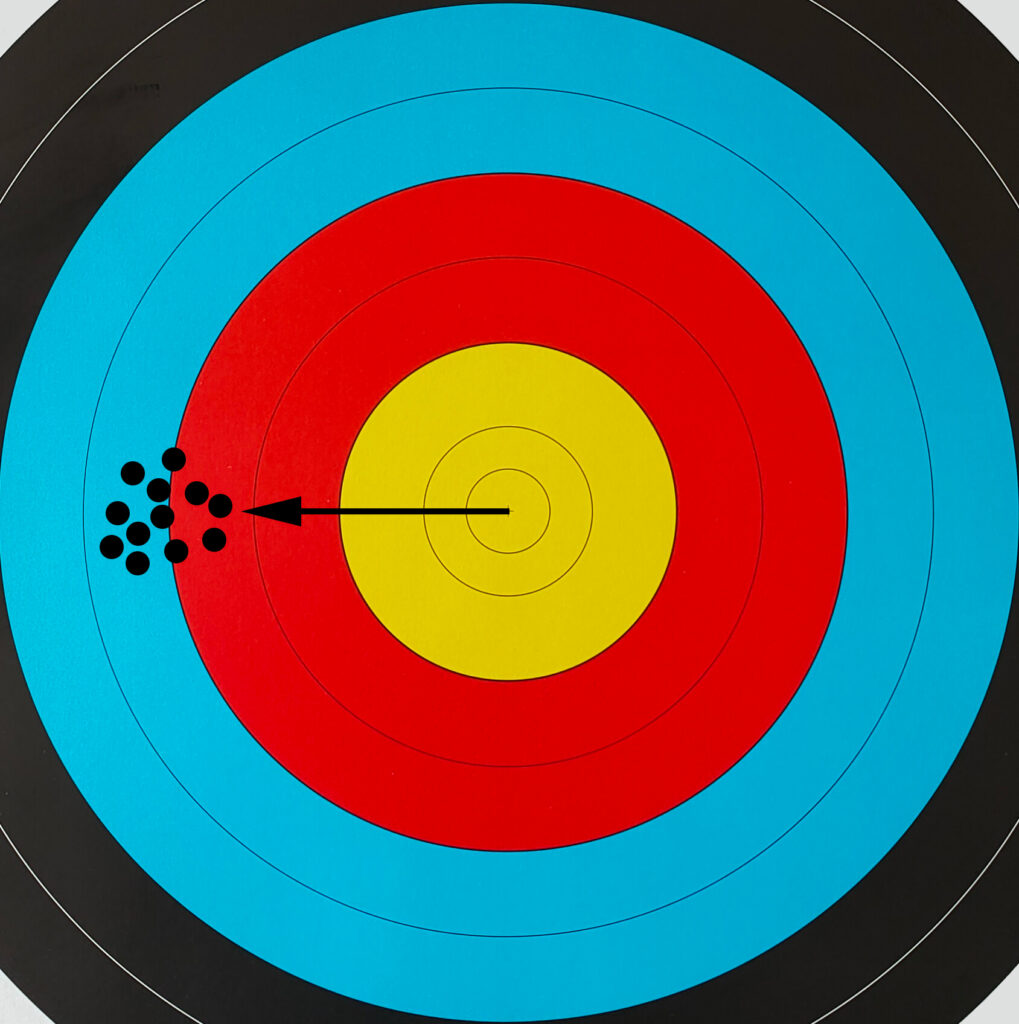
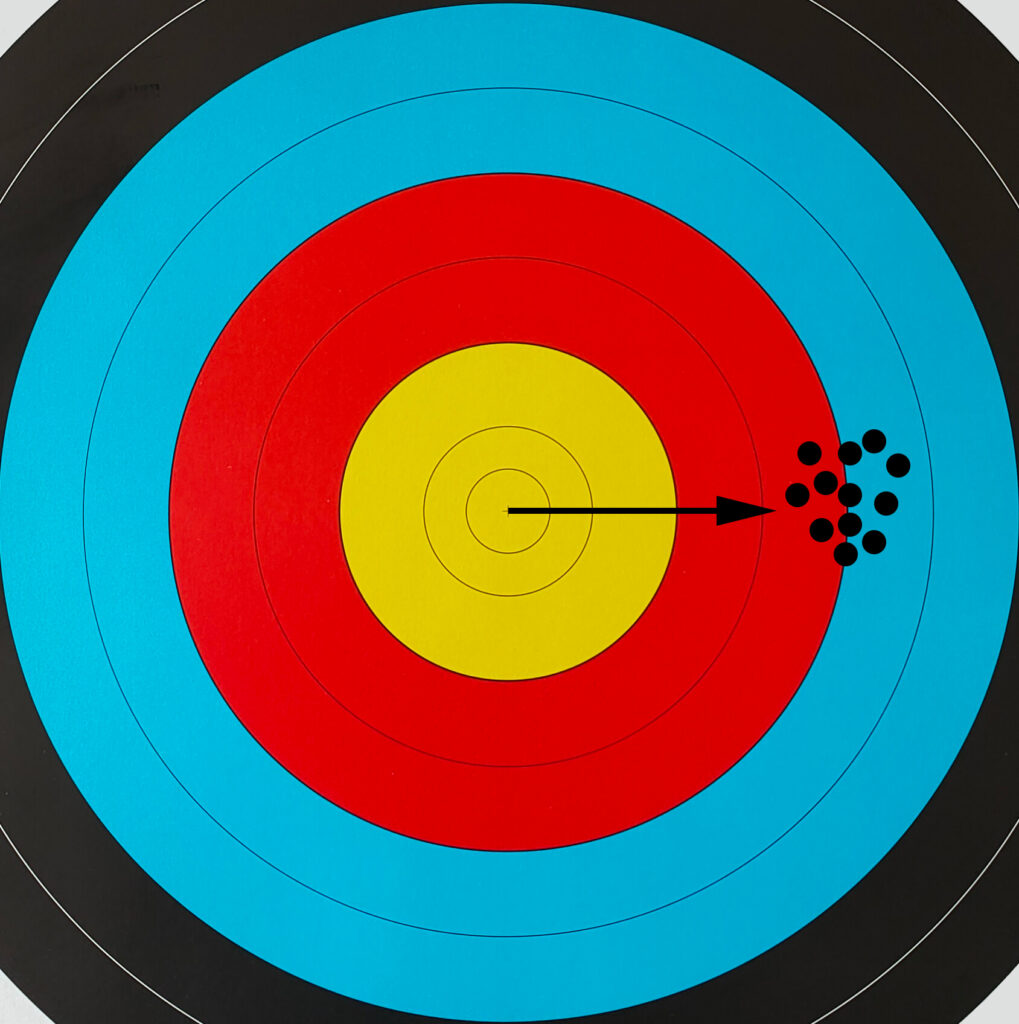
Whenever you are adjusting your sight, think of this mnemonic: move your sight toward the error on the target. If your shots are low, move your sight down. If your shots are to the right, move the sight to the right. Simple isn’t it?
Don’t be hesitant to move your sight. If all your shots land on one side of the target your sight is probably not configured right.
Once your sight is configured both your windage and elevation settings should stay the same. Only when you increase the distance, you need to lower the sight.
You shouldn’t have to change the windage setting of your sight. If you shoot in the center of the target at one distance and to the left or right at another, your sight might not be centered correctly. We will discuss how to center your sight in more detail next.
Center shot
Whenever we tune a bow, we set our sight center shot. After we have tuned our sight, we don’t change the windage settings anymore. In this section, I will discuss why we put our sight center shot and how you can do this for your bow.
What center shot is
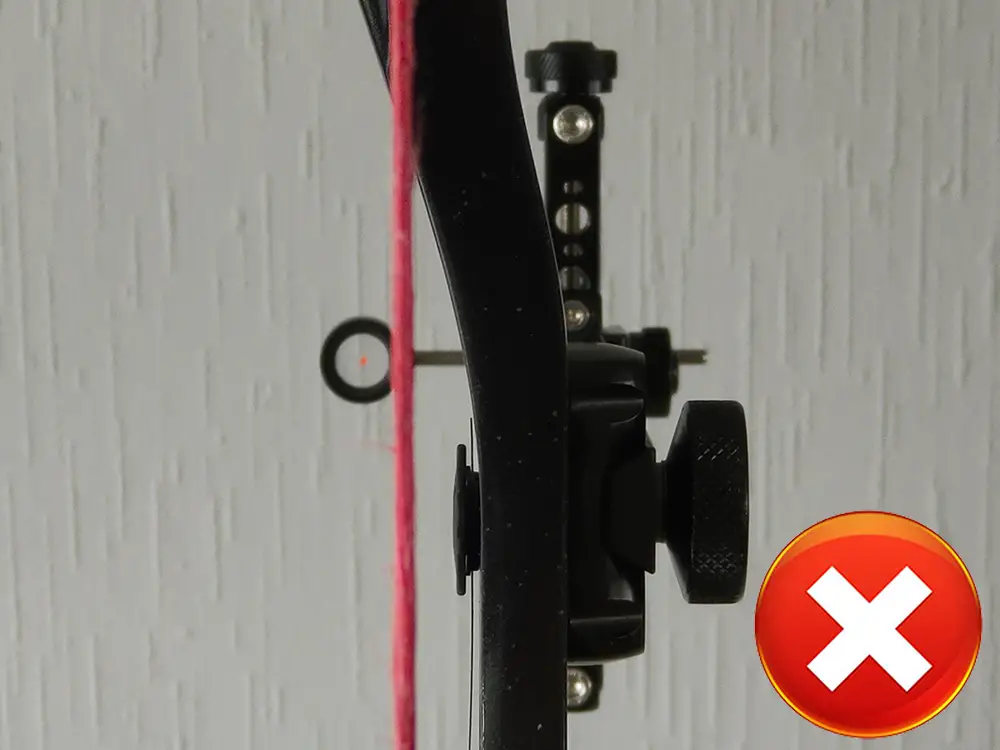
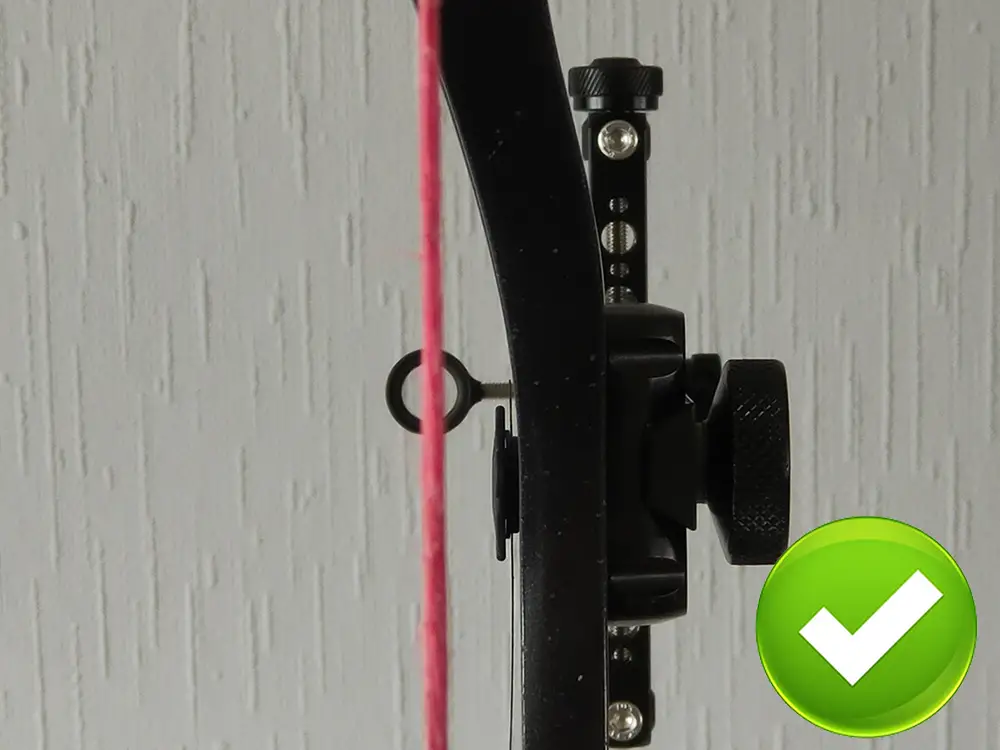
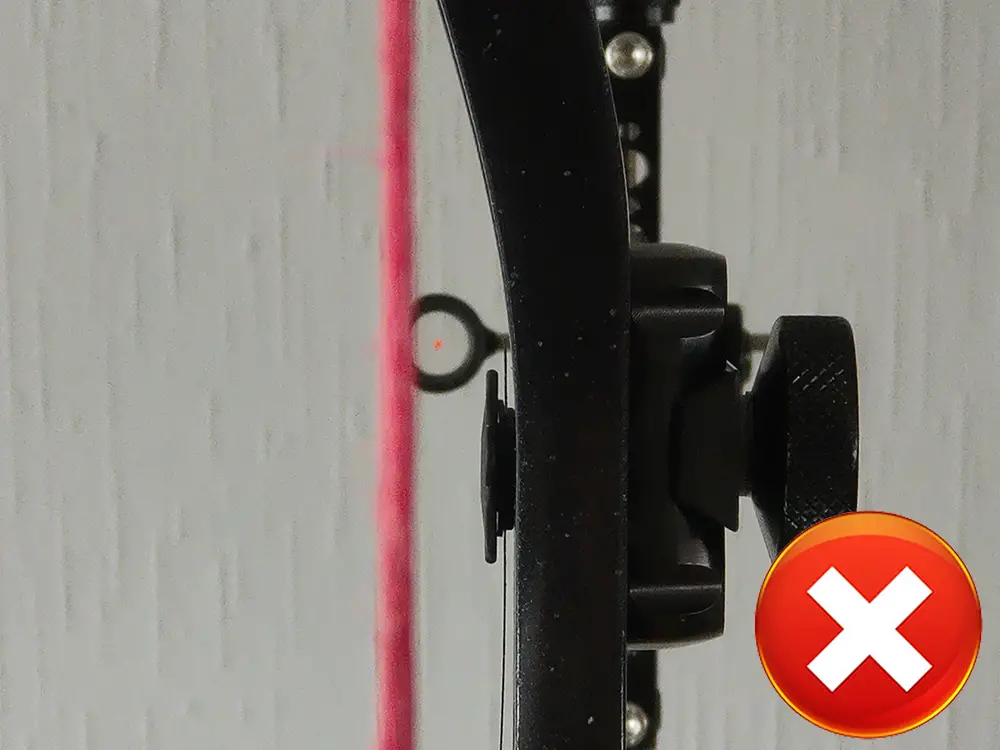
When setting our bow center shot, we align both the arrow rest and the sight. If you look at the back of the bow, both the pin of the sight and the arrow should be straight behind the string.
Why we set our sight center shot
We center our sight and arrow rest for multiple reasons. The first reason is that more energy is correctly transferred into the arrow, which makes the arrow flight more stable. It also, makes it easier to use our sight at multiple different distances.
If we don’t have our sight and arrow rest center shot, the arrow will deviate slightly to the right or left at different distances. For new archers, that only shoot at short distances, this isn’t too big of an issue. But for experienced archers, that shoot at longer ranges, this can be a big deal.
How to set your sight center shot
Although there are some fancy and very accurate ways to set your center shot. Most archers don’t have the tools and don’t need that level of precision. Therefore, most archers just do this with their eyes. Just follow the steps below to center your sight.
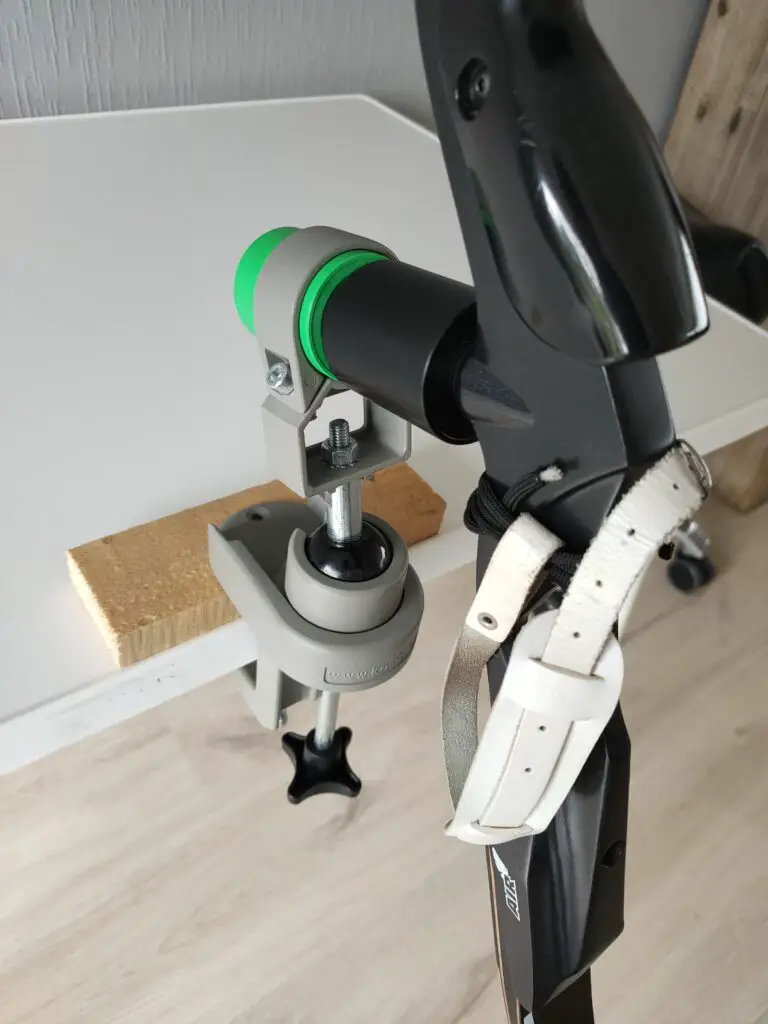
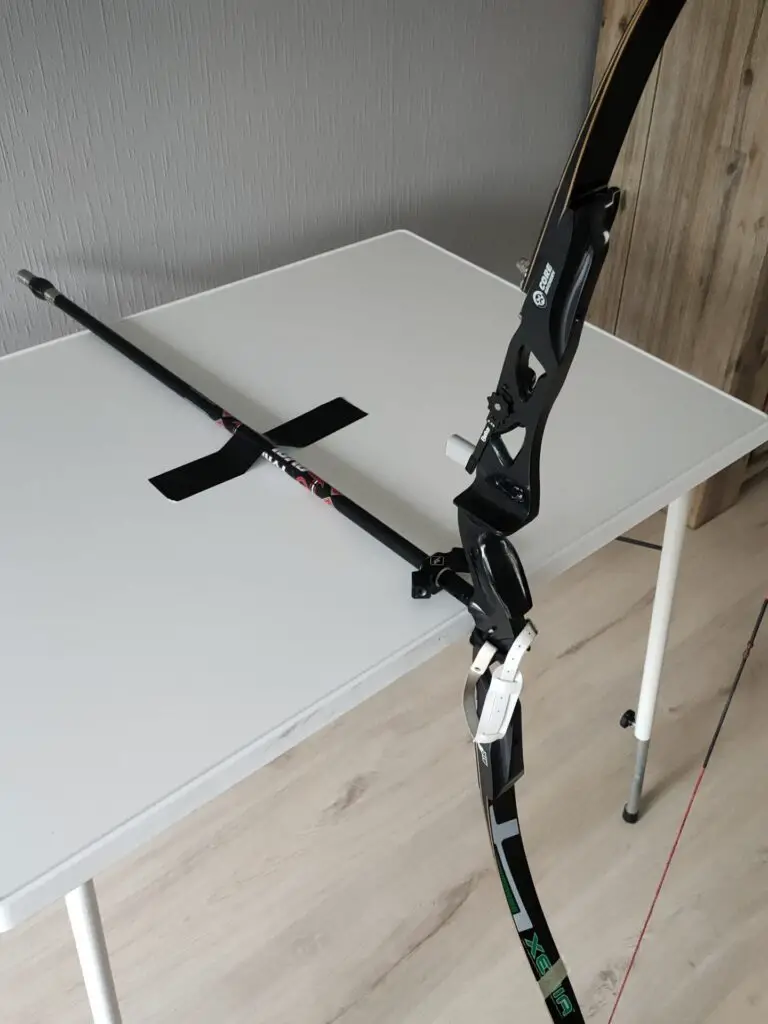
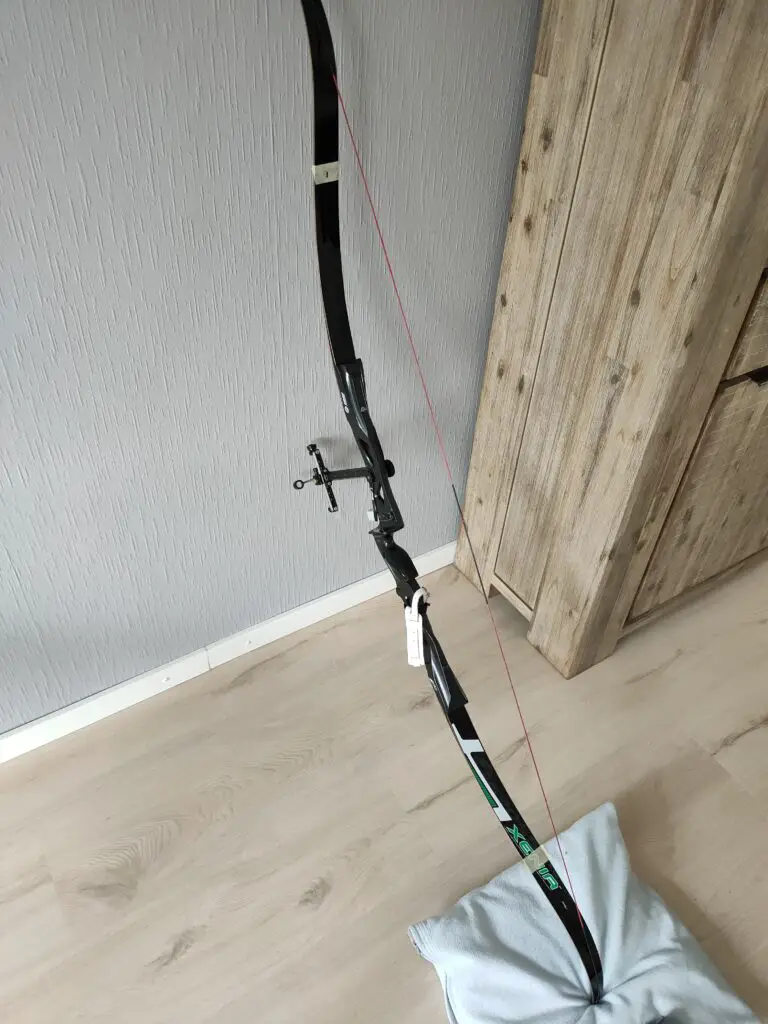
Step 1: prop up your bow, which allows you to look at your bow from a distance. You can use a bow holder vise for this, but if you are creative you can also use other methods. For example, you can tape your stabilizer to the table to get the same effect. Or you can balance the bow against a wall. The bow must be stable when you are going to the next step. Therefore, you can’t ask a friend to hold it for you.
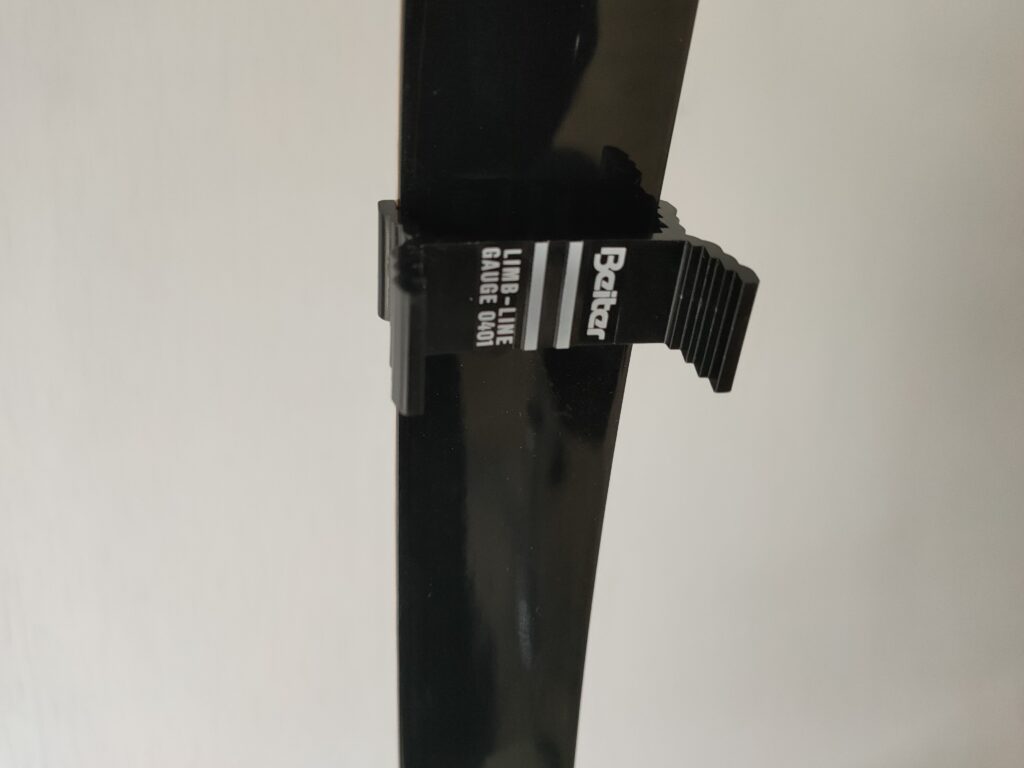
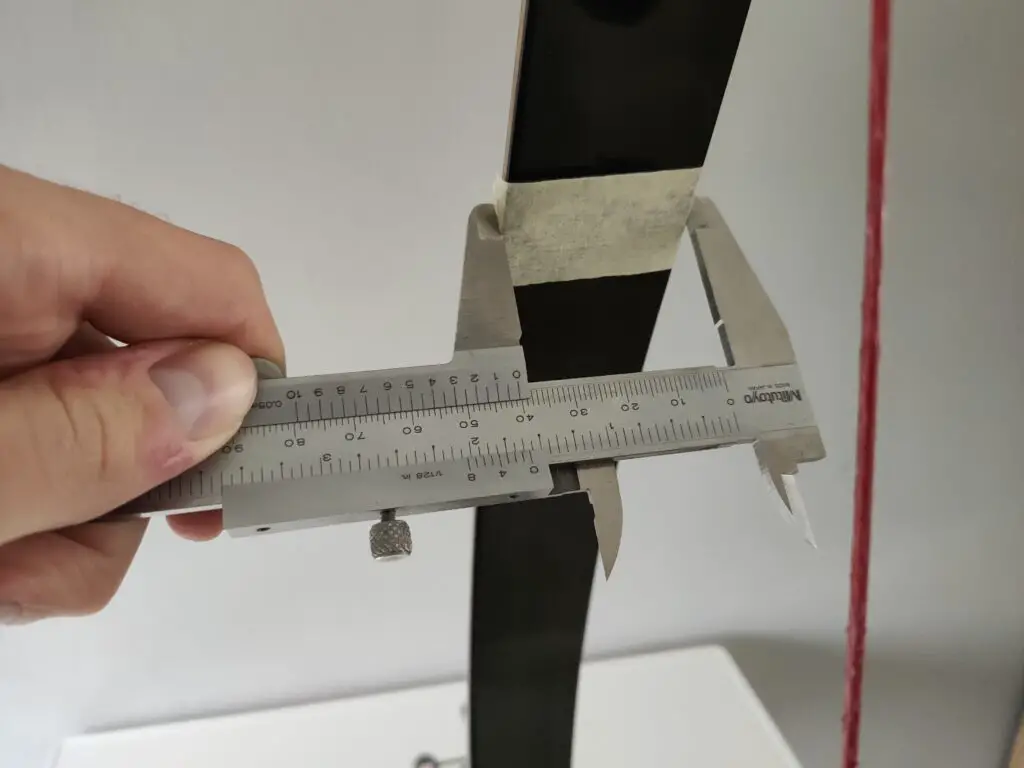
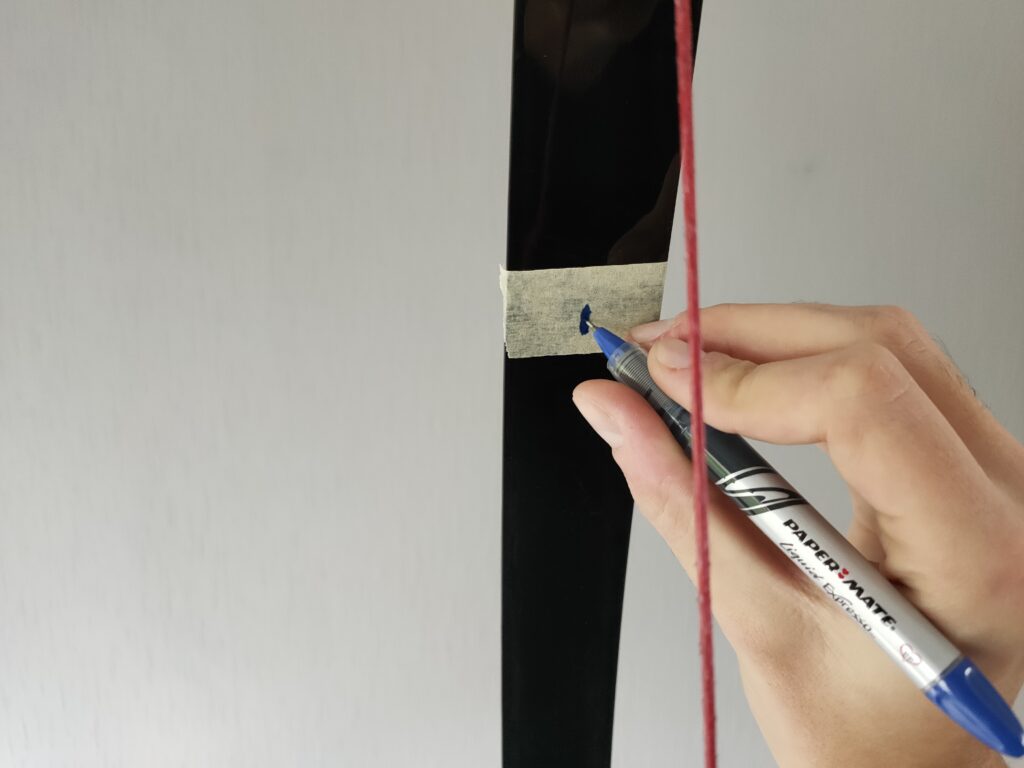
Step 2: the next step is to create center markers. The easiest way is to buy some recurve alignment gauges, like these from Beiter. If you don’t want to buy these, you can also use some sticky tape and mark the center of the limbs. Just measure the width of the limb and divide it by 2. This doesn’t have to be extremely precise because you won’t be able to see it that precisely either.
Step 3: take a few steps back from the bow and move left or right, to make sure that you can see the string through the center markers. It can sometimes be helpful to sit down, to make sure that you are not moving from the right to the left.
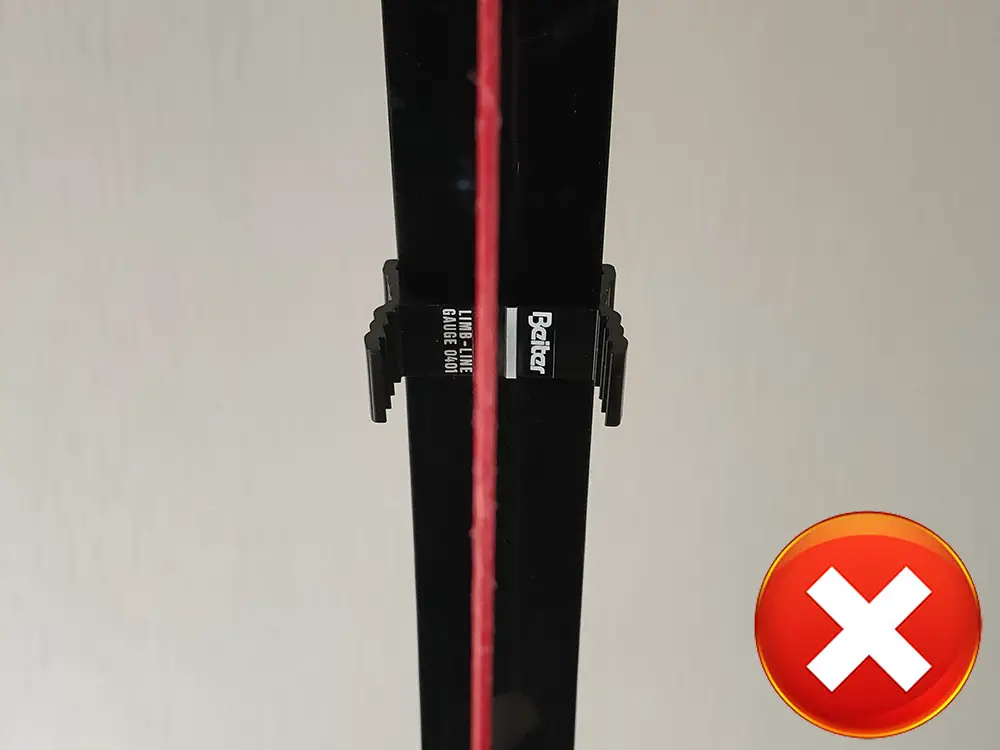
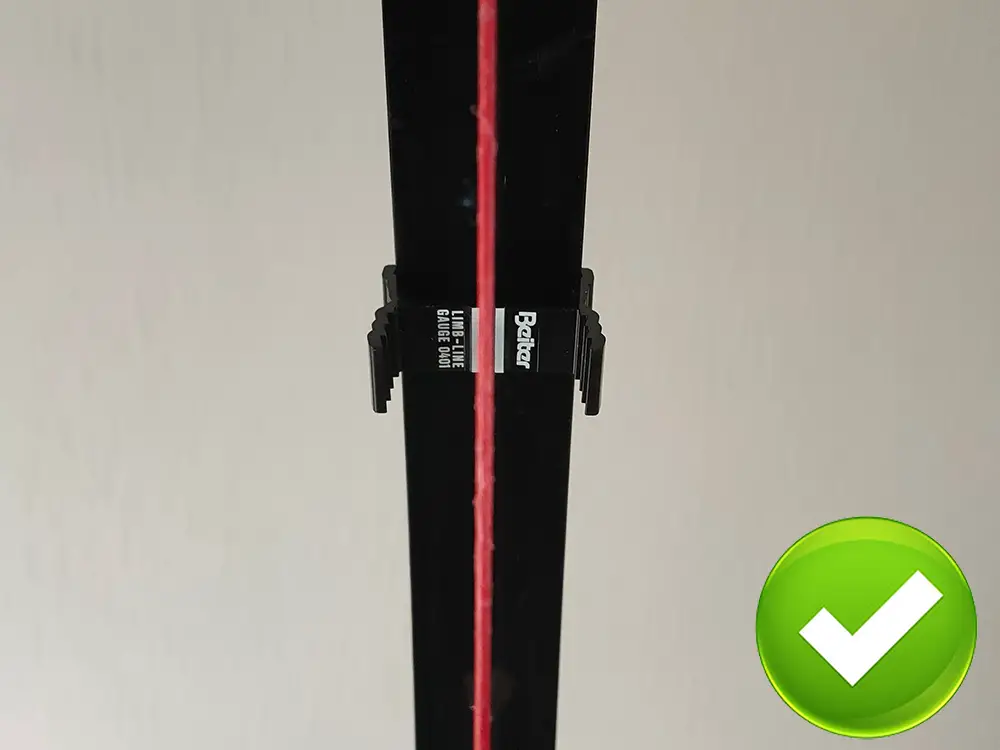
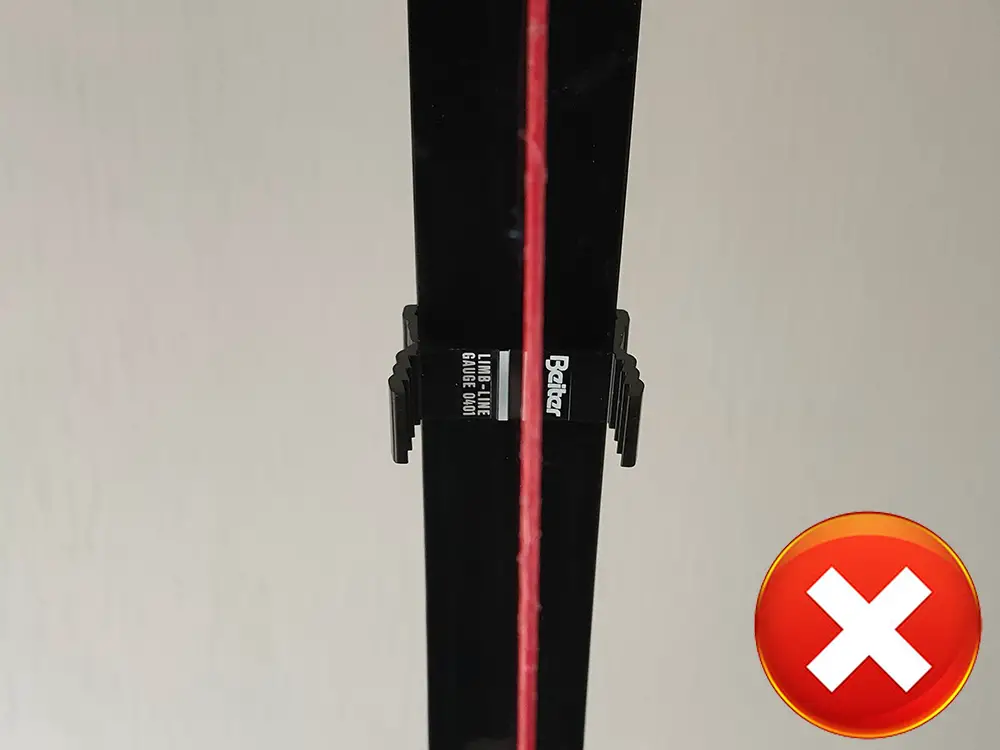
Step 4: while making sure that the strings stay within the center markers, start looking at the sight. The pin of the sight should go directly through the string. If that is not the case, move the sight either inwards or outwards and repeat step 3 and 4. It might take a few tries before your sight is perfectly centered.

Why we don’t use the windage settings to adjust for wind
You use the windage settings to adjust for wind, sounds logical right? Well, that sounds like a good idea until you try to put it into practice. The problem with wind is, that it doesn’t stay consistent. Wind can change dramatically every few seconds.
We can’t adjust our sight for every gust of wind. When we have our bow at full draw, we can’t adjust our sight. Therefore, it’s just not practical to change your sight to accommodate the wind. In most cases, you should just aim a bit against the wind, to make sure that the arrow hits in the center of the target.
A lot of archers also wait until the gust of wind has passed. That is not always possible of course. But using these two tactics tend to work a lot better than adjusting your sight every time.
The duality between the sight and arrow rest
Even if your sight and arrow rest is centered correctly you might notice that the arrows fly to the right or left. When this happens, you have two options, you can either change the position of the sight or the arrow rest.
You can move the sight towards the error as we mentioned earlier, or you can move the arrow rest away from the error. Your sight and arrow rest work in the opposite direction. Recurve archers must adjust the plunger (also known as the button). Compound archers must move the entire rest to one side.
As a recurve archer, changing the tension of the plunger might help. If your arrows fly to the left decreasing the tension of the plunger might help. When the arrows fly too much to the right, you should increase the tension of the plunger.
If the arrow rest and sight of a compound bow are centered correctly it should shoot in the middle of the target. When this isn’t the case, you might have issues with your technique.
How center shot can drive you nuts
When I discussed the basics of the sight, everything was quite simple. If you shoot too much to the right, you move your sight to the right. If you shoot too much to the left, you move your sight to the left. But now you know about center shot, you also must think about the plunger tension and the position of your arrow rest.
Therefore, you shouldn’t obsess over center shot. Don’t worry if your bow isn’t 100% aligned. Some archers think that you can’t shoot well if your bow isn’t completely center shot, but that is not true. It’s a best practice to keep the sight center shot but being too strict on this can cause other issues.
Constantly screwing around with your arrow rest cause clearance issues. Therefore, you should be considerate before you move your arrow rest. The same is true for changing the tension of your plunger.
So, don’t focus too much on keeping your bow center shot. If it’s slightly off-center it will not cause major issues. You can just use your windage settings to compensate for it.
How to align your sight
As we mentioned earlier, when we shoot at different distances, we only want to change the elevation of the sight. As we discussed earlier, your sight should therefore be centered, but there is something else, that we also need to consider.
The sight moves up and down on the sight bar. This bar should be vertical, otherwise, if we move the sight up or down, the left-right adjustment alignment will change as well. This is also the reason why we don’t tilt our bows but keep it straight.
In most cases, your sight will already be aligned from the factory. But in some cases, you might have to do this yourself. Luckily, the process is quite straightforward.
Loosen the two screws at the back of the sight bar. When these two screws are loose, you will feel that you can tilt the sight bar. The bottom screw should have more range of motion than the upper screw. You can now straighten the sight bar. Tighten the upper screw first. This allows you to make some final adjustments before you tighten the lower screw.
More about the sight
The sight is quite a complex piece of equipment. Understanding how it works and how you configure it can make shooting your bow a lot more enjoyable. Therefore, read my other articles, to learn even more!
- How to fix a sight that won’t go any lower
- How far you should extend the sight forward
- Why you should consider a magnified sight for your compound bow
- How to pick the right sight for your bow – recurve archery
More about tuning
In this article, we have discussed one part of the bow that can be tuned. But shooting well will still be challenging if your other bow parts are not correctly configured. Therefore, make sure to tune your entire bow by following the guide below:
Also, make sure to read my in-depth articles on tuning the individual bow parts:
Final words
Although you can make a lot of adjustments, you shouldn’t keep making changes to your sight. Sometimes your technique can be slightly off, which means that you shoot clustered in one direction.
Just because you shoot three arrows in one cluster above your target doesn’t mean that you must raise your sight. Maybe you draw back a little bit further, which means that the arrow travels faster. Therefore, don’t change your sight to lightly. You should see a clear pattern that all your arrows are skewed to one side. Therefore, check your technique first before you worry about your sight.
I hope this article was helpful. Please leave any feedback or questions in the comment section down below. I will respond to any questions as soon as possible and I will send you an email with my reply.

Tim van Rooijen
For as long as I can remember, I have always been fascinated by archery. First due to its historic significance but later because I like being outdoors. With this blog, I share my knowledge about Archery and how you can improve your shot. More about author…
I’ve been shooting recurve a couple of years now but certainly learned quite a bit by reading this article. Thanks.
Hi Rob, thank you for your comment. I am happy to hear that this article was helpful! I try to make my articles easy for beginners but also in-depth for more experienced archers.
my 10 yard pin on a 5 pin sight is not inline with the other pins. how do I move the single pin in or out
Hi Arthur,
That is very strange indeed. I do not know the make and model of your sight, but I am afraid that it is not possible. I have never seen a sight where it is possible. Normally all the pins should be in one line (vertically). If not, it seems to me like there is a manufacturing error.