Almost all recurve archers use a plunger (also known as a button or cushion plunger). This plunger allows you to configure the arrow position and tune the side pressure. If you are new to archery, this can be quite difficult. You might for example wonder ‘’how do I configure the plunger?’’ or ‘’how much spring tension do I need for my arrows?’’
In this article, I will discuss both of these questions and much more. I will also explain why it’s important to tune your plunger and how you can finetune it. Also, I will give some tips on how you can solve common issues.
How you should set your plunger
On every plunger, there are two main things you have to configure: the plunger position and the plunger tension. Let me quickly explain how you should set your plunger.
Your plunger should be set that the arrow points about ½ till 1 arrow width slightly to the left (for right-handed archers). The plunger tension should match your draw weight. Which means a soft plunger for a low draw weight and a stiff plunger for a heavy draw weight.
If you need more help, read my in-depth guide below.
Plunger position
As I mentioned above, the plunger should be set in a way that the arrow points slightly to the left, if you are a right-handed archer. If you are left-handed you have to keep the point to the right. If you haven’t tuned your bow before, you might wonder how you can check the plunger position. Let me explain this step by step:
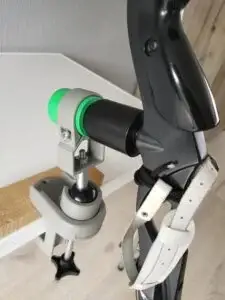
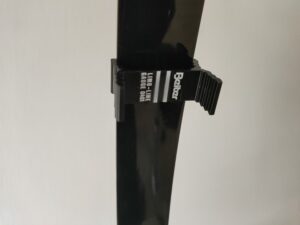
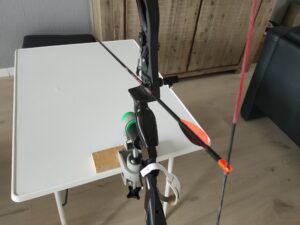
Step 1: To check your plunger position, you have to find a way to prop up your bow. An archery technician will use a bow vice for this which screws into the stabilizer bushing. But I can imagine that you might not want to invest in another tool. Therefore, here is an easy alternative. Simply screw on your stabilizer and use some duct tape to stick it onto the table. It might be a bit more cumbersome, but it’s a decent alternative.
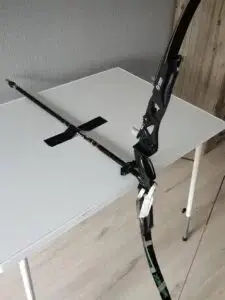
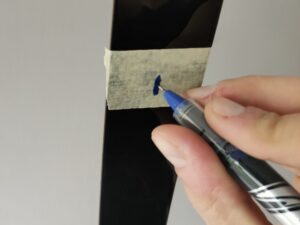
Step 2: Now we need some center markers on both bow limbs. You can use some tape and mark the center, or you can use some limb gauges. These gauges make tuning the bow a lot easier and since there are relatively cheap, you might want to invest in a pair.

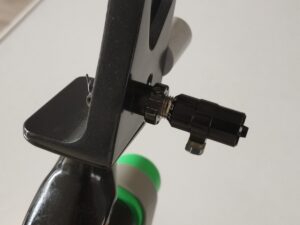
Step 3: Screw in your plunger until it hits the locknut (the metal ring of the plunger). Now put the arrow on the arrow rest and take a few steps back.
Step 4: Now close one eye and align the string in the center of the limb using the bow gauges. If it’s not centered you will have to move your head left or right. Check whether your head position is correct for both the upper and the lower limb, before moving on to the next step.
A quick note: when you are looking at the bow with your bow gauges, you might notice that your bow is not completely straight. This could be the case if you haven’t centered your limbs. If this is the case, you might want to read the article below for more information:
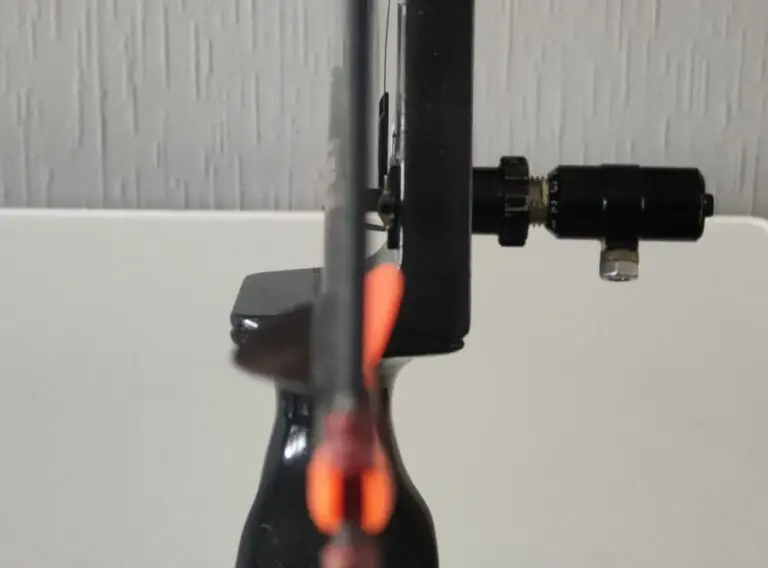
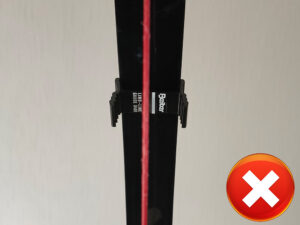
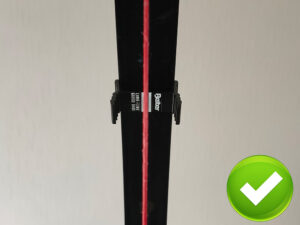
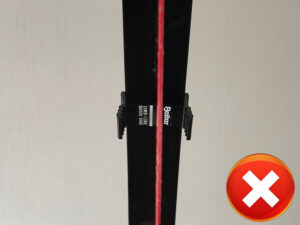
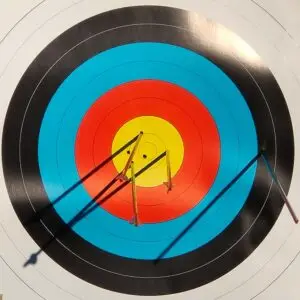
Step 5: while keeping your head still, look at the arrow. You can now check the position of the arrow in relation to the center plane. As mentioned earlier, it should be about ½ till 1 arrow width away from the string, as you see in the picture
Plunger tension
In the bolded part at the beginning of this section I said: ‘’The plunger tension should match your draw weight.’’ I understand that it’s difficult to determine the ideal plunger tension. Since there are many different plungers available on the market, I cannot tell you in great detail how many twists you need. Also, it differs a lot per archer. Do you release cleanly or do you let the string roll over your fingers?
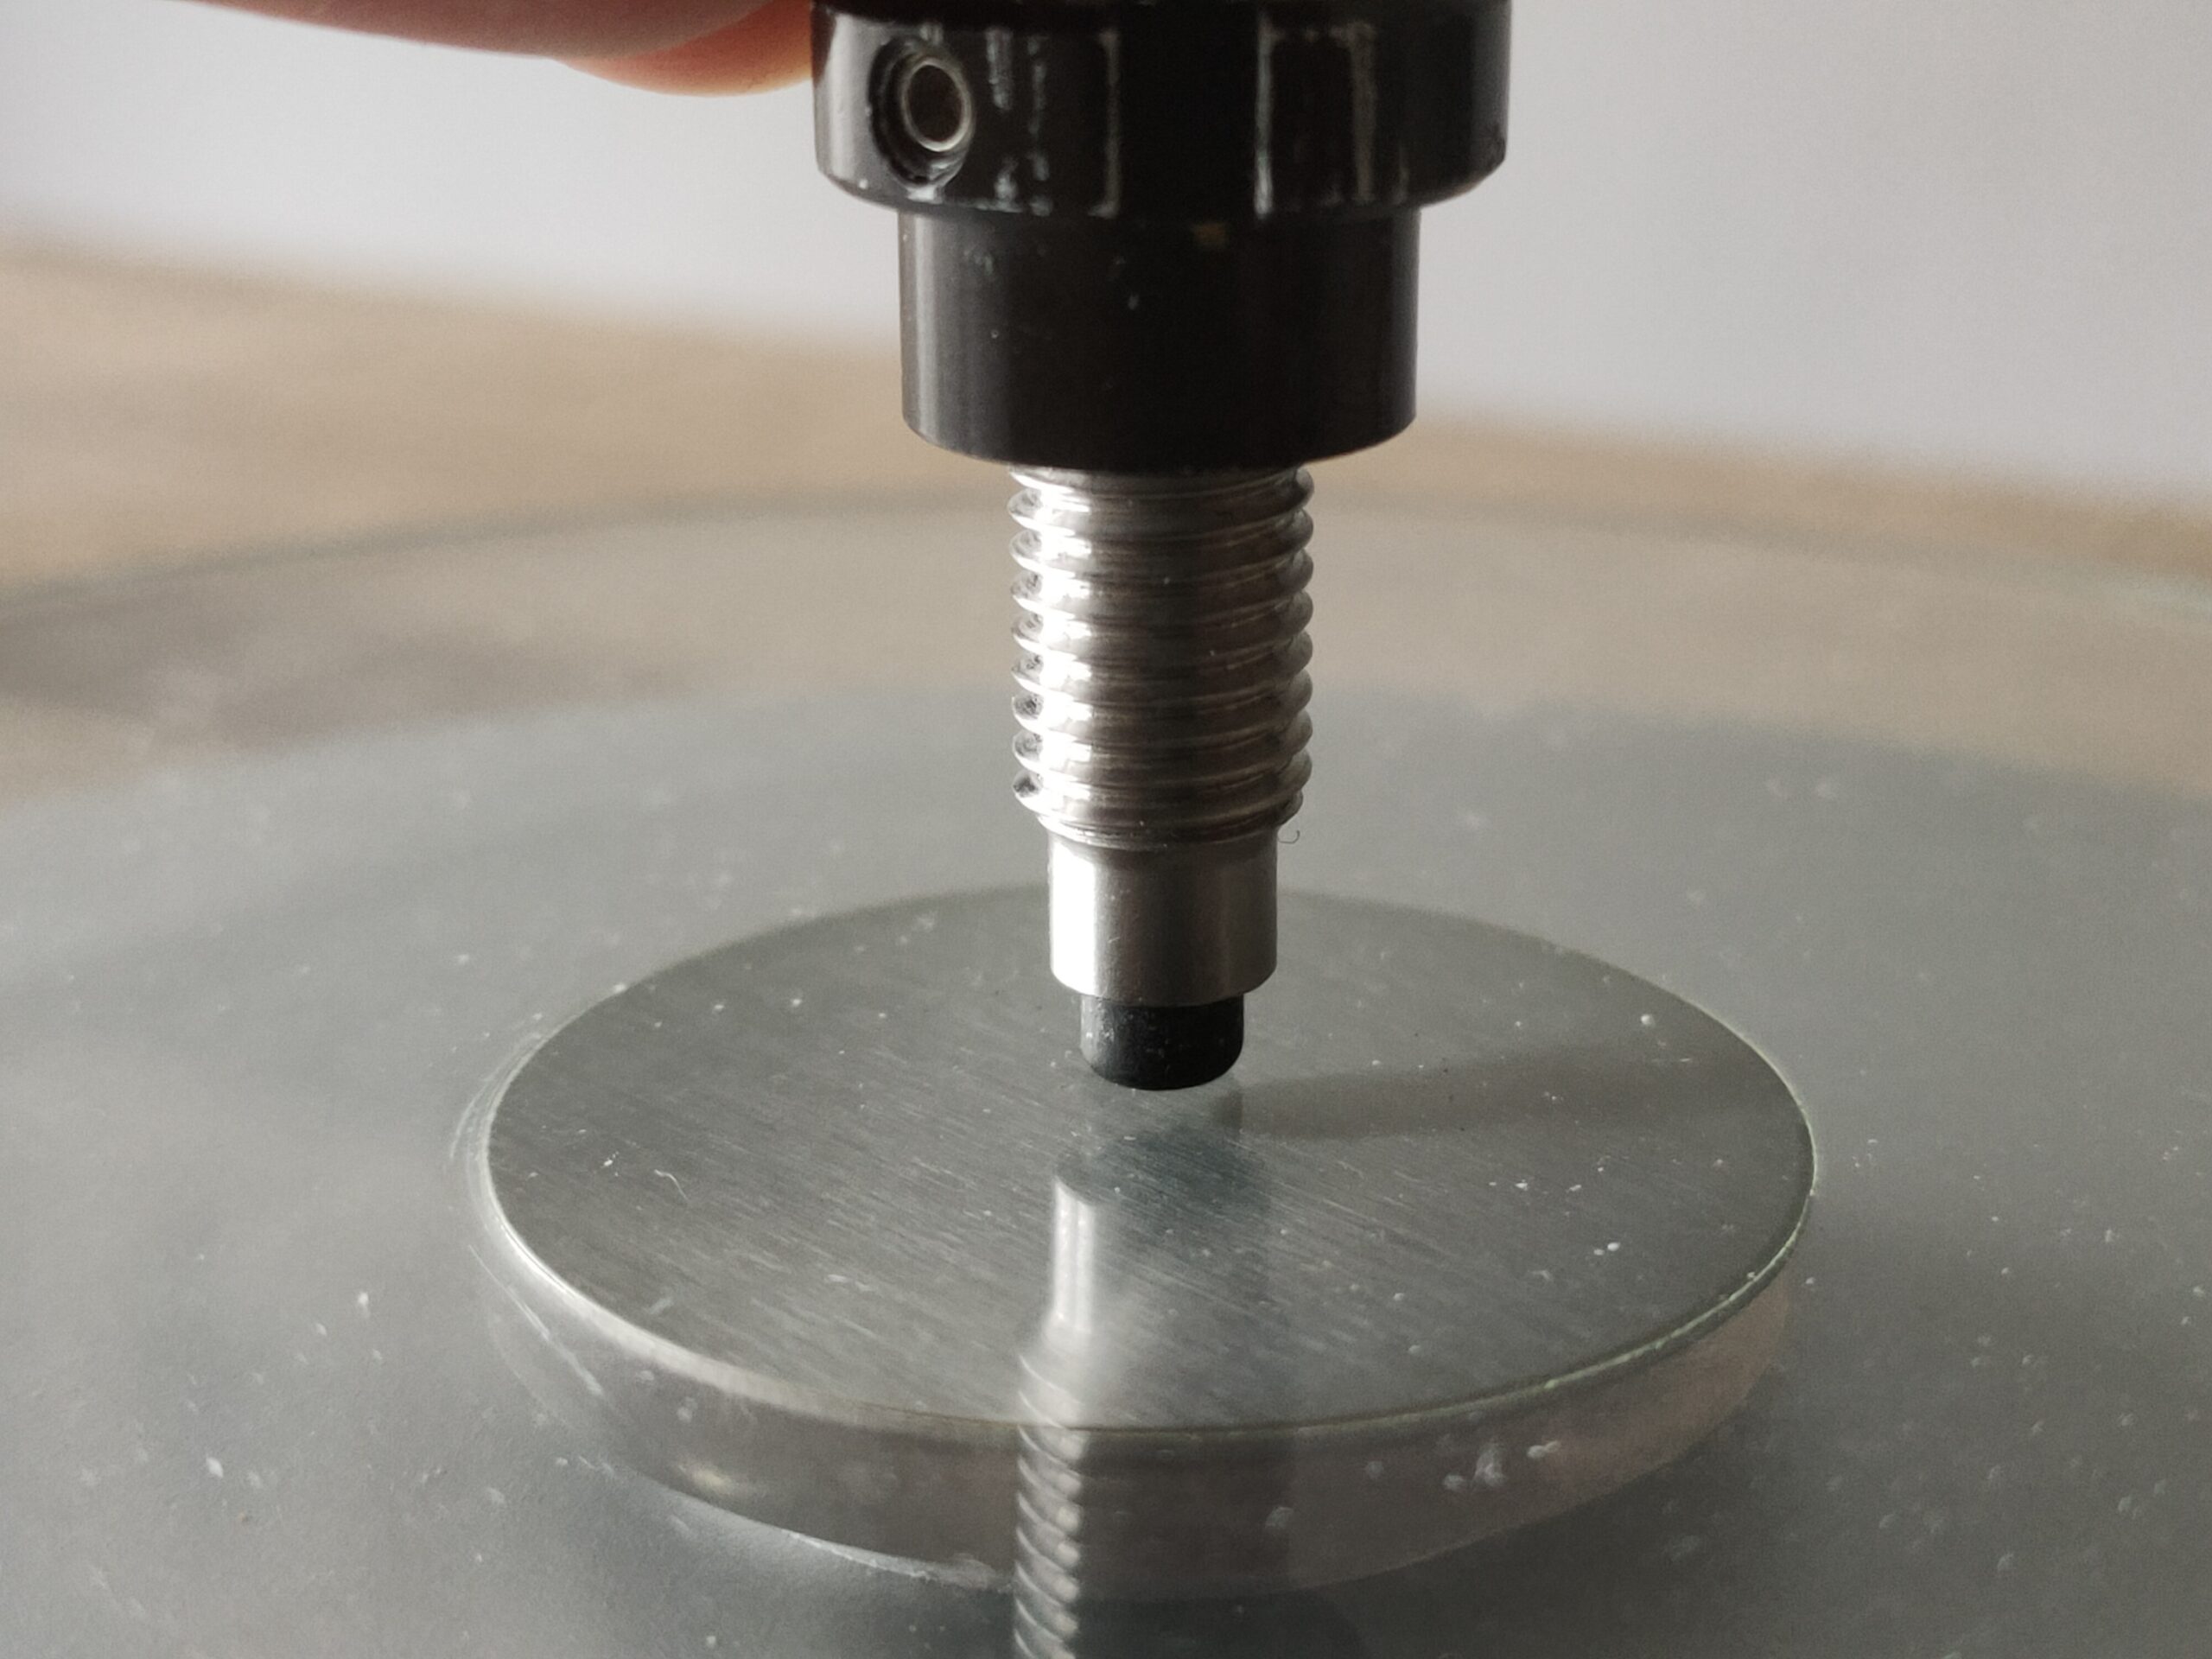
But luckily there is a way to test plunger stiffness across different plunger types. Use a scale and push the plunger down on the scale until the plunger head disappears halfway into the barrel. Now look at your scale and note down the mass, this is your plunger stiffness.
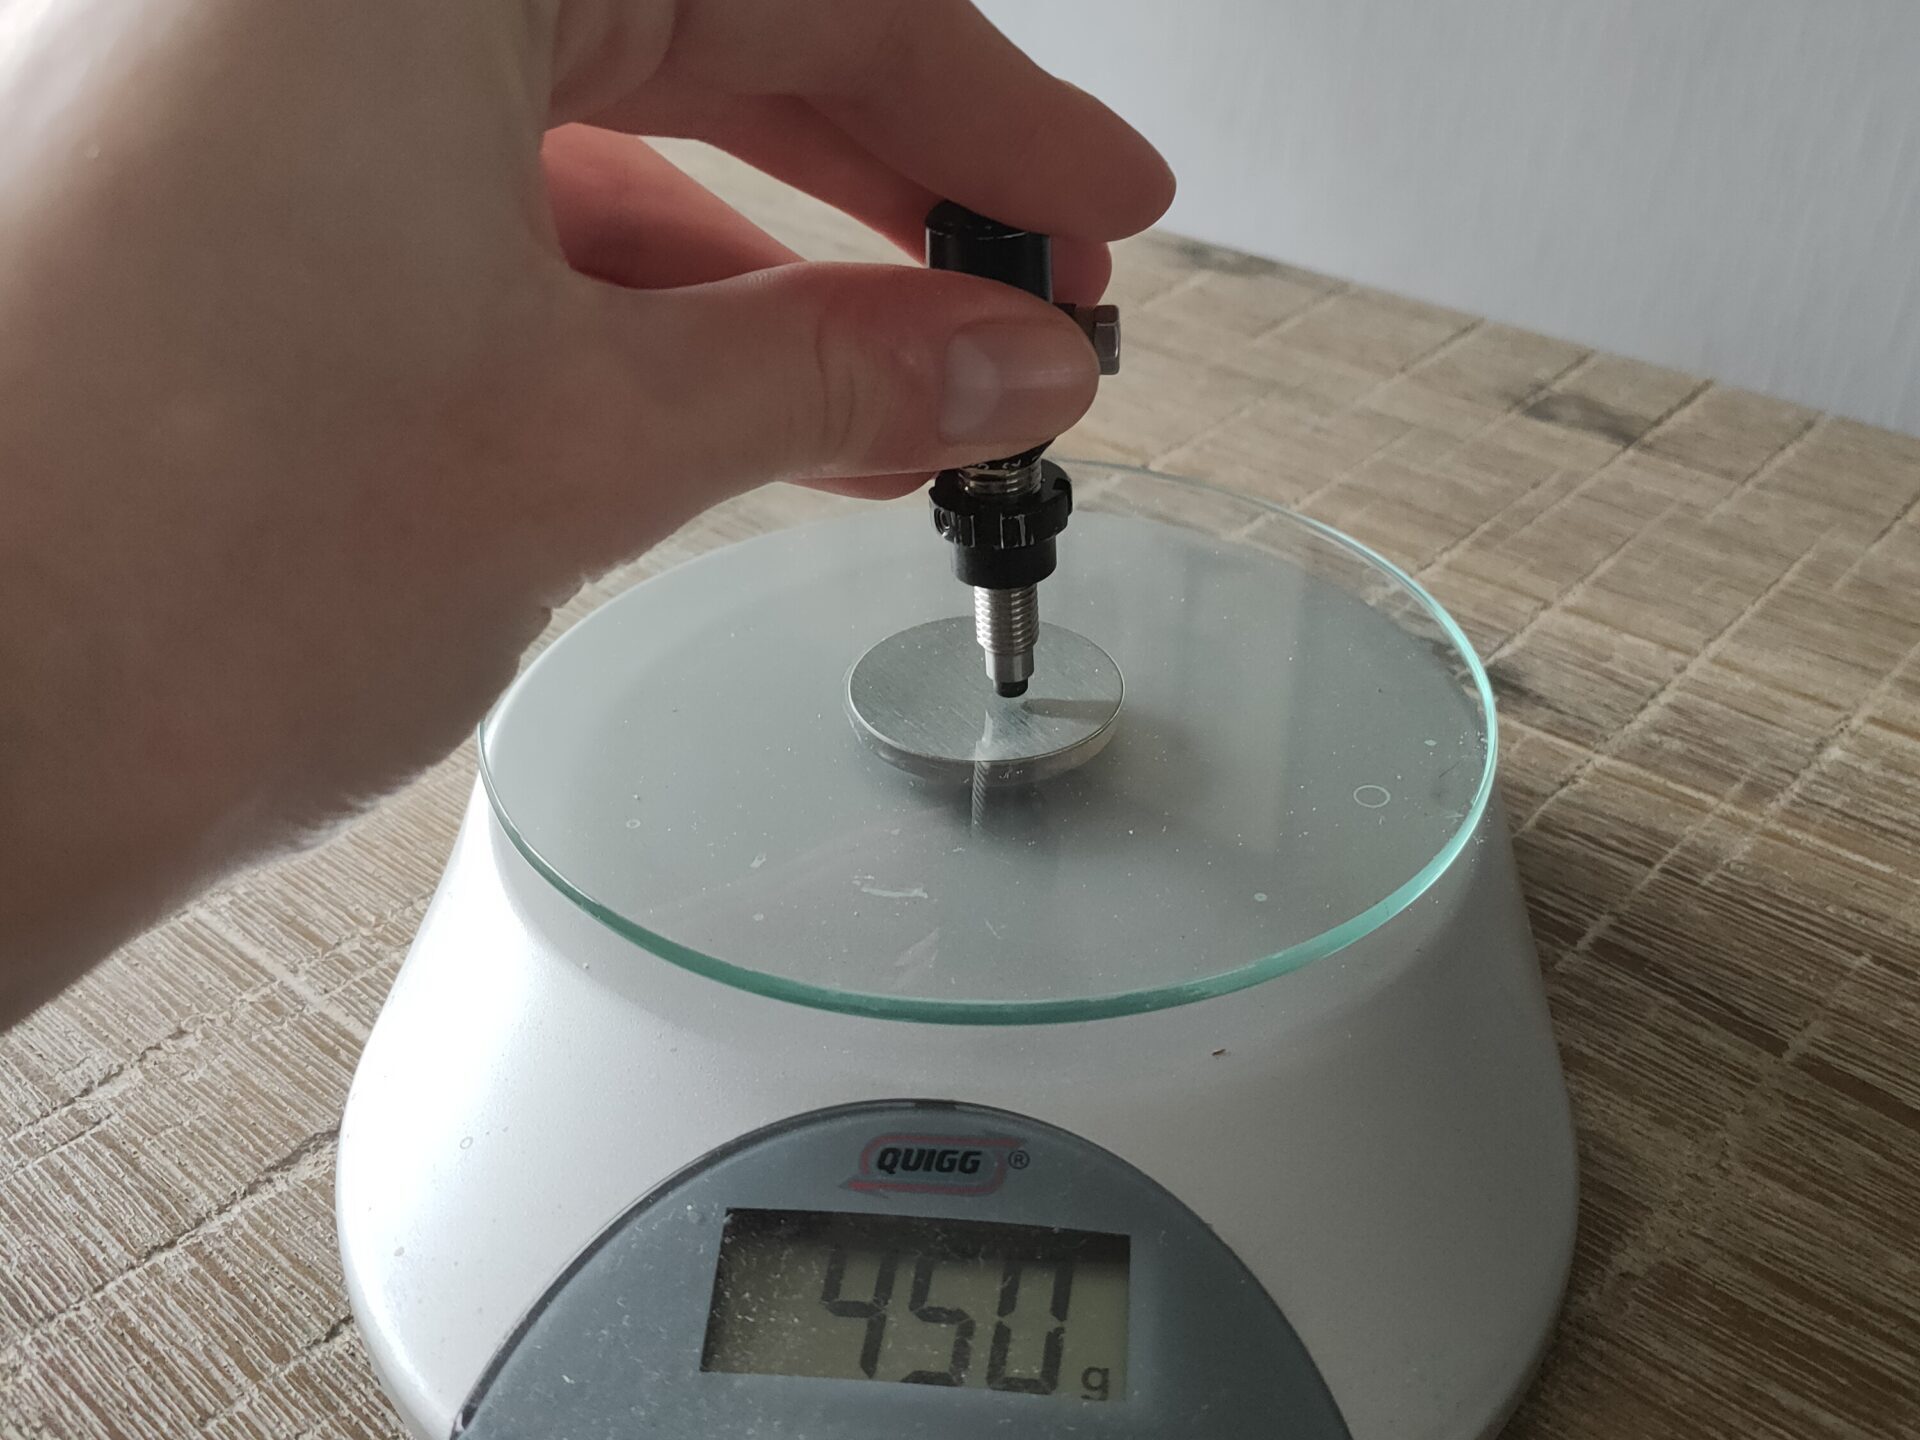
With these measurements, you can now compare your plunger to the recommended plunger stiffnesses listed in the chart below:
| Bow draw weight* | Grams | Ounces |
| 16-20 LBS | 200 | 7 |
| 20-30 LBS | 300 | 10 |
| 30-40 LBS | 350 | 12 |
| 40-50 LBS | 400 | 14 |
| 50 LBS+ | 500 | 18 |
*The draw weight listed here is the actual peak draw weight, so not necessarily the draw weight listed on the bow limbs. Read this article to learn more about actual draw weight and the default draw weight.
This table is just a starting point though, to properly tune your plunger stiffness, you should follow the guide later explained in the article.
How to configure your plunger
Plungers are available in two form-factors, one features a tension screw, while the other features a tension rod. I won’t discuss these differences in great detail, but if you want to learn more, read my in-depth article on plungers below:
How to choose the right plunger/button
Below, I will discuss how to configure the plunger for both form-factors.
Plunger position
To configure the plunger position you twist the metal ring (the locknut) either towards the plunger tip or the cap. The locknut is secured with a small hex nut which you have to loosen first. Some higher-end plungers have two hex nuts which both have to be loosened.
If the arrow needs to point more to the left you should twist the metal ring towards the plunger cap and vice versa. This is for right-handed archers, though; you should do it in reverse if you are left-handed. It might take a few tries, but eventually, you will see that it’s rather intuitive.
Plunger tension
Before we can change the plunger tension, we need to know what kind of plunger you have. You can see this by looking at the plunger cap, if you can rotate it, you have a plunger with a tension rod. If you cannot rotate the plunger cap, you have a plunger screw. Let me discuss how to change the plunger tension on both types of plungers.
Configuring plunger tension with a tension rod
Configuring the plunger tension with this type of plunger is very simple, which is one of the major benefits. You simply twist the plunger clockwise to increase the plunger tension and anti-clockwise to reduce the plunger tension.
You will feel some clicks that correspond to the numbers on the side of your plunger. This allows you to fine-tune the plunger without having to loosen screws. The ratcheting system will secure the plunger tension.
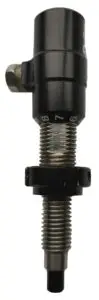
Configuring plunger tension with a tension screw
Most cheaper plungers will feature a tension screw. The tension screw is the screw that sticks out of the plunger head. You can rotate this tension screw with a small-sized hex key. Usually, this hex key will be provided with the plunger, when you buy it.
Before you can rotate the tension screw, you have to loosen a small screw on the side of the plunger head. Usually, you will have two screws, you will have to loosen the outermost screw. Just loosen this screw a few twists and you can start making adjustments.
Now use your hex key and turn the tension screw clockwise to increase the plunger tension and anti-clockwise to lower the tension. Once you have made your final adjustments, make sure to tighten the locking screw on the side of the plunger. This screw makes sure that your plunger tension doesn’t change!

Tuning your plunger from start to finish
As I mentioned earlier, the ideal plunger tension doesn’t only regard the bow, but also the archer. Different archers need slightly different plunger tension. I will discuss why in a bit more detail later in the article.
To tune your plunger, I recommend a method called bare shaft tuning. I have to say though there are quite some discussions regarding this method. And some archers and even professionals prefer other methods, but by far this is the most popular method. Also, this guide is made for right-handed archers; for left-handed archers, you should do everything in reverse.
Step 1: configure the plunger tension by using the recommended plunger tension values as recommended earlier. You don’t have to be very precise, but it saves time to get it roughly in the right position before you start the tuning process.
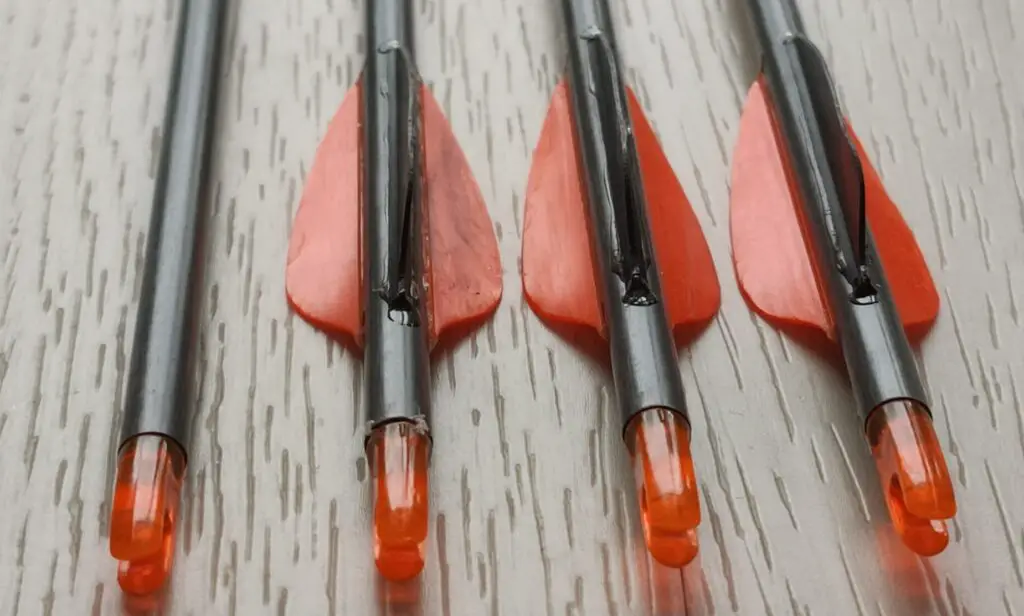
Step 2: Select 3 normal arrows and prepare 1 arrow that has no vanes. The arrow without vanes is what I call the ‘’bare arrow’’.
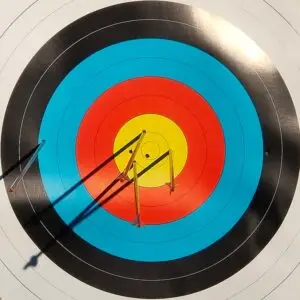
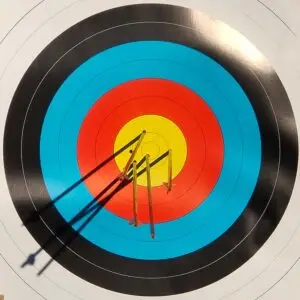
Step 3: Shoot the arrows at the target in random order. The three arrows with vanes should be in a tight grouping, otherwise, the tuning method will provide invalid results.
Step 4: Analyze where the bare arrow landed compared to the fletched arrows. Ideally, the fletched arrow should be in the group of fletched arrows. If the bare arrow is to the right of the group, you have to increase the plunger tension. If the bare arrow is to the left you have to decrease the plunger tension.
Step 5: Make small changes to the plunger tension according to the recommendations from step 3 and repeat from step 2. Continue this process until the bare arrow is within the grouping of the fletched arrows.
Some comments regarding bare shaft tuning
Although you might be excited to start with bare shaft tuning right away, it’s important to think whether this is the right time. If you are not already quite accurate, you cannot tune your bow with bare shaft tuning.
Tuning with bare shafts requires tight consistent groupings with the fletched arrows. The better you shoot, the better you can tune your bow. You simply cannot tune your bow better than your current skill level.
That’s why I don’t recommend beginners or even intermediate archers to work on bare shaft tuning. Time spent having headaches over the correct tuning is better spent working on your technique. So, make a fair assessment of whether you are ready for tuning!
The difference between a decently tuned bow and a perfectly tuned bow is very minor. Therefore, you will only notice the difference if you are a good shot to begin with, if you notice it at all.
If you have any issues with tuning, I recommend contacting a local professional to help you. Tuning is complicated and in some cases, you might have some other issues that prevent you from tuning correctly.
I am also willing to help of course. Feel free to leave a comment below this article and I will do my best to help you.
Solving common issues with plungers
Although the plunger is an essential piece of your archery kit, it can be quite frustrating at times. I have had my fair share of issues with my plunger, but luckily they are quite easy to solve with some tricks.
Make sure to read my article below, if you are experiencing any of the following problems:
- The spring tension of the plunger cannot get any lower
- The plunger keeps coming loose, by the vibration of the bow
- The locknut keeps getting loose
If you have an issue that I haven’t discussed, please let me know in the comment section down below. I would like to help you out and it can also help out fellow archers!
Why you should use a plunger
In all my tuning articles, I like to give some background on why we need certain gear and how it affects the arrow. This not only helps you to remember and understand the techniques, but it also helps you when you need to troubleshoot issues on your bow.
A quick look at arrow flex
Before we can understand why we need a plunger, we need to understand arrow flex. Whenever you shoot an arrow the arrow will flex. On a recurve bow, the arrow will flex horizontally (left to right) and on a compound bow, it will flex vertically (up or down)
This flex is caused by the acceleration of the arrow. All arrows have a relatively heavy point, which requires more energy to move. Therefore, the point of the arrow creates more resistance than the back of the arrow.
The heavier point has simply more power to resist movement. Since the back of the arrow doesn’t have that much power it continues to move forward. This causes the arrow to flex also known as ‘’archers paradox’’. You can see this happening in the video below:
The purpose of the plunger
It is very important that we regulate the amount of flex of the arrow. A too flexible arrow can cause the arrow to wobble a lot, while a too stiff arrow can cause clearance issues (the arrow hitting the riser). Both of these issues will cause inaccurate shots and a decrease in arrow speed.
This is also the reason, why we have arrow shafts in different stiffnesses available (also known as spine weight). If this is new to you, I highly recommend reading the article below, to learn more about spine weight and arrow stiffness:
Spine weight: how to find the right arrow shaft
Another method to change the amount of arrow flex is by configuring the plunger tension. When the arrow is shot, the arrow flexes against the plunger, which will absorb some of the arrow’s flex. This reduces the amount of arrow flex, which makes for a more stable and less wobbly arrow flight.
Why tuning your plunger is important
It is very important to tune your plunger. Your plunger shouldn’t be too stiff nor too squishy. If the plunger is too stiff, it will not absorb the wobble but simply push the arrow away from the bow. When the plunger is too squishy, the plunger will be pressed in completely and the arrow will hit the bow.
That’s why you generally need to increase the plunger tension on bows with a heavy draw weight. There is more force behind the arrow, which causes more powerful arrow flex.
Although it would be easy to have clear-cut rules to tune your plunger. Sadly it’s simply trial and error since also the archer influences the amount of arrow flex a bit. Therefore, a bow tune to you may not work well for other archers.
Learn more about tuning
In this article, we have discussed one part of the bow that can be tuned. But shooting well will still be challenging if your other bow parts are not correctly configured. Therefore, make sure to tune your entire bow by following the guide below:
Also, make sure to read my in-depth articles on tuning the individual bow parts:

Tim van Rooijen
For as long as I can remember, I have always been fascinated by archery. First due to its historic significance but later because I like being outdoors. With this blog, I share my knowledge about Archery and how you can improve your shot. More about author…
I very much needed this information. Thank you.
Fantastic write up and really interesting and informative, thank you very much
6 years shooting and I finally find an actual guide on plungers. thank you.
I can’t buy performance I am told but I still bought and love top level equipment
I have a Meta DX riser with MXT 10 medium limbs at about 31 pounds full dray with 750 Spine X10 and Superdrive micro arrows.
My problem is 2 things. the limbs change with temperature especially during indoor season. My bow is stored around 18 C and one day I may shoot at 6C outdoor then 20 C indoor. Over the course of a session my plunger performance changes as the bow warms or cools. I may start out a 5.5 then as the temperature changes the arrow spread out. depending on the ambient that might mean 1 click to 5.4 will tighten the group or 1 pick to 5.6 will improve the group. In hot days I may go to 5.8 to maintain group size. the usual thing is I shoot gold when the setting is good and then the arrows start spreading out left and right or circling the gold as opposed to the group moving left or right. This can often cause a disaster end and this weekend I was shooting a 1200 provincial championships. I shot a 17 in the 3rd round then a 16 in the 4th round with 25s my average end that is near 15 points and thankfully my 500 on the first day held up in my age group (70+) My second day was a 475 or off my goal. I recognize that some of this is fatigue but over each day the plunger played a role in my scores and that is very frustrating. Of note my centre shot is set with my arrow down the centre of the string rather than slightly left when I shoot parallel shafts. Few if any of my competitors ever move their plungers and are seemingly more consistent. When I started out I managed a 267 score but the next year and nearly every year since my best scores are 250 to 255