Modern bows are highly adjustable, which allows you to tune your bow to your arrow and overall setup. This gives you a lot of flexibility, but it can be rather overwhelming when you are just getting started. One step of tuning is to set the tiller, also often called ‘’tillering the bow’’.
To understand how to tiller your bow, you need to understand what tiller height is and how the tiller works. Therefore, I will explain in detail everything there is to know about tillering.
What tiller height is
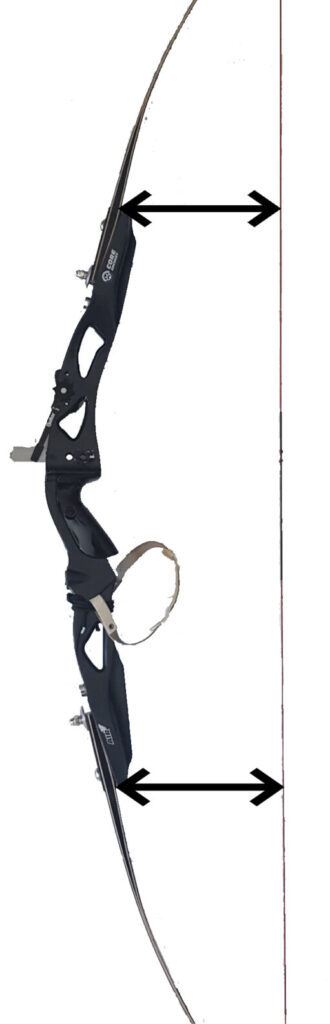
Tiller height is the horizontal distance between the string and the limb closest to the limb fitting. By comparing the tiller height of the upper and lower limb, you can compare the amount of pre-tension of both limbs.
Comparing tiller heights
Looking only at the upper or lower tiller height doesn’t say much. It’s all about comparing the two measurements. In most cases, we want the lower tiller height to be lower than the upper tiller height. This means that the lower limb is under more tension than the upper limb. I discuss why we do this later in the article.
To make this comparison, we use the following formula:
‘’tiller upper limb – tiller lower limb = tiller setting’’
This formula will give you the following result:
- Positive tiller: the tiller of the upper limb is higher than the lower limb.
- Neutral tiller/no tiller: there is no difference between the upper and the lower limb.
- Negative tiller: the tiller of the upper limb is lower than the lower limb.
Most archers shoot with a positive tiller, but some prefer a neutral tiller. In general, shooting with a negative tiller is not recommended.
How to measure tiller height
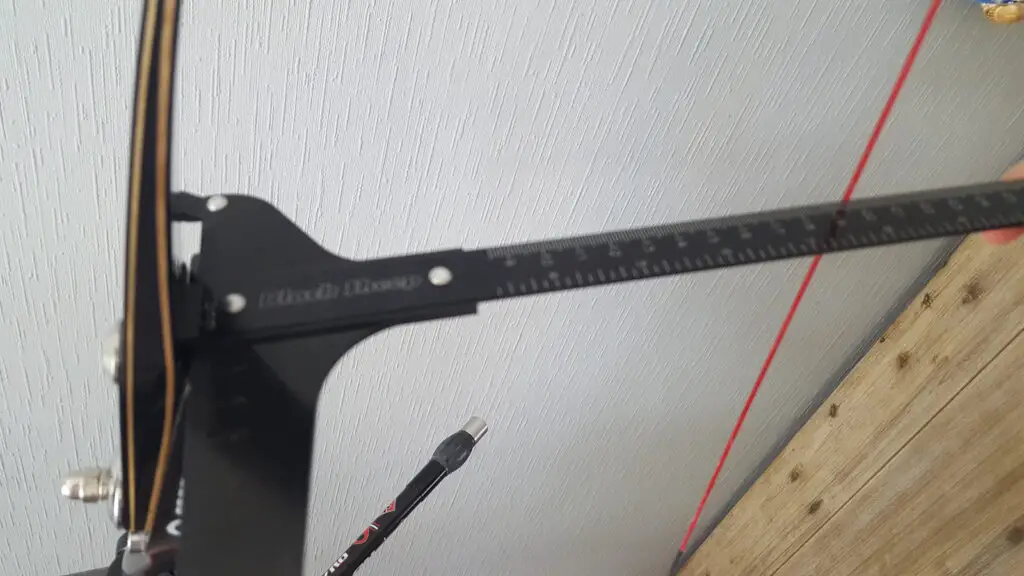
An easy way to measure the tiller height is to use a bow square. If you don’t have a bow square yet, I highly recommend buying one because you also need it when you are tuning your nocking points and it also makes it easier to measure your brace height. I have bought this bow square from Easton and overall I am very happy with the durability.
To measure your tiller height with a bow square, you place the top of the T-shape on the limb near the riser. While holding the bow square in a straight line, you read off the measurement in the center of the string.
How to configure the tiller
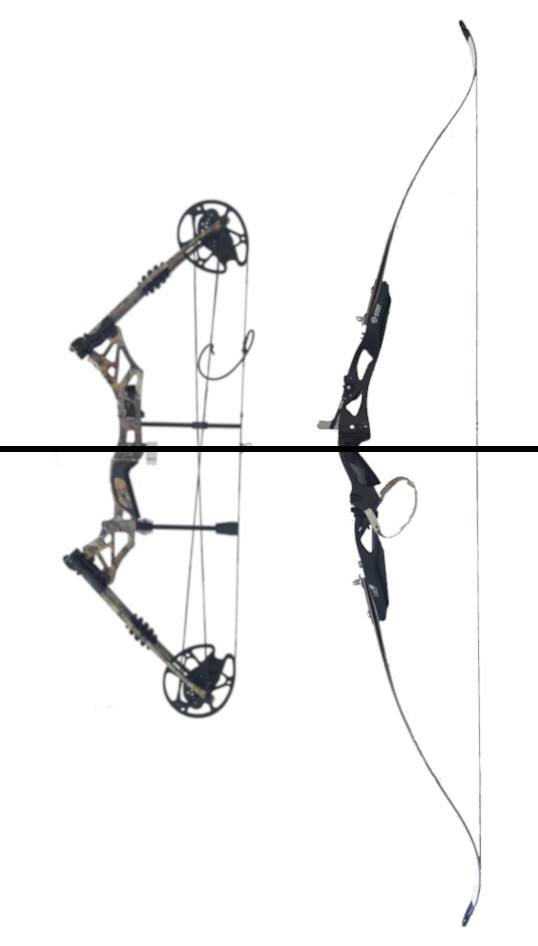
Now you know how to measure the tiller, it’s time to configure the tiller. Both recurve bows and compound bows have a tunable tiller. But especially on recurve bows, it tends to be quite complicated. Therefore, I will discuss that one first!
Recurve archery
To configure the tiller on a recurve bow, you must follow these steps:
1. Measure the current tiller height: before you start adjusting the tiller, you should measure the tiller height of both the upper and lower limb. Now subtract the tiller height of the lower limb from the upper limb.
2. Lookup the ideal tiller height: most manufacturers have a recommended tiller height for their bows. Therefore, consult the owner’s manual to find the ideal tiller height. If you can’t find a recommended tiller height, you can use 5/32 inches (4 mm) which is generally accepted as a decent tiller height. Later in this article, I will discuss this measurement in more detail.
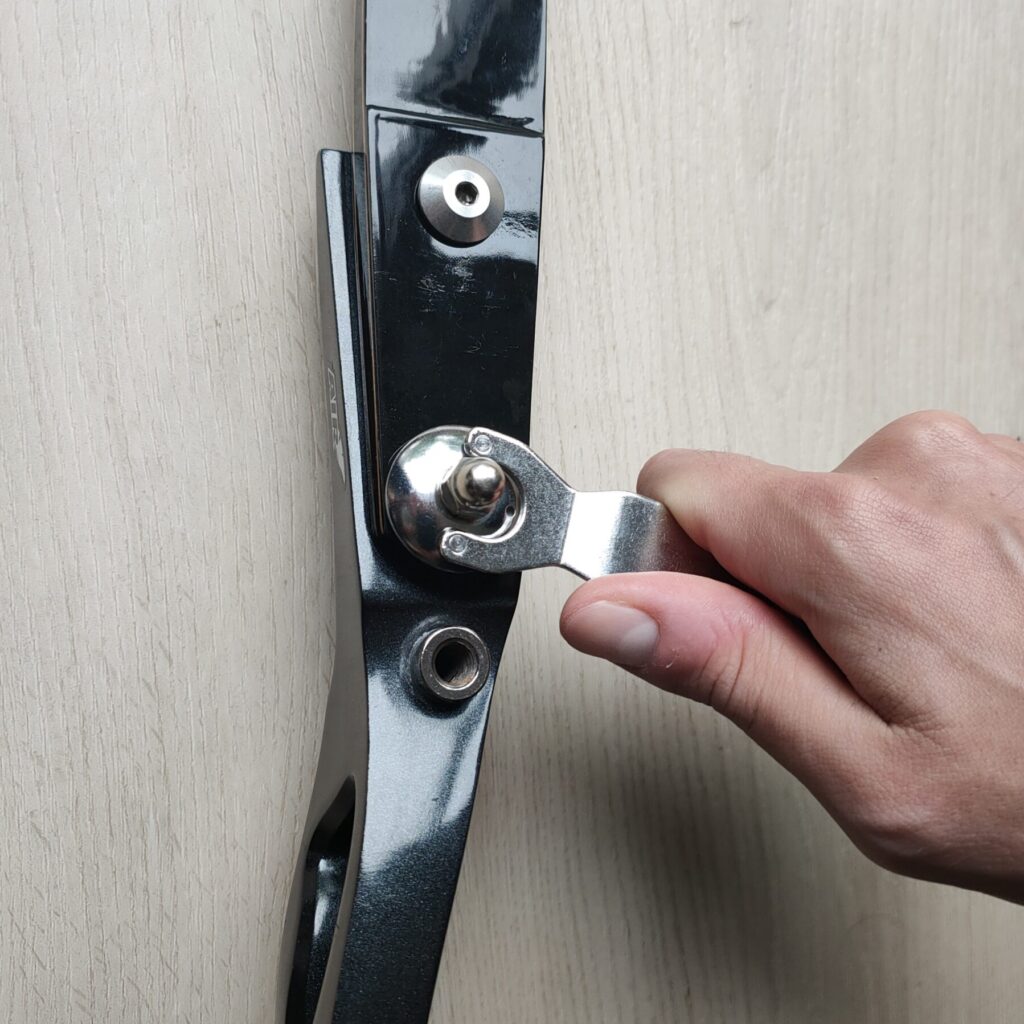
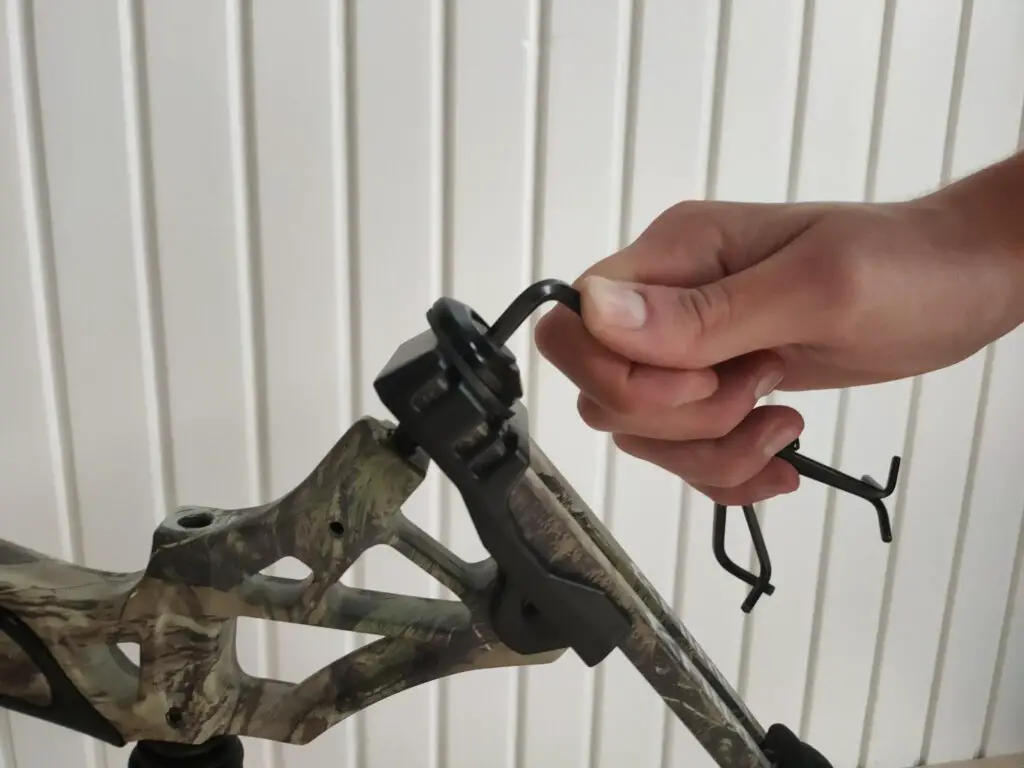
3. Unscrew the locking bolt in the back of the riser: most recurve bows have a bolt that locks the tiller in place. Otherwise, the tiller could change every time you store your bow. In most cases, you loosen this bolt with a 5/32 (4 mm) hex wrench.
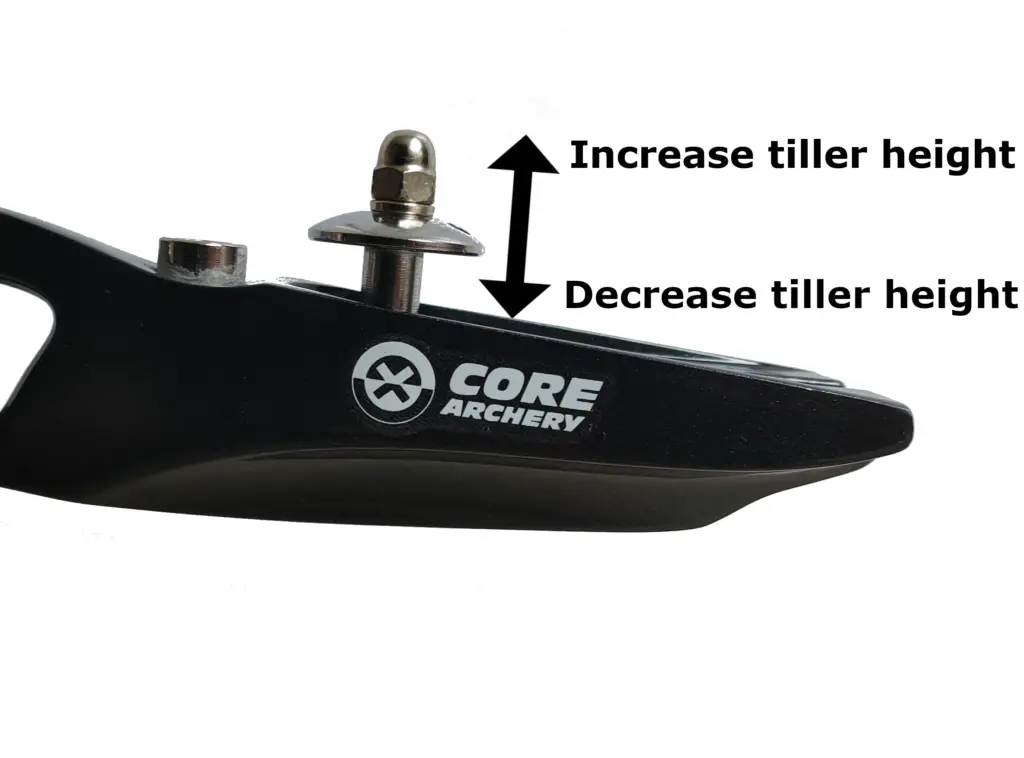
4. Adjust the tiller with a hex or your proprietary key: on most bows, you adjust the tiller with a hex screw integrated into the tiller head. Turn the head clockwise to decrease the tiller height and turn the head anti-clockwise to increase the tiller height. One turn increases or decreases the tiller height by about 3/64 of an inch (1 mm). But the actual amount differs per bow
5. Tighten the locking bolts once both tillers are configured correctly: in most cases, you can get to the recommended tiller setting by adjusting only one tiller. But sometimes you must adjust both tillers in the opposite direction. This might take a few tries.
Additional tips:
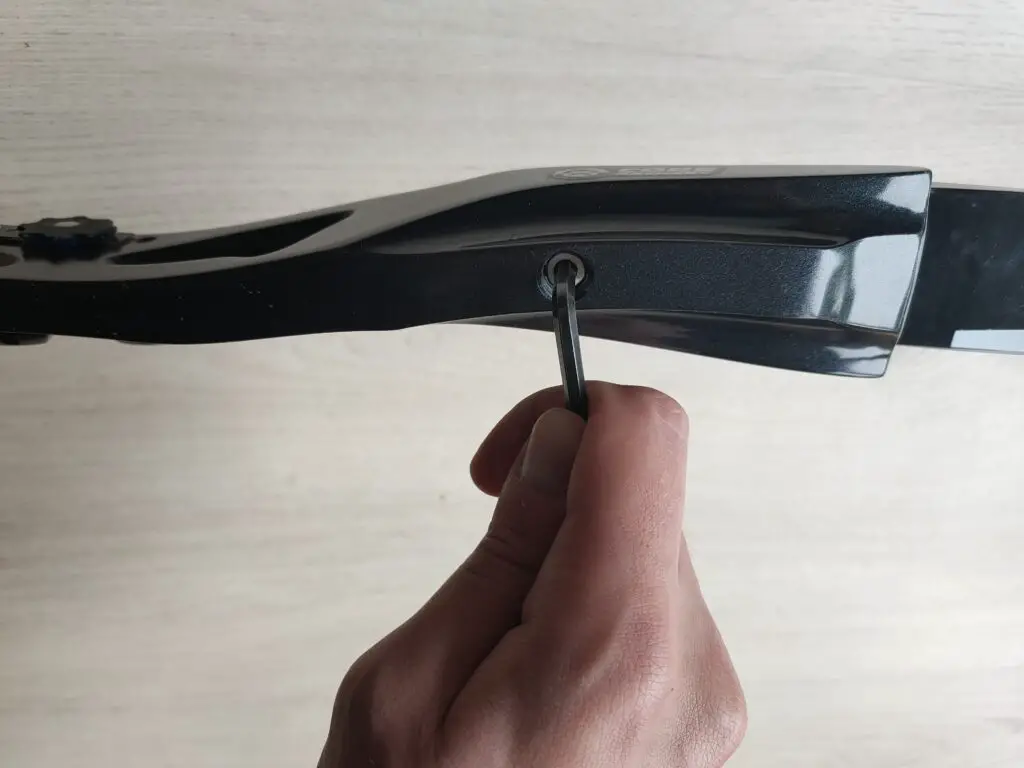
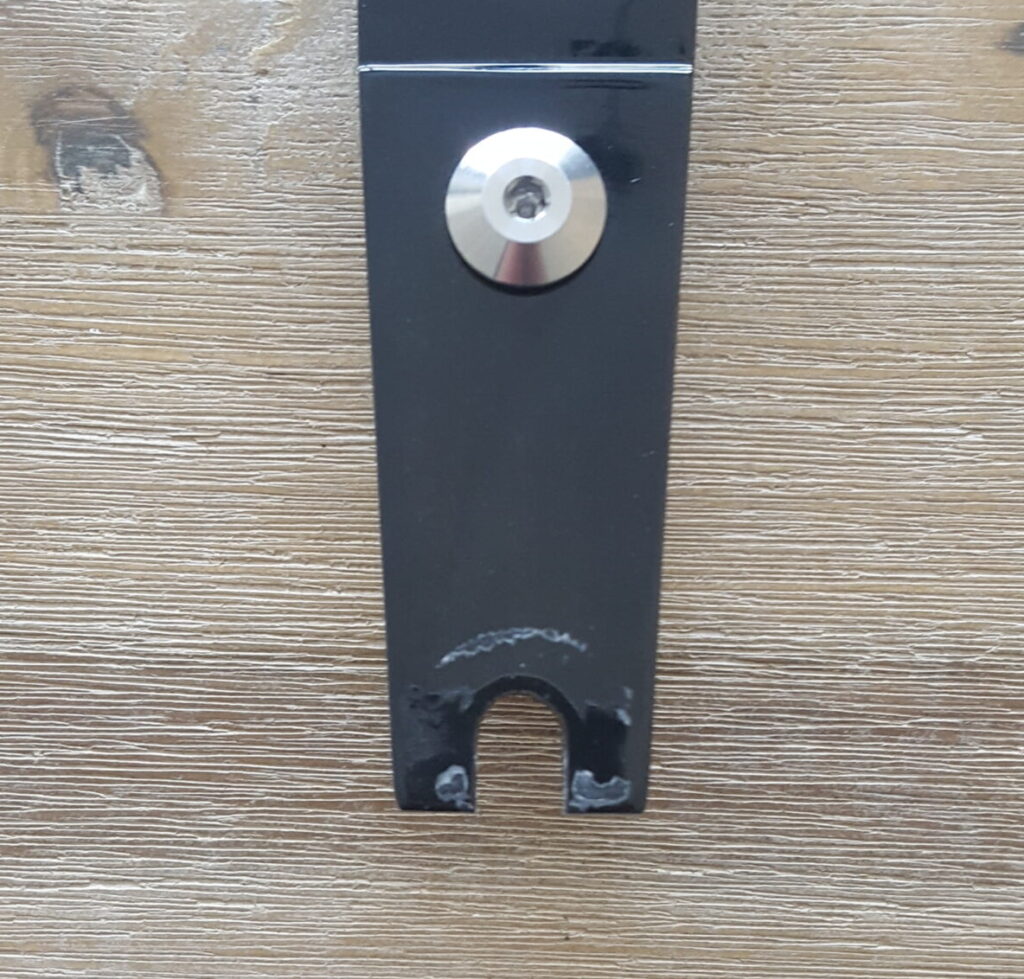
- Remove the tension from the limbs while changing the tiller: I always recommend changing the tiller when the bow is unstrung, for two reasons. The first reason is that the rotating tiller head can severely scratch the limbs (see picture). On most bows, the tiller assembly can also be removed from the riser. If you accidentally do this while adjusting the tiller, you can get injured or damage your bow.
- Once you have configured the tiller, make sure to write both tiller heights down: since the bow vibrates a lot during your shots, the limb bolt might come loose every now and then. If you have both tiller heights written down, you can use it to restore it to your old settings.
- Check whether your limb alignment has changed: bows with a proprietary key have an eccentric axle which also configures the limb alignment. That’s why there is often a marker on the limb head which helps you check your limb alignment. If you change the tiller, you will therefore also change your limb alignment. For more information and a demonstration, check this article. On these risers, I recommend first tuning the tiller height and then tune the limb alignment.
Compound archery
To change the tiller height on a compound bow, turn the hex screw on the front of the tiller head. Turn clockwise to decrease the tiller height and anti-clockwise to increase the tiller height.
Compound bows should be set up with a neutral tiller. This means that the tiller on both sides should be the same. The tiller on a compound bow should only be set once and checked only when you are configuring your draw weight.
Make sure not to fully untwist one of the tillers if there is still tension on the bow. This can cause the bow to snap loose which can hurt you and it can damage the bow. So be very careful while lowering the draw weight, and make sure to only do 2 twists per side at a time!
Recommended tiller
As mentioned earlier, a good starting point for recurve bows is to set the tiller at 5/32 (4 mm). Whether you lower or increase the tiller depends on your preference. I discuss how to do this in the next section.
I recommend staying within 0 and 15/32 inches (12 mm). Having a high positive tiller or a negative tiller is not ideal in most cases. Therefore, only go beyond these recommendations if you have experience and understanding of the dynamics of the tiller.
Finetuning the tiller
One of the great things about adjustable tillers is that you can tune them to your liking. In this section, I discuss two methods on how to tune the tiller and some reasons why you might want to skip this step for now.
Method 1: sight pin method
The sight pin method is often used by coaches because you can easily tune the tiller and observe its effects. But these days, most archers think that the second method is more ideal. The sight pin method works as follows:
- Point the sight pin in the center of the target and draw your bow (without an arrow).
- Make sure to keep your arm relaxed while drawing the bow.
- Look at your sight pin and check whether it’s starting to drift upwards, downwards, or if it stays in place.
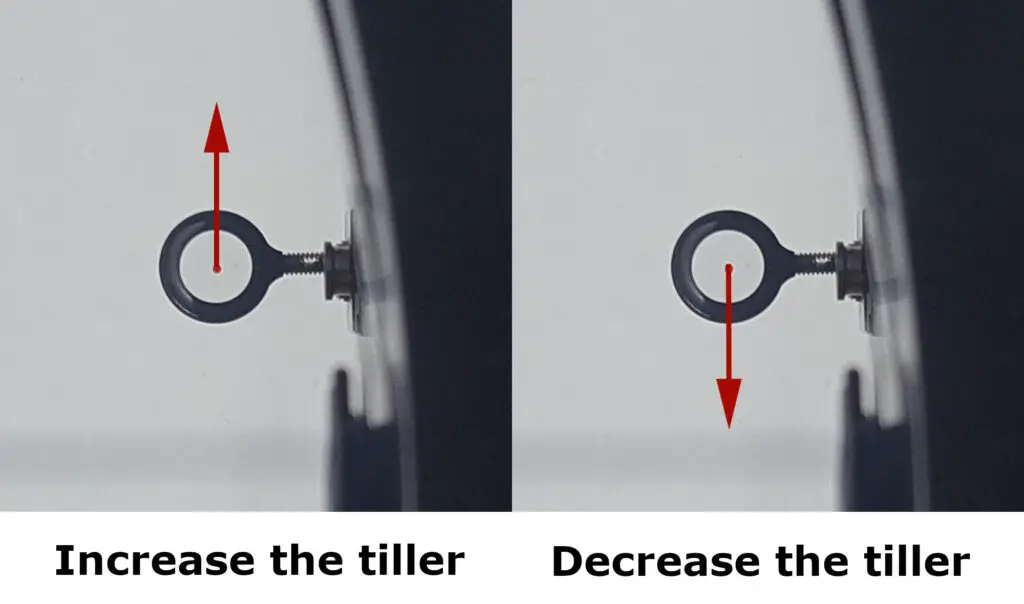
- If the sight pin rises you should increase the overall tiller. If the sight pin moves down, you should reduce the overall tiller.
- Continue changing the tiller till your sight pin stays in the center during the draw.
This is an easy method to use while finetuning the tiller, but it’s not perfect. Therefore, most archers use the second more modern method. Additionally, if you must change the tiller beyond the recommended boundaries from 0 to 15/32 inches (12 mm), you probably should tune the nocking points instead.
Method 2: Finger pressure method
With this method, you analyze the finger pressure. Draw your bow to your anchor point and feel how much pressure is exerted on each finger. Is your index finger doing all the work or does it start to slip?
For example, if your middle finger starts to slip, you might want to increase the lower tiller. This reduces the force on this finger and makes it easier to hold. This is all very personal and it’s best to experiment with this to find your ideal tiller configuration.
In the video below, Jake Kaminski explains in more detail how he configures the tiller with this method:
Why you might want to skip this step
If you are looking for tuning guides you might start to fall into a rabbit hole. When I first started tuning it definitely felt this way. There are so many ways to finetune the bow and the overall effect on the archer is often overstated.
For most archers, finetuning the tiller isn’t worth it. Just set the till to the recommended value and forget about it. In archery the maxim ‘’if it ain’t broke don’t fix it’’ definitely holds true. Why would you finetune your bow if the arrows are flying straight?
Therefore, I only recommend finetuning the tiller if you are experiencing issues or if you are interested in testing different settings. I believe most archers would prefer to spend that time on the range instead.
Why you must configure the tiller
Tuning the tiller of your bow is important because this helps to equalize the amount of force above and below the arrow. If the amount of force is not equal arrow will fly less straight, which causes inaccuracies in your shot.
On recurve bows, it’s recommended to shoot with a positive tiller because the grip is in the center of the bow. Since the arrow is shot above the grip, the arrow is closer to the upper limb than the lower limb. Therefore, without configuring the tiller, the upper limb would exert more power on the arrow, which causes a disbalance.
Therefore, we reduce the tiller of the lower limb. This essentially increases the amount of tension of the lower limb which compensates for this difference.
On a compound bow, we shoot with a neutral tiller, which means that the upper and lower tiller is the same. On compound bows, the arrow is shot from the center of the bow, and the arrow is placed below it. Therefore, tiller tuning is extremely easy on compound bows.
Recurve bow: grip is in the center
Why you should occasionally check your tiller
Since the tiller height influences the arrows’ flight pattern, it’s a best practice to check it occasionally. You don’t have to check it as frequently as brace height, but I would check it at least every 3 months.
The tiller height shouldn’t change much, but sometimes the locking screws might come loose. Therefore, always make sure that your tiller heads are fixed before you assemble your bow.
Stretching of the string can also change your tiller height. Therefore, when you adjust the brace height of your bow, you might also want to check whether your tiller height is still within acceptable margins.
If you want to learn more about tiller height, make sure to read the article below:
Brace height – what it is and how to adjust it
Learn more about tuning
In this article, we have discussed one part of the bow that can be tuned. But shooting well will still be challenging if your other bow parts are not correctly configured. Therefore, make sure to tune your entire bow by following the guide below:
Also, make sure to read my in-depth articles on tuning the individual bow parts:
Final words
In most cases, brace height is a set-and-forget aspect of bow tuning. If you, do it right once, you shouldn’t have to change it, with some rare exceptions. I hope this article helped you to configure and understand how tiller height works.
If you have any questions, comments, or tips you would like to share. Please leave them down below. I will respond to any questions as soon as possible and I will send you an email once I replied.

Tim van Rooijen
For as long as I can remember, I have always been fascinated by archery. First due to its historic significance but later because I like being outdoors. With this blog, I share my knowledge about Archery and how you can improve your shot. More about author…
how to adjust dynamic tillering with using a bracer or i need to know more about the dynamic tillering process