Having and maintaining the right anchor point is one of the most important things in archery. If you don’t have a consistent anchor point, getting really accurate will be near impossible. Therefore I believe every starting archer should focus their first weeks of shooting mainly on improving their anchoring.
Being consistent with your anchor point can however be quite difficult. Even the smallest of differences in your anchor point can make huge differences on the target. Since anchoring is such an important topic in archery I will discuss the process in more detail. In this article, I will discuss: what an anchor point is, how to find it, and how to keep it consistent.
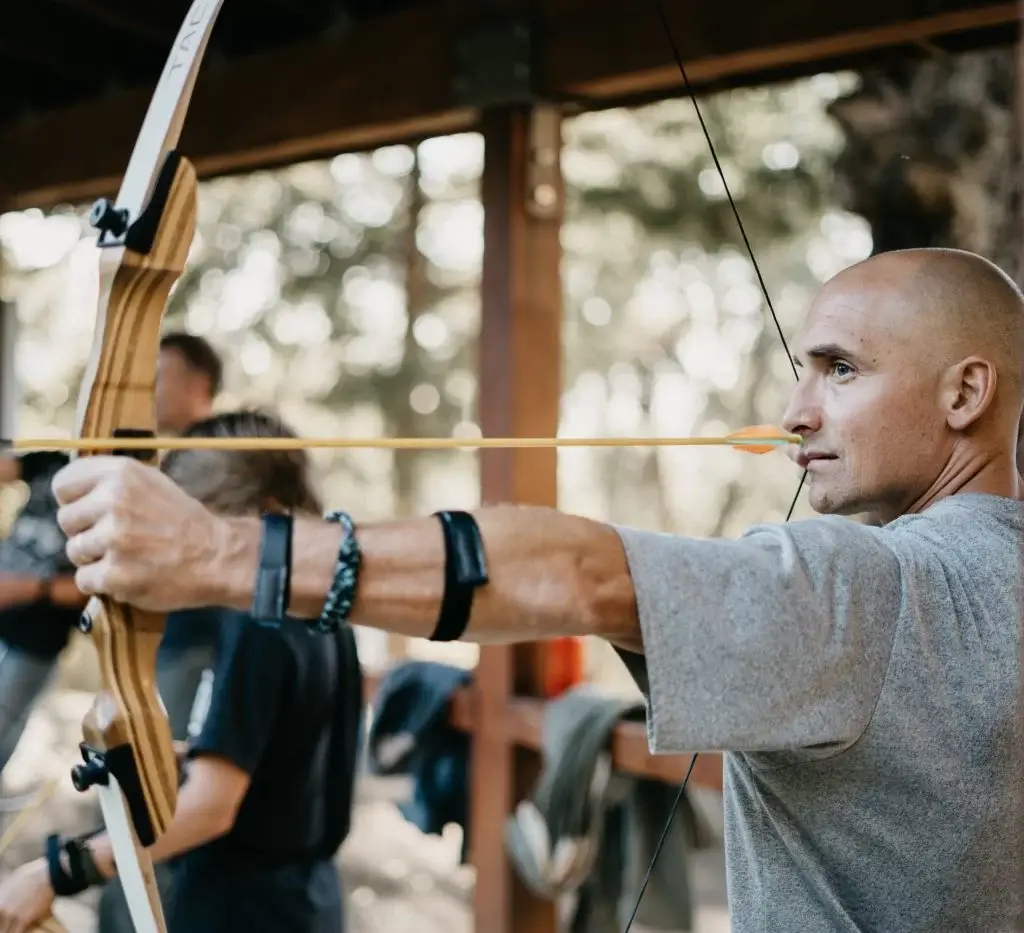
The anchor point is the point where you keep your hand when at full draw. This point is used as a reference for consistent shooting. Having a clear anchor point can greatly increase your accuracy. It’s often a good idea to have multiple anchor points because this makes it easier to spot when you are inconsistent.
Before we start
Although I try to make this guide as complete as possible, it’s not possible to cover all minute aspects. Therefore, this guide aims to give you the basics. If you are serious about archery, I would highly recommend taking an archery course or hiring an archery coach.
I understand that hands-on coaching is not always available for everyone. Luckily there is a great (in my opinion even better) alternative – following an online course from the Online Archery Academy. With video examples and detailed explanations, these courses are a great way to improve your archery. I can personally vouch for them, as I have also taken the courses.
Readers from this blog will get a discount of 20% if you use the discount code IYA at checkout. If you don’t think the courses help you improve your archery, you can always use the 100-day money-back guarantee.
What is an anchor point?
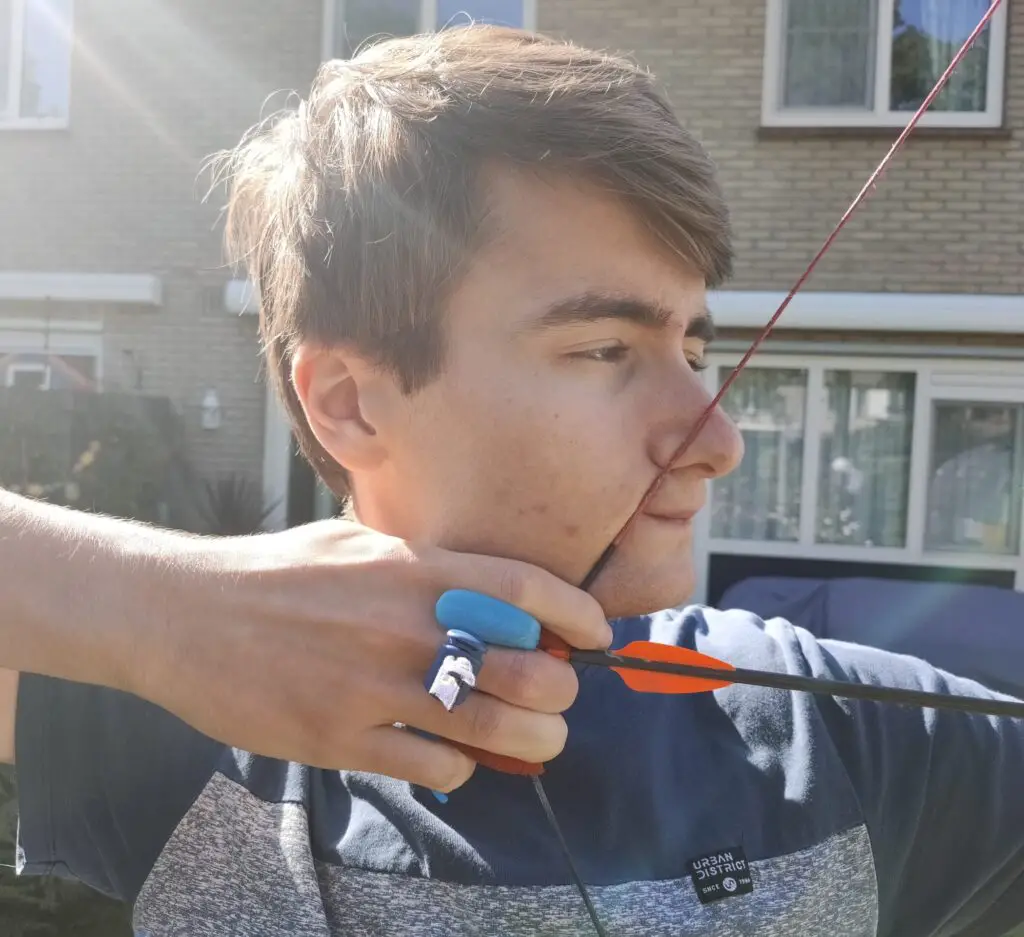
The anchor point is the point where you keep your draw hand (the hand that holds the string), when you fire the bow. At this point, your bow is at full draw. When your draw hand is correctly placed at your anchor point, you can start aiming.
Your anchor point should be located somewhere on your face, some common anchor points are:
- On the cheekbone
- Under the jaw
- At the corner of your mouth
Your anchor point should be consistent and allow you to aim. For traditional shooting styles, you often aim by looking along the arrow. With Olympic recurve archery you look through the string. And with compound archery, you look through the peep sight. Therefore the anchor point should bring the string right in front of your eyes.
Many starting archers don’t have a consistent anchor point. I can’t stretch it enough, your main priority should be to focus on that first. When you have a consistent anchor point, you will see dramatic increases in your scores.
Multiple anchor points
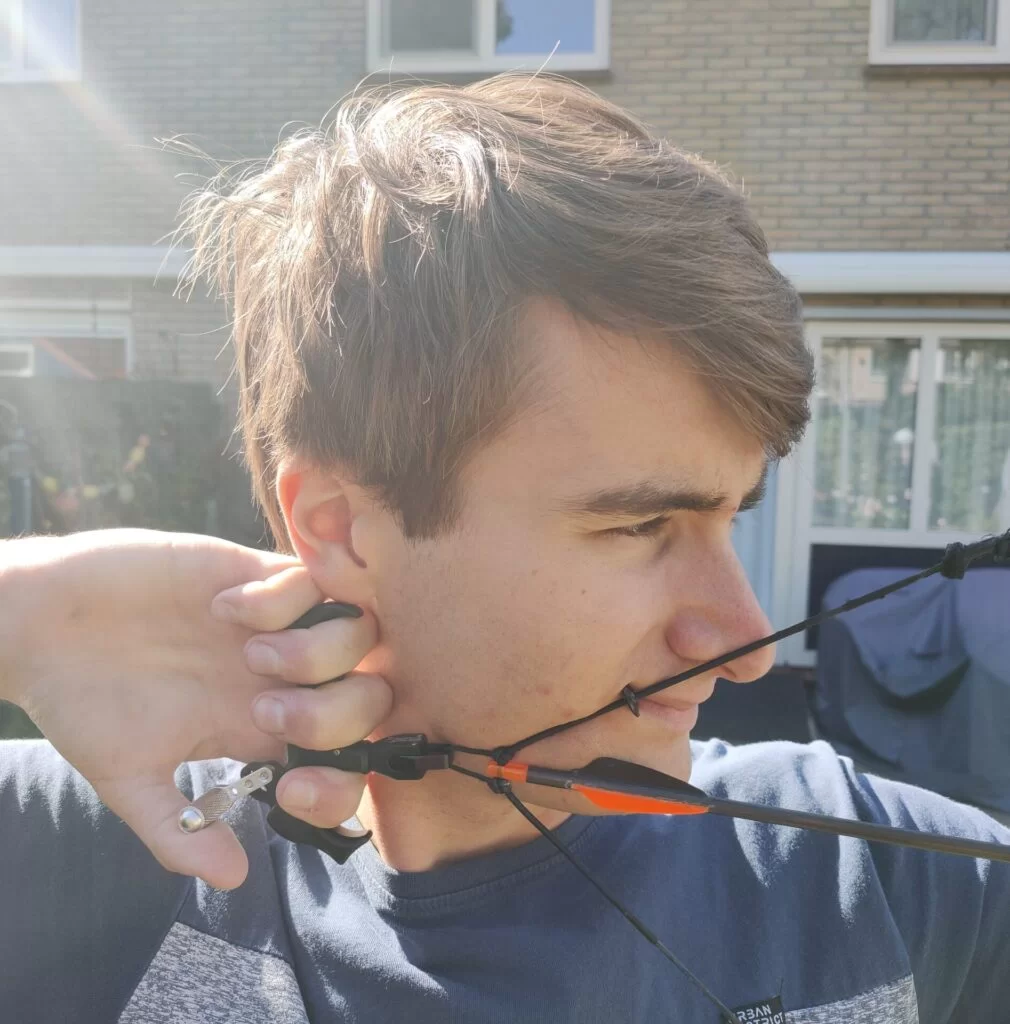
Since having a consistent anchor point is vital in archery, it is good to have a second and maybe even a third anchor point. Having multiple anchor points make sure that you have your head in the exact same orientation and it provides you with an additional reference. Where you put your hand on your face is your primary anchor point, but you can have additional anchor points with the string.
An often-used secondary anchor point is the point of your nose. If you are at full draw your string is already very close to your nose. If you turn your head a little bit towards the string you will be able to touch it with your nose. This technique is very common in Olympic recurve archery.
Another often used secondary anchor point is the chin. Just like the point of your nose, the string will get very close to your chin already. If you can remember this point you can use this as a secondary reference to check if you are consistent
The last secondary anchor point is the corner of the mouth. The corner of the mouth is often used in traditional archery as a primary anchor point. But compound archers often use a kisser which they place in the corner of their mouth as a secondary anchor point. According to World Archery rules, you are even allowed to use a kisser in the recurve class (22.1.2.1).
With anchor points, my philosophy is: ‘’more is better’’. If you, for example, can’t notice that you are inconsistent with your primary anchor point, you will probably notice it with one of your other anchor points. Just make sure that you are not affecting the string upon release.
How to find an anchor point?
For the different shooting styles, there are different anchor points that are commonly used. I will briefly discuss these in more detail. Just remember that they all rely on the same concept. You use the anchor point as a reference for consistent stance and draw.
Traditional
Within traditional archery, you have many different shooting styles. Some archers aim over the arrow and will therefore want the arrow as close to the eye as possible. Some other archers look along the side of the arrow and therefore want the arrow at exactly the same height as the eye. Some traditional archers don’t use the arrow at all to aim, this is called instinctive shooting. Therefore depending on your shooting style, you might have some limitations on where you anchor. Common anchor points for traditional archery are:
- The corner of your mouth: with this anchor point you use the index finger and place it in the corner of your mouth, while you draw. This may feel strange at first, but after a while, you will get used to the feeling. This is the most common anchor point in traditional archery because it’s so easy to feel.
- Anchoring on the cheekbone: this is an anchor point that I personally like when I am shooting instinctive. I like to draw my bow a little bit further and therefore I prefer the cheekbone.
The best way to find an anchor point is to try a few out. Don’t be impatient when experimenting, take your time to find an anchor point that works for you. If you stick with an anchor point that doesn’t work for you, archery will get a lot harder, so don’t be afraid to experiment.
Recurve
Recurve archers always anchor under the chin or jaw. This position is better suited for recurve archers because they use a tab that can make anchoring on your face pain full. You also get more vision because your hand is out of your field of few, and it tends to be a more stable anchor point. I like to use a tab with a thumb rest and use my jawbone to anchor. But you should experiment with different positions and find a place that you can consistently find.
I believe that having a secondary anchor point in recurve archery is really important. When you are anchoring under your jaw or chin you will notice that there are a lot of ways you can hold your hand. By using a secondary anchor point you will find the spot more consistently. I like to use the tip of my nose for example. Be sure however that you don’t turn your head too much, otherwise your nose might interfere with string upon release.
Compound
Since you shoot with a release anchoring with compound archery is quite different. There are many different ways you can anchor, but this does also depend on the type of release you are using.
Archers that are using a thumb release often use their knuckles and anchor somewhere on or behind the jaw. When you are using a wrist release you turn your hand 90 degrees which makes it impossible to use your knuckles to anchor. You can, however, use your index finger and place it somewhere on or behind your jaw. Again I would highly advise trying a few anchor points and see what works for you.
I would also highly advise using a secondary anchor point when shooting a compound bow. One of the most used secondary anchor points is a kisser that is placed in the corner of your mouth. I would highly advise using a kisser since it can really help out.
How to keep your anchor point consistent?
When you have found a solid anchor point, it is vital that you anchor at that exact spot every time. Therefore I would suggest only focussing on your anchor point at least the next 5-10 shooting sessions. This might seem like a lot, but in my experience, you need at least 5 sessions to get the new anchor point in your head. Don’t try to work on other things during these sessions, otherwise, you might get distracted. When you stop training your anchor point, you should be able to draw your bow automatically and consistently to the same spot.
Even when you have trained your anchor point you should regularly check if you are still anchoring at the same spot. It often happens that you slowly change your anchor point without noticing, until you notice that your scores have dropped significantly. It would be better if you spot it early on because it will then be easier to correct.
What if I am not at the correct anchor point?
If you have trained on your anchor point, but you still can’t consistently anchor at the same spot, you might have to reconsider whether your anchor point fits your shooting style. It can be that you simply don’t feel where your anchoring because the spot is not obvious enough. You should have a really obvious anchor point, which you can easily feel.
For example, knowing that your anchor point under your cheekbone is not specific enough, you need to be able to point to the exact spot. Sometimes you have to experiment a long time before you find the right spot. Changing the orientation of your head between shots can also make it more difficult to find a consistent anchor point.
Some quick tips
Keep the following tips in mind when working on your anchor point.
- Close your mouth: always close your mouth. Opening your mouth will lower the jaw and will therefore lower your anchor point. Therefore you will incidentally shoot higher.
- Try a kisser: if you are shooting Olympic recurve or compound you are allowed to use a kisser, therefore I would highly advise you to try it out to see if it works for you.
- Try using a camera: if you struggle to find the right anchor point it might help if you film your anchoring. This makes you able to see where you anchor and where you made a mistake.
- More is better: try to find at least a secondary anchor point. The more anchor points you have the faster you will spot if anything is wrong with your stance.
The shot cycle
It’s essential that you keep your anchor point consistent. Once you mastered this technique you can work on other aspects of the shot cycle. Make sure to check out my other articles, to master the entire archery technique!:
How to shoot a bow (an overview)
- Step 1: stance
- Step 2: nocking
- Step 3: grip the bow
- Step 4: grip the bowstring
- Step 5: maintain the right form
- Step 6: draw the bow
- Step 7: anchor
- Step 8: aim
- Step 9: release
- Step 10: follow through
Final words
Finding the right anchor point is really difficult, therefore be patient and don’t get frustrated when it takes a long time to be consistent. In my opinion, having a consistent anchor point is the single most important thing in archery. This is also one of the major points that differentiates an experienced archer from a new archer. Once you have found this spot, you will see tremendous improvement in your score.
Before you go, don’t forget to use the coupon code IYA if you are buying one of the courses from Online Archery Academy. As mentioned earlier, I highly recommend taking a structured course. As this will greatly deepen your archery knowledge and skill.

Tim van Rooijen
For as long as I can remember, I have always been fascinated by archery. First due to its historic significance but later because I like being outdoors. With this blog, I share my knowledge about Archery and how you can improve your shot. More about author…
I need advice. I started out three weeks ago and after about 2.5 weeks I was hitting very small groupings from 20 yards – arrows basically on top of each other to the point I’ve torn 3 fletchings.
I realized though, that I was always doing a smiling motion as I was squinting my eyes. I felt my kisser in the exact same spot if my upper lip, very close to the corner of my mouth, and the string ever so slightly on the side of my nose. Both anchor points felt very comfortable and familiar BUT I also noticed at times I could feel the fletching of the arrow on my chin/cheek. I also thought that if I don’t raise/squint exactly the same way in a hunting situation I might mess up my shots.
I started trying to makes sure my face is totally rested and my kisser is now at the very corner of my lip and the string touches the tip of my nose, but it feels feet unnatural and I can’t pinpoint if I’m touching the exact same spots. Needles to say my consistency is back to where it was when I started, maybe even worse.
Should I stick with retraining my new anchor points or is it okay to go back to what i started since I was having very good results?
Hi Samuel,
That is a tough call, sometimes you indeed need to take a few steps back to improve your anchor point. Getting used to a new anchor point always takes a while which will result in lower scores. But since you mention that it feels unnatural and that it’s hard to pinpoint the exact spots, I wouldn’t stick with your new anchor point. An anchor point should feel natural and should be easy to identify.
In your case, I think it would be a good idea to experiment with some different anchor points. Try some different anchor points to find what works and what doesn’t. That can easily take a few weeks. If you notice that the anchor point you used previously is the most comfortable, the most natural, and allows you to be most consistent, I would stick with that.
We have to make compromises in archery. Although the squinting motion indeed can cause variance between shots, if you are shooting tight groups, I wouldn’t worry about it. The same is true for the fletching touching your cheek. If you can keep it consistent, it won’t affect you negatively. Although there are many guidelines on how you should shoot, everyone has their own shooting style. As long as it works, it’s fine.