People that aren’t into archery often think archery is all about aiming. But if you have shot a bow, you know that this isn’t the case. Your overall form and technique require much more work than your aiming technique. That doesn’t mean that aiming isn’t important. Especially when you have decent form aiming becomes much more important. In this article, I explain how you aim a bow, both with and without a sight. Let me first give you a quick summary:
To aim a bow with a sight, you point the sight pin in the center of your target. To aim a bow without a sight, you use the point of the arrow as a reference point. To shoot at larger distances, you decrease the gap between the point and the center of the target.
Seems simple right, well in practice it’s quite difficult. Therefore, I will explain in much more detail how to shoot both a bow with and without a sight. We will also discuss instinctive shooting and eye dominancy. At the end of this article, I will give some additional tips on how to improve your aim.
To aim properly, you need a solid anchor point. So, if you don’t know what an anchor point is, or if you require more guidance, I recommend reading the article below first:
Finding and maintaining an anchor point
Before we start
Although I try to make this guide as complete as possible, it’s not possible to cover all minute aspects. Therefore, this guide aims to give you the basics. If you are serious about archery, I would highly recommend taking an archery course or hiring an archery coach.
I understand that hands-on coaching is not always available for everyone. Luckily there is a great (in my opinion even better) alternative – following an online course from the Online Archery Academy. With video examples and detailed explanations, these courses are a great way to improve your archery. I can personally vouch for them, as I have also taken the courses.
Readers from this blog will get a discount of 20% if you use the discount code IYA at checkout. If you don’t think the courses help you improve your archery, you can always use the 100-day money-back guarantee.
Aiming a bow with a sight
To aim a bow with a sight, you aim the sight pin in the center of the target. If your bow is configured correctly and you keep the right form the arrow should hit the center of the target. Don’t try to force the sight pin in the center of the target. Instead, let the sight pin float.
Aiming with the sight pin
The most important tip is to let the sight pin float. This means that your sight pin doesn’t have to stay precisely in the middle of the target. That will be impossible to achieve. Because we will always vibrate or move a little. We can’t stay still like a statue.
Therefore, don’t worry if you can’t keep it centered completely. The more you train the smaller the floating patterns will be. Trying to force it in the middle will only cause more vibration and tension which decreases your accuracy.
We will naturally release at the right time. So, don’t try to time your shots to shoot when the sight pin is in the center of the target. That often results in a rushed technique. So, don’t overcomplicate aiming. Your instincts will help you!
Aiming with the string silhouette
When you anchor correctly, you will see the silhouette of the string. This faded image of the string can help you to anchor and aim correctly. This is often called string alignment because this helps you to align your string with your sight. Some archers like to use this silhouette while others ignore it.
It’s generally accepted that you should align the string silhouette with the sight pin or alternatively on the riser. For a right-handed archer, the silhouette should never be on the left of the sight pin. This is quite an advanced technique though, so I would only experiment with this if you are an experienced archer. The video below will give you some additional guidance on how to aim with the string silhouette:
If you like to aim with the string silhouette, you want to pick a string color that is easily visible on the target such as black or red. If you prefer to ignore the silhouette, a lighter color might be a better fit. But this also depends on where you shoot (outdoors or indoors) and the lighting conditions. For more information and tips, read the article below:
What is the best color for a bowstring?
Configuring the sight
If all your arrows don’t hit the center of the target but are clustered anywhere else, your sight might not be configured right. In that case, you want to adjust the sight towards the error on the target. If you shoot too much to the right, you want to move the sight to the right. Read the article below for more information on how to configure your sight:
Aiming a bow without a sight
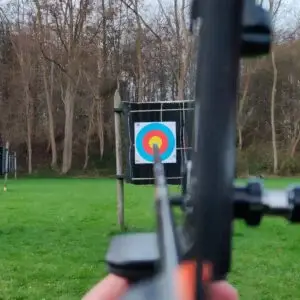
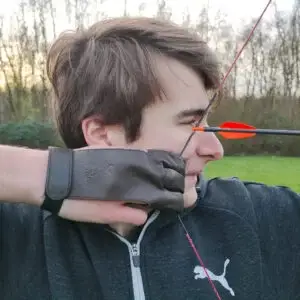
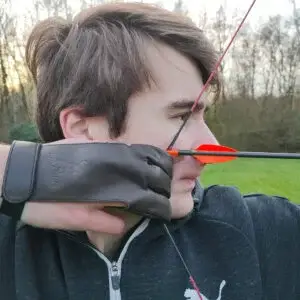
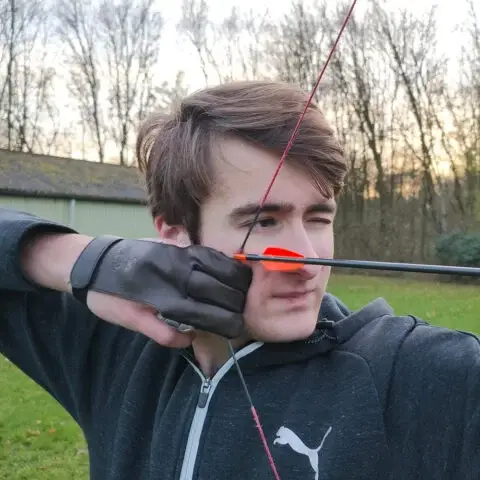
To aim without a sight, you use the point of the arrow as a reference. You use the visual gap between the point of the arrow to aim. Since you use the arrow to aim, you want to have the arrow close to your eye while shooting.
Aiming without a sight is much more difficult, it is less intuitive, and you are more restrictive in your anchor point. The bolded section above explains how to shoot aim with the gap shooting method. Most people use this method, but there are also two other methods you can use: string and face walking. Below is a summary of the pros and cons of each method.
| Gap shooting | String walking | Face walking | |
| Arrow tip is on the target | No | Yes | Yes |
| Consistent anchor point | Yes | Yes | No |
| Consistent finger placement on the string | Yes | No | Yes |
Most archers prefer the gap shooting technique because it allows you to keep both a consistent anchor point as finger placement on the string. The disadvantage is that it’s less precise because it can be difficult to see the exact distance between the tip of the arrow and the center of the target.
But as I mentioned earlier technique and form are more important than aiming. So, I recommend using the gap shooting method.
Gap shooting
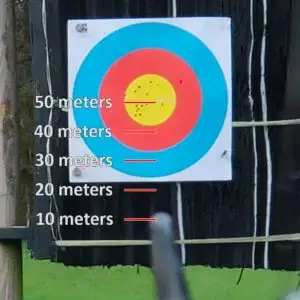
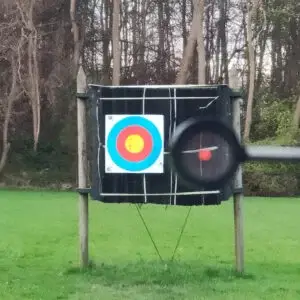
With gap shooting, you keep the same anchor point and hand position on the string regardless of the distance you shoot. To adjust for the distance, you decrease the gap between the point of the arrow and the center of the target.
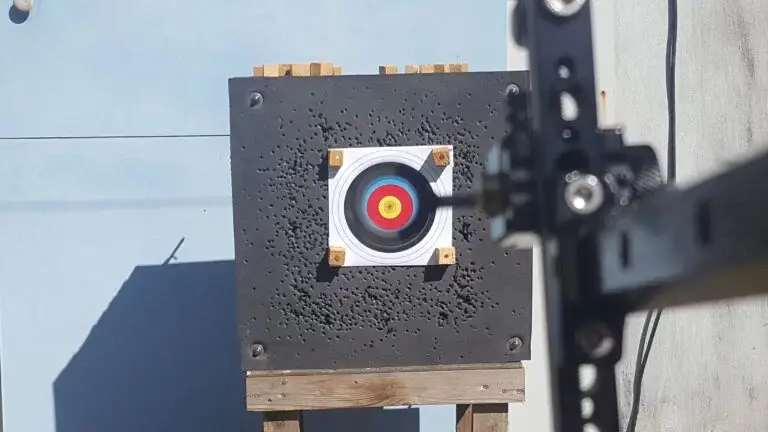
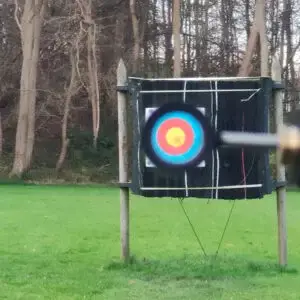
Therefore, you must remember how big the gap between the center of the target and the tip of the arrow should be. This is difficult to get precise, but there are multiple ways to achieve this. If you are a target archer, you can for example use the rings on the target. Other methods include using the thickness of the arrow or using markings on the riser.
Most archers will do this instinctively because these methods might distract you from using the right technique and form. But in case you are interested, read this (external) blog article that discusses these different techniques.
String walking
String walking allows you to keep the tip on the center of the target and keep a consistent anchor point. With string walking, you place the fingers closer to the arrow to achieve long-distance shots and farther away from the arrow to achieve short-distance shots.
If the fingers are closer to the arrow, the arrow will be pointed upwards since your anchor point stays the same. When you move your fingers down, the arrow will be more horizontal for short-distance shots.
The disadvantage of this technique is that you must change your finger position which can cause inconsistencies in your technique. Additionally, you want your fingers close to the arrow because this improves the efficiency of the bow.
Face walking
With face walking, you change the anchor point on your face to achieve the right elevation for your shot. This means that you move your anchor point down for long-distance shots. This angles your arrows upwards. For short distances, you keep the anchor point very close to your eye.
The major disadvantage of this technique is that it makes it more difficult to be consistent with your form because your hand placement changes. Additionally, you need to lower your anchor point straight down. If you also move it slightly to the right or left, your arrows will also fly in that direction.
Especially for new archers, the gap shooting technique tends to be the best option. Because it helps you to stay consistent.
Horizontal alignment
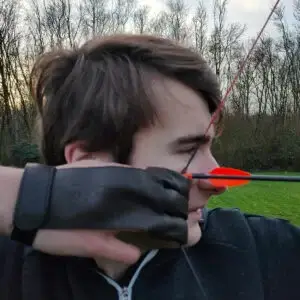
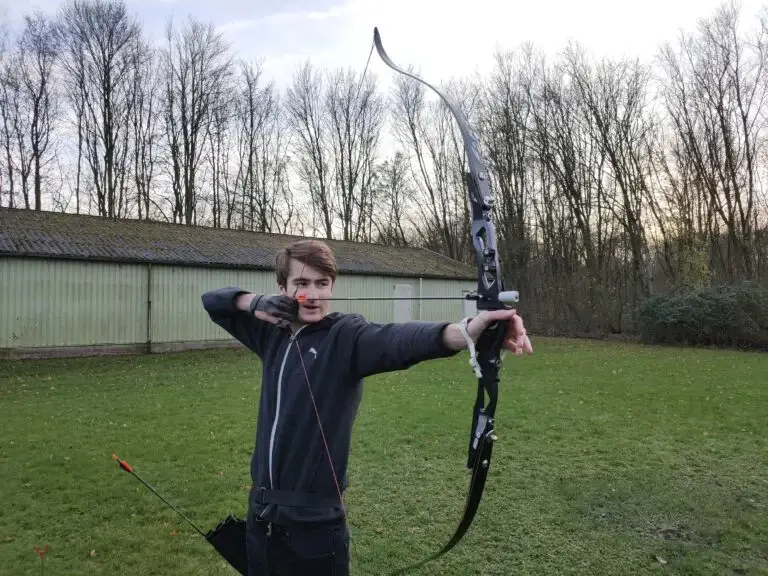
For all three of these shooting techniques, the arrow should be horizontally aligned when you aim. This means that you only must make changes to your aim to compensate for different distances. To achieve this, you should have the arrow straight below your eye
Therefore, your anchor point is determined by the right-left alignment of the shot. If the arrow goes too much to the right, you should anchor more to the left on your face. Once you have figured this out, this should stay consistent for all distances you shoot.
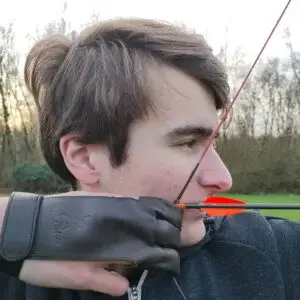
Although this right-left alignment is technically the most ideal method, it doesn’t work for all archers. Some archers have to anchor at an awkward or inconvenient spot to achieve this. Additionally, for some archers, the string obstructs the view and makes it more difficult to aim.
Therefore, some archers don’t keep the arrow right under their eye but keep it next to the eye. You can still use the tip of the arrow as a reference, but then you must use both the horizontal and the vertical gap between the arrow.

Instinctive shooting
With instinctive shooting, you don’t take conscious steps to aim. You draw your bow and look at the target with two eyes open and shoot. With a lot of practice, most archers can become very accurate with this method.
Some archers only get distracted by all the techniques involved in trying to shoot with the point of the arrow. They just want to draw their bow to their natural anchor point which doesn’t align the arrow with their eye.
In that case, instinctive shooting might be the better option. It requires a lot of training to learn and maintain the skill. But it allows you to shoot fast and in a lot of different conditions (poor lighting for example).
This is also a great shooting technique for new archers. Because you are not worrying about aiming you can focus on your technique and consistency. It does take longer to become accurate though, so that might deter some new archers from using this technique.
How the best method differs per archer
The best method to aim a bow differs per archer. In most cases, a sight allows you to get accurate the fastest. But I also experienced some archers that couldn’t get used to it.
I can shoot well with both a sight and with some practice instinctively as well. But I tried long and hard to shoot while using the point of the arrow as a reference. I had to change so much about my technique that my arrows flew everywhere except on the target.
Therefore, if you get stuck using one technique, it might be time to experiment. That doesn’t mean that you must change it every training session, but a little experimentation never hurts.
Aiming with one eye vs two eyes open
New archers often shoot with one eye closed. But if you look at competition archers, you will see that a lot of archers shoot with two eyes open. Let me explain why.
Why you want to shoot with two eyes open
Shooting with two eyes open has some clear advantages. It lets in more light and it’s less strenuous for your eyes. There is a reason why we have two eyes instead of one. It allows us to estimate distances easier and allows us to see depth. Your eyes together also make your field of view wider and create a clearer picture.
Therefore, shooting with two eyes makes it easier to aim. You might not notice it but there is a definite advantage of shooting with two eyes open.
Why most archers shoot with one eye closed
But there is a catch. To shoot with two eyes open your eye dominance must match your bow. If your left eye is dominant while you shoot a right-handed bow you can’t aim properly. In that case, you need to shoot with your off-hand, if you want to shoot with two eyes open.
To understand why this is an issue, you need to understand eye dominance. We always see from the perspective of one of the two eyes. If you look through your left eye with your right eye closed, you will see a slightly different perspective than if you do this the other way around.
So, if we shoot a right-handed bow, we need a right-handed riser. Otherwise, we can’t look through the sight or look along the arrow. If you shoot instinctively this isn’t an issue of course.
Therefore, archers that have a dominant left eye and are right-handed (and vice versa) close their left eye to make sure they can look through the sight correctly.
Eye dominance test
Use this test to check which eye is dominant:
1. Put your hands in front of you and form a small triangle out of your hands.
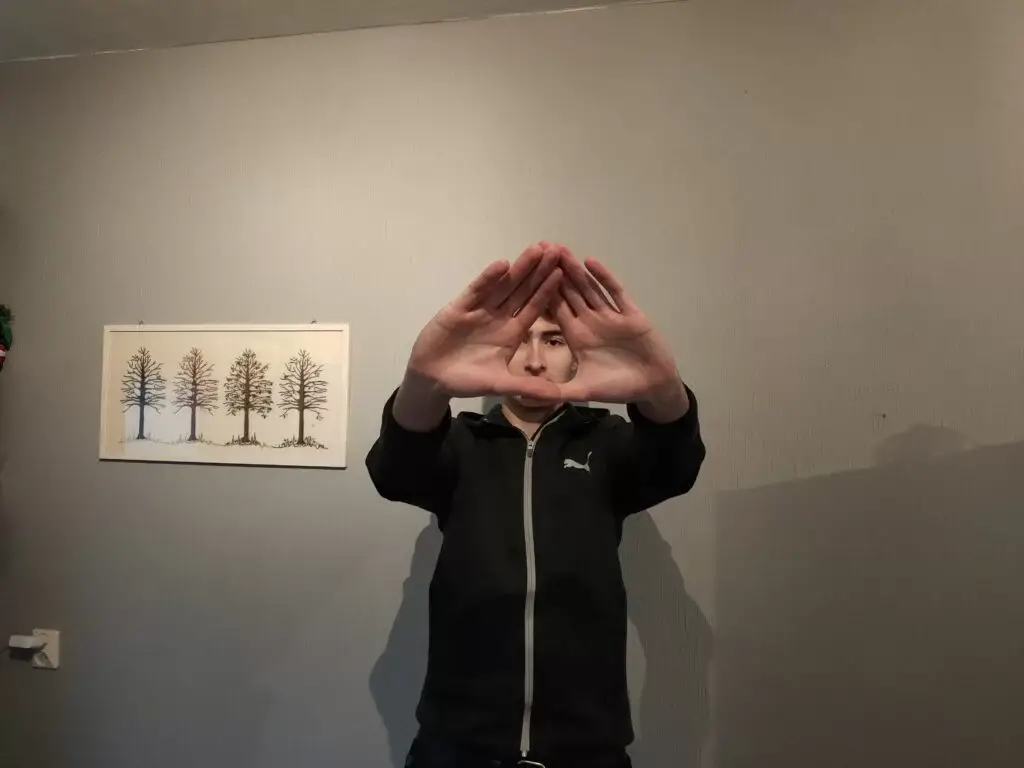
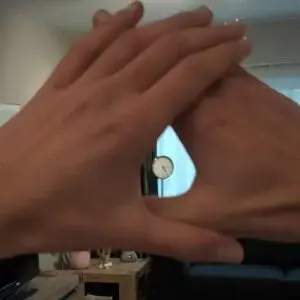
2. Look through the triangle at a recognizable spot on the wall such as a painting or a clock
3. Now close your left eye while staying in this position and check whether you can see the spot
4. Open your left eye and close your right eye and check whether you can see the spot
If you have the dominant eye open, you will still see the spot. If you have your non-dominant eye open the spot will disappear behind your hand.

Some people have a weak dominance or have cross dominance. So, you might want to repeat this test at different times. If you have cross dominance you should always close one eye while aiming.
Tips to improve your aim
Finally, I want to give you some quick tips on how to improve your aim. For more tips, read the article below:
Focus on the target
When you are aiming, you must be focused. This means that you focus on the center of the target. Don’t look at the sight pin or the point of the arrow; otherwise, the target will become blurry. If you focus on the target and release instinctively, you will automatically time your shots well.
Take your time to aim properly
Some archers tend to rush their shot. Therefore, they don’t take enough time to aim properly. This is often caused by a bow with a heavy draw weight. So, consider decreasing the draw weight if you feel that you are rushing your shot.
You might think that if the sight is in the middle of the target that you can release it. But it’s better to hold a bit longer. This helps you relax and makes for a cleaner release. I recommend taking at least 3 seconds if you aim without a sight and 5 seconds if you aim with a sight.
Without a sight: experiment with different techniques
If you shoot without a sight, you have a lot of different techniques you can use to aim. Don’t just stick to one because someone recommends it. Experiment with the different techniques to figure out what works for you.
Most archers like gap shooting while others find it hard to estimate the distance between the tip of the arrow and the center of the target. We all have different strengths and weaknesses.
With a sight: let the sight pin float
If you shoot with a sight, it’s tempting to force the sight pin in the center of the target. But sadly, that isn’t possible, and trying to keep it in the middle only makes it worse. It will cause our muscles to vibrate. This makes the manageable float change to an uncontrollable vibration.
Especially for compound archers, you want to let the pin float a while before you shoot. This helps you subconsciously time your shot.
Don’t overcomplicate your aiming technique
There are a lot of ways you can overcomplicate your aiming technique. If you aim without a sight, you can for example use makings on the riser to ‘’measure’’ the gap. That seems like a good idea, but for most archers, that overcomplicates things.
Even if you shoot with a sight, you will notice that the arrows don’t always fly where you are aiming, in a good sense. I have had multiple times that I was aiming off-center while my arrow flew perfectly hitting the gold.
I believe there happens much more than what we consciously perceive. We constantly train our mind to hit the center of the target. So, I think we subconsciously compensate for this. The more we train the better it becomes!
The shot cycle
If you shoot with a sight, aiming is one of the easiest steps in the shot cycle. But there is much more to learn. To master the entire archery technique, make sure to check out the other articles too:
How to shoot a bow (an overview)
- Step 1: stance
- Step 2: nocking
- Step 3: grip the bow
- Step 4: grip the bowstring
- Step 5: maintain the right form
- Step 6: draw the bow
- Step 7: anchor
- Step 8: aim (this article)
- Step 9: release
- Step 10: follow through
Final words
I hope this article was helpful to improve your aiming technique. If you have any questions, comments, or feedback, please leave them down below. I will answer any questions as soon as possible and you will receive an email notification when I replied.
Before you go, don’t forget to use the coupon code IYA if you are buying one of the courses from Online Archery Academy. As mentioned earlier, I highly recommend taking a structured course. As this will greatly deepen your archery knowledge and skill.

Tim van Rooijen
For as long as I can remember, I have always been fascinated by archery. First due to its historic significance but later because I like being outdoors. With this blog, I share my knowledge about Archery and how you can improve your shot. More about author…