For new archers, how you grip the bow seems like something that needs no explanation. You just grip it firmly to keep control of the bow, right? Sadly, that isn’t the case, gripping the bow firmly decreases your accuracy. Additionally, you should consider your wrist tension and hand alignment. Therefore, how you should grip your bow is more difficult than it seems. If you don’t have time to read this entire article, read at least the bold section below.
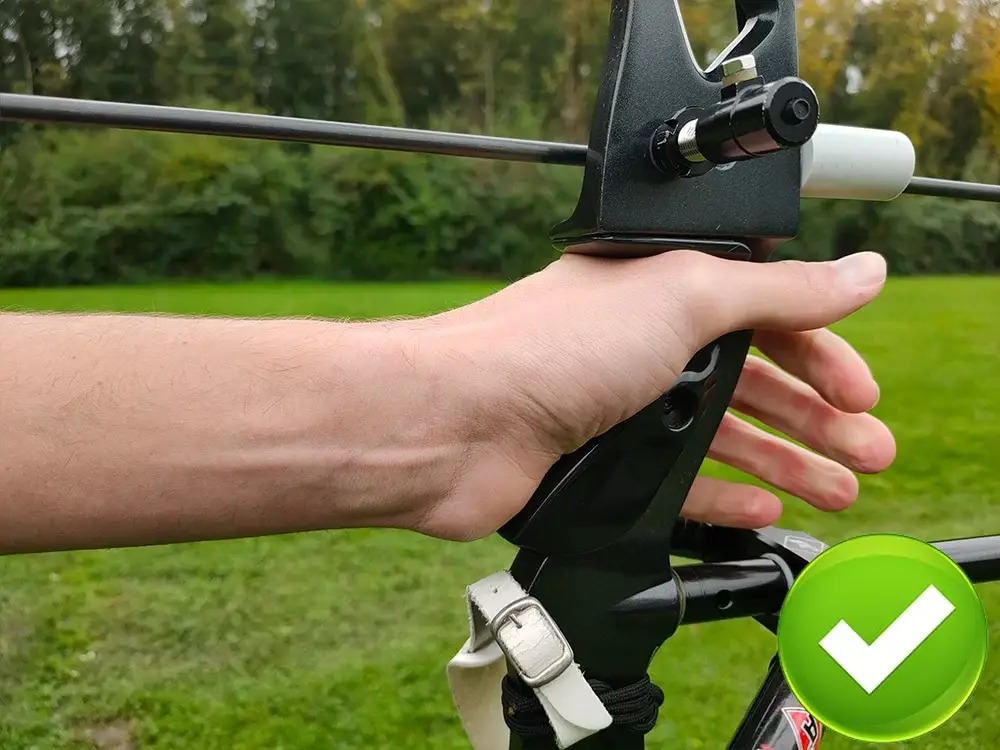
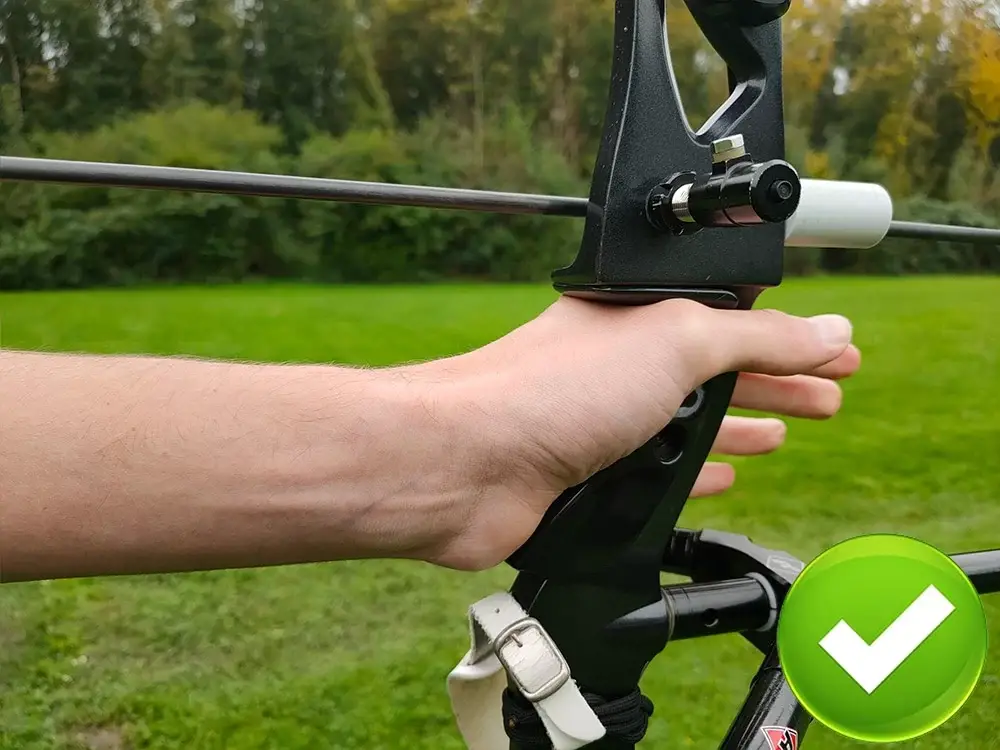
You should grip your bow with a relaxed hand, which means that you keep your hand in a natural position and don’t close your fingers. Make sure that the deepest part is on the webbing between your thumb and index finger. Keep your wrist as straight as possible and don’t twist your hand while shooting.
If you have read the previous paragraph, you already know the basic technique. But in the remainder of this article, I will explain more and give some examples. I will also discuss whether it’s beneficial to experiment with different grips.
Before we start
Although I try to make this guide as complete as possible, it’s not possible to cover all minute aspects. Therefore, this guide aims to give you the basics. If you are serious about archery, I would highly recommend taking an archery course or hiring an archery coach.
I understand that hands-on coaching is not always available for everyone. Luckily there is a great (in my opinion even better) alternative – following an online course from the Online Archery Academy. With video examples and detailed explanations, these courses are a great way to improve your archery. I can personally vouch for them, as I have also taken the courses.
Readers from this blog will get a discount of 20% if you use the discount code IYA at checkout. If you don’t think the courses help you improve your archery, you can always use the 100-day money-back guarantee.
The technique
Alright, let’s discuss how to hold your bow, step by step.
How to keep your hand
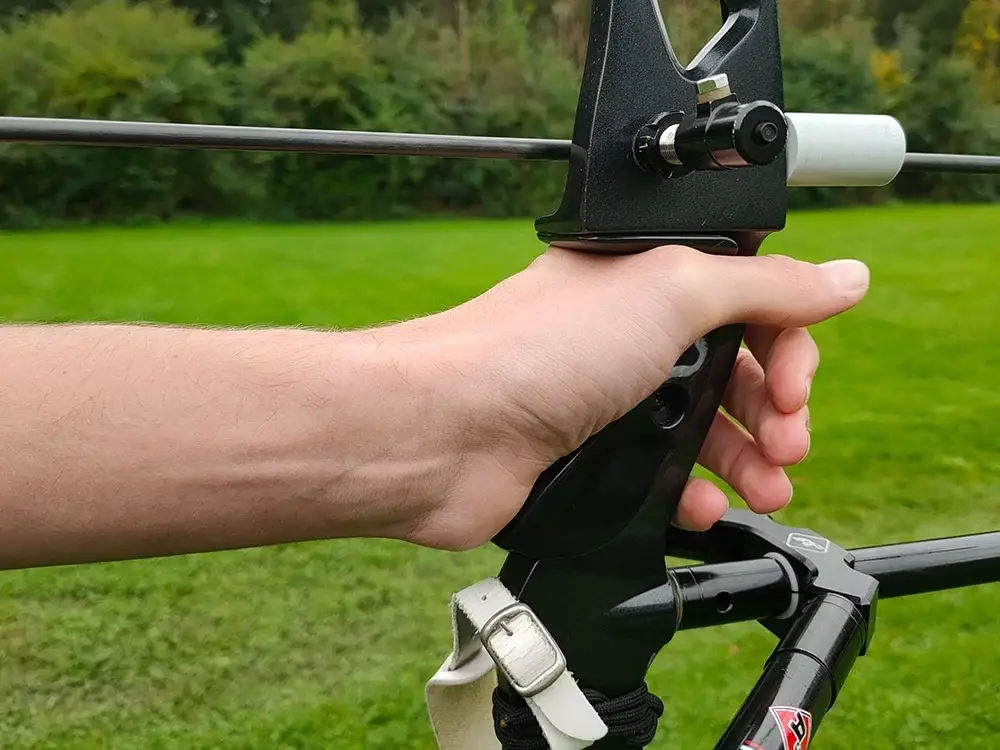
If you completely relax your hand and arm, your fingers will be slightly bent, and your thumb will be poking outwards. This is exactly how you want to hold your hand while shooting a bow. Therefore, coaches often say: relax your bow hand. Although it’s a good start it’s not completely true. You still slightly tension your hand, otherwise, your wrist will bend, and you will lose all control of the bow.
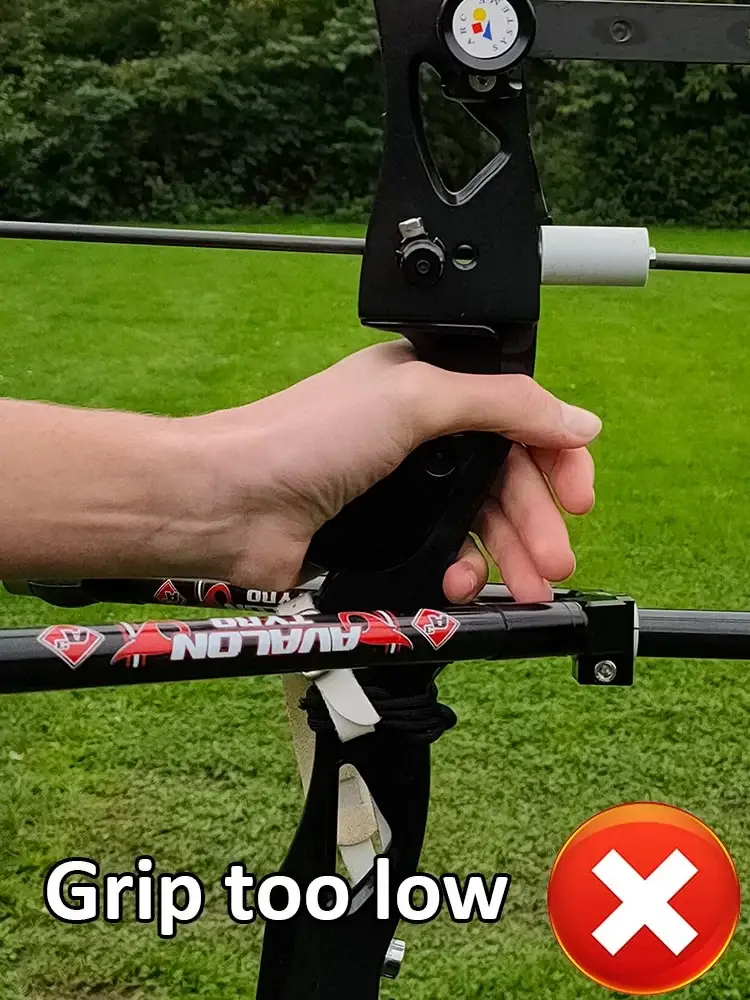
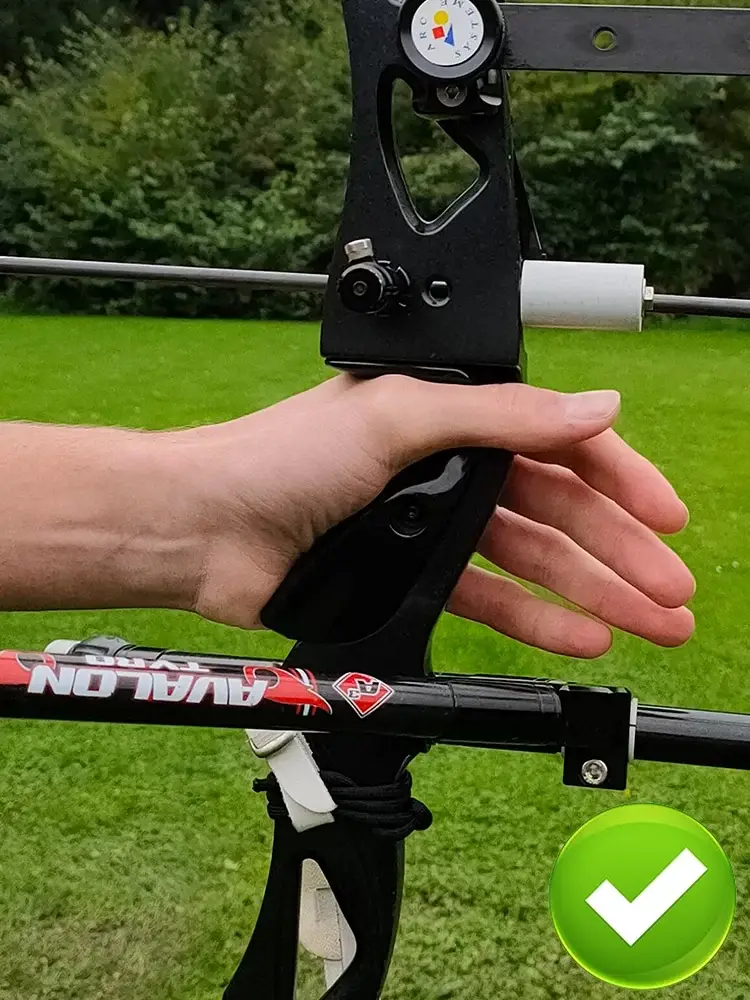
Make sure that the webbing between your thumb and index finger is in the deepest part of the grip. Most people will do this naturally since it feels most comfortable. But some archers grip it low because they experience pain in their webbing. In most cases, this is due to using the wrong gripping technique or bow grip. We will discuss how to change your bow grip later in this article.
Also, make sure that you keep the bow right between your thumb and index finger. If you keep it too much on your thumb you might experience thumb fatigue. Also, don’t the grip in the palm of your hand. This can cause bow torque which severely reduces your accuracy.
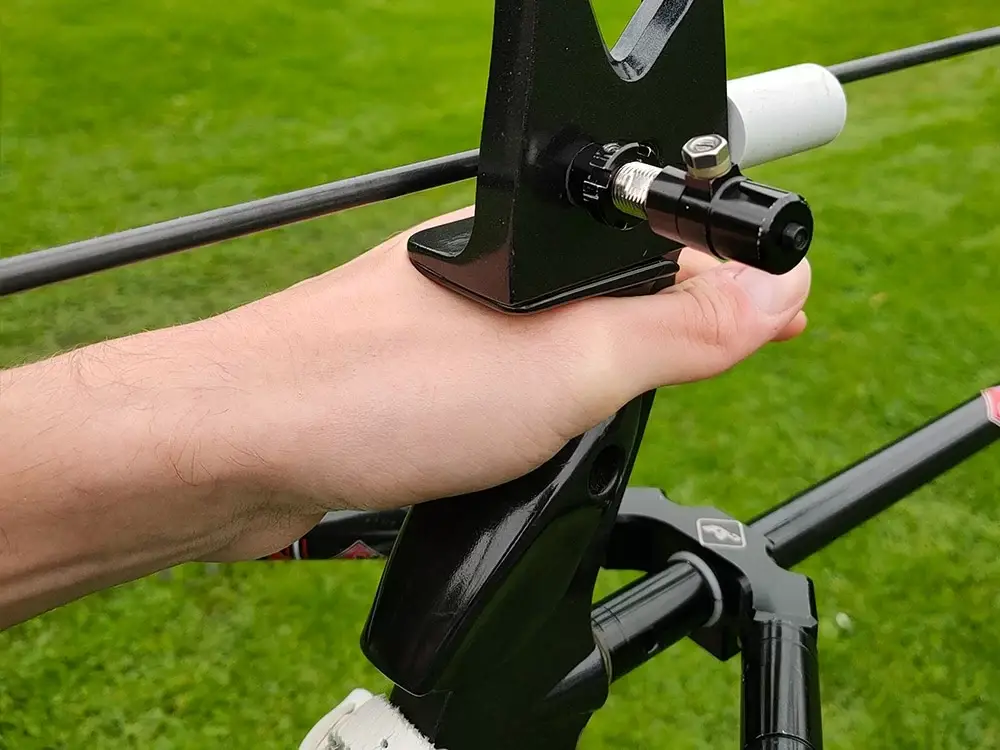
Pressure points
To help understand how you hold the bow, it’s often helpful to think in pressure points. How you hold the bow, changes where you come in contact with the grip. As we mentioned earlier, you should at least have a pressure point in the webbing of your hand. Otherwise, you will do something seriously wrong.
Depending on your gripping technique, you might have a smaller or bigger pressure point. With a high grip, your pressure point will be quite small, while your pressure point with a low grip will be a lot bigger. We will discuss these gripping techniques in more detail later in the article
Wrist alignment
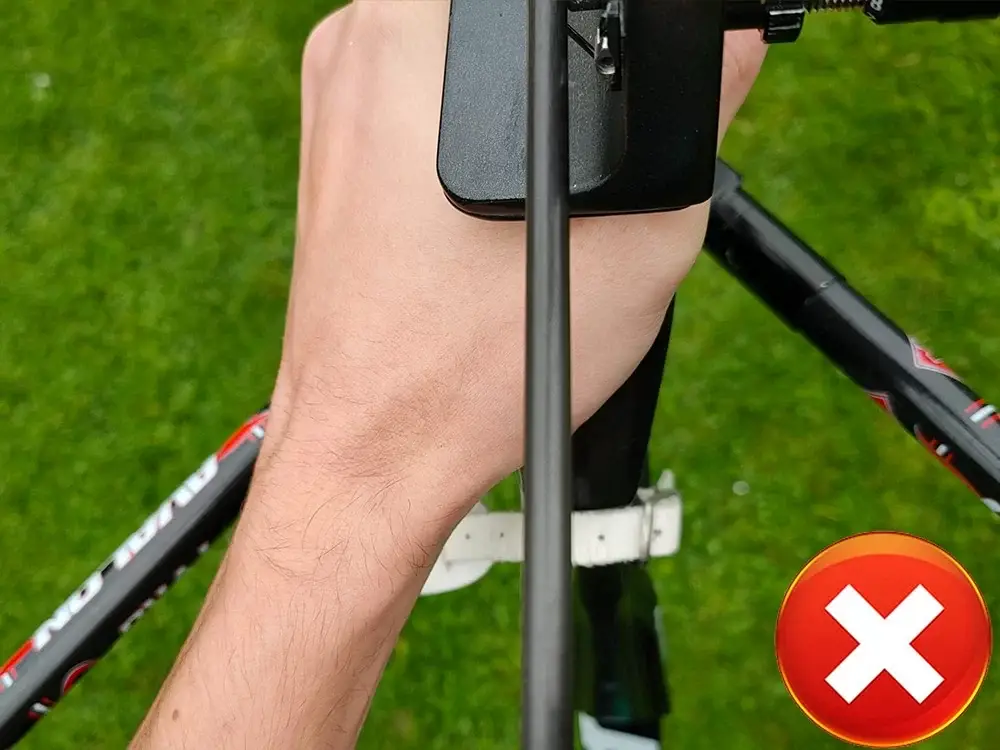
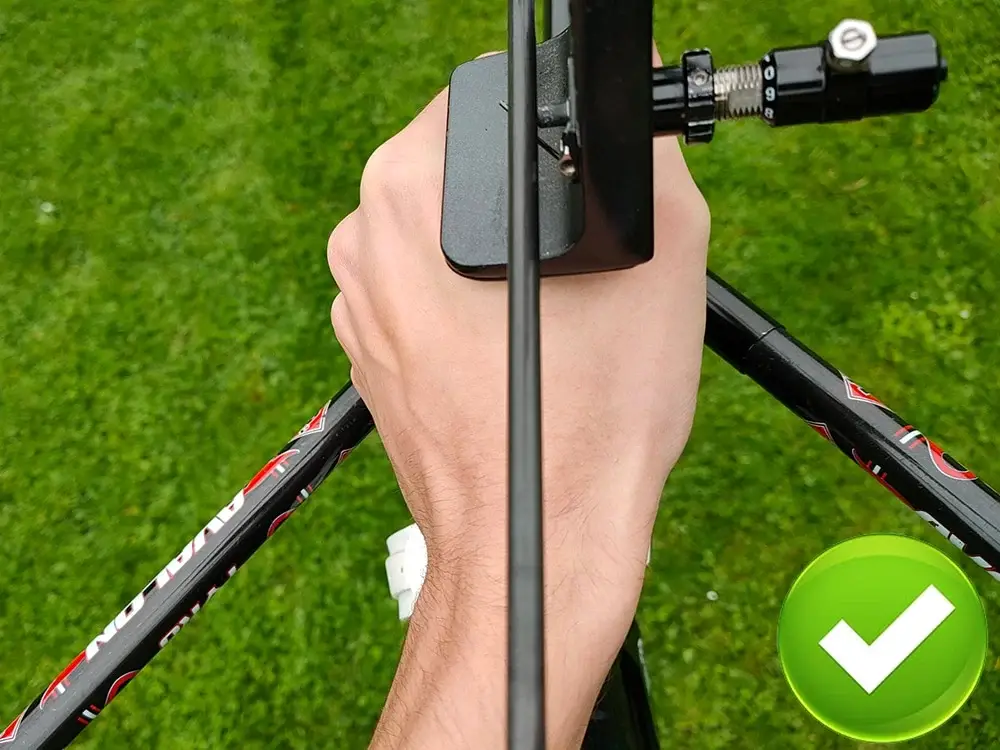
You must keep your wrist straight while you hold the bow. If you keep your hand right, you should already keep your wrist relatively straight. Keeping your wrist straight reduces bow torque and stress on your muscles. Luckily, you can easily check whether your wrist is straight by looking down while at full draw.
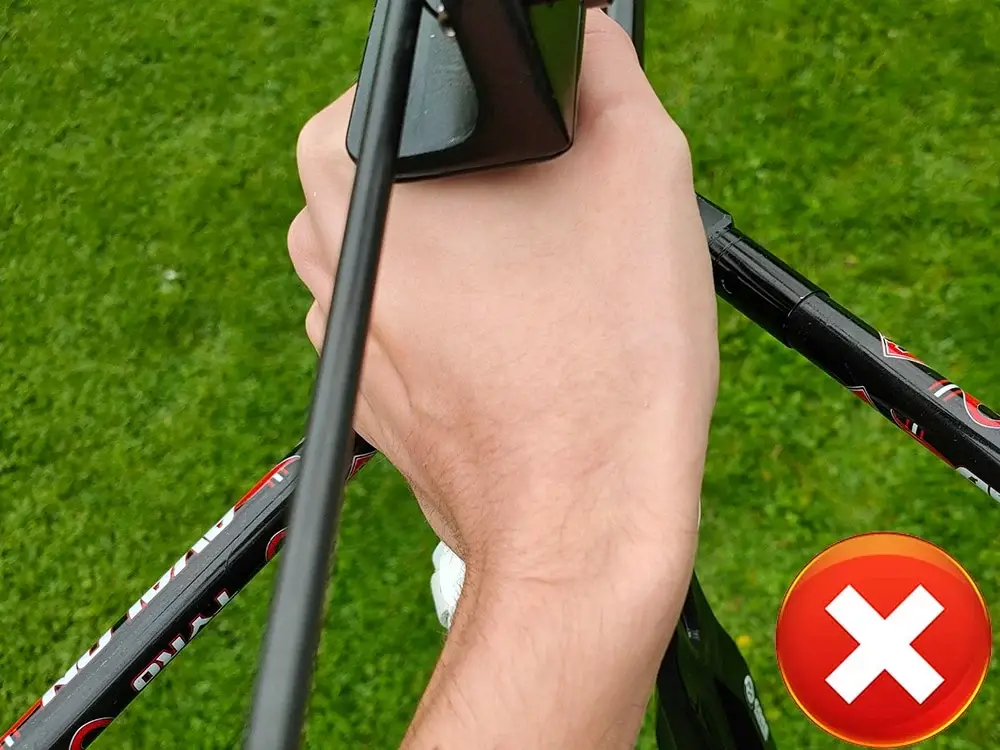
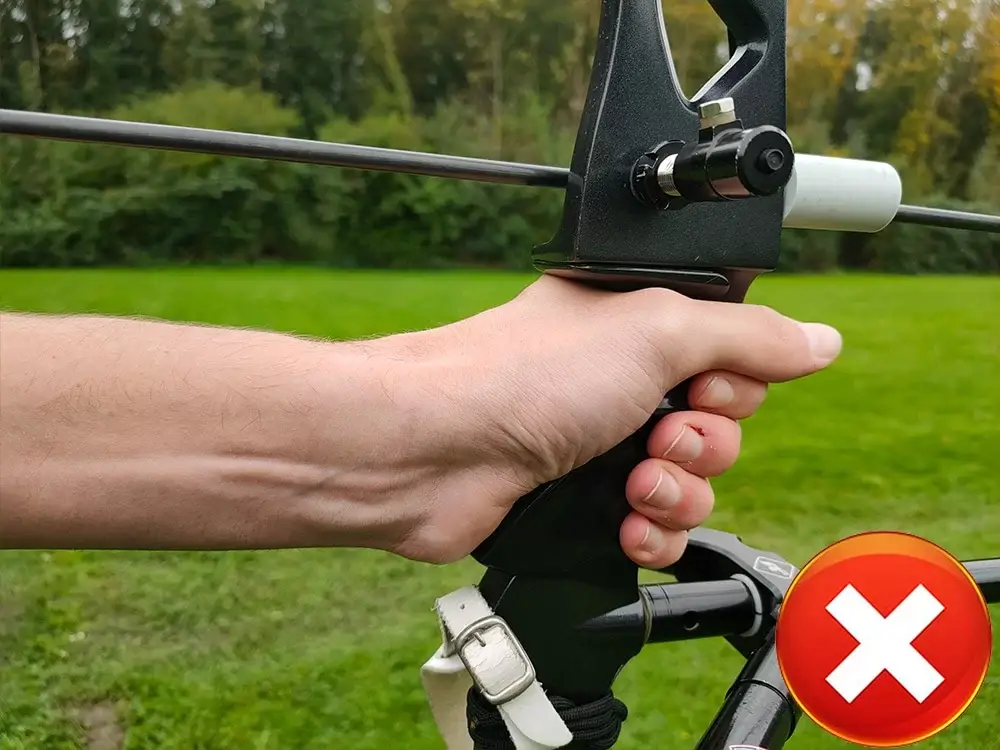
The death grip
When archers are just getting started, they often hold the bow in a firm grip. They believe that they need a firm grip to control the bow. But essentially what you do with this grip is add a huge amount of human variance in the arrow. Think for example about vibration and minor movements of your hand after you released your shot. We often call the unexpected rotation of the hand bow torque.
These inconsistencies between shots significantly decrease your shot. Therefore, we often call this ‘’the death grip’’ because it can kill your accuracy. Therefore, you shouldn’t hold the bow tightly. Holding the bow tightly can cause rotation, which you don’t want. Therefore, you should only tension your muscles to keep the bow on the webbing of your hand.
Open vs closed hand
Some archers shoot with a closed hand while others shoot with an open hand. Both are acceptable if you don’t firmly grip the bow. That isn’t possible with an open hand, therefore, a lot of archery coaches learn this technique.
That doesn’t mean that closing your hand is bad. You just have to make sure that you don’t grip the bow without noticing. Essentially, the bow should fly forward after you released the shot. That might seem unsafe to you, but that’s exactly why archers use a wrist or fingers sling. We will discuss this in more detail later.
Follow-through
A good follow-through is essential, if you mess it up, a good grip will do no good. Essentially, you must keep your hand relaxed and let the bow fly forward. The only pressure the bow should receive from the archer is straight forward.
Therefore, recurve archers often use the free fall swing technique. Which means that you completely let the bow fall and automatically gets caught in the finger sling. We discuss the free-fall swing technique in more detail in the article below:
Is it really necessary to swing your bow?
If you don’t swing your bow, you must be careful that you don’t grip the bow too early after your release. The bow should shoot forward freely until the arrow has completely left the bow.
High vs low grip
There is one thing that I haven’t covered in the technique guide above. And that is how far you should bend your wrist upwards or downwards while holding the bow. I haven’t discussed this yet, because there is quite a debate in the archery community about what is better. Keeping the wrist up high (the high grip) or keeping the wrist up low (the low grip).
With the high grip, you hold the bow primarily with the webbing of your hand. With the low grip, you hold the bow with almost the entire part below the webbing of your hand. Essentially, there is a spectrum between these two extremes. But we often only discuss three different options: high, medium, and low grip.
Let’s discuss the pros and cons of both gripping techniques.

Surface area & bow torque
The low grip was the default grip till years ago. When you pick up a bow without any training, you will probably draw it with a low grip. It feels the most natural and comfortable.
These days archers are constantly analyzing how our techniques influence the bow. One thought that became popular is that the amount of contact with the bow should be minimized. If you would shoot a bow without human error, it will be most accurate. Therefore, they believed that decreasing the surface area of a grip would improve accuracy.
One method to do this is by twisting the wrist upwards, in other words, using the high grip method. This idea was quite popular for a while, but we nowadays see more and more archers switch to the medium or low grip. The high grip also has some cons as we will discuss next.
Comfort
The low and medium grip is simply more comfortable to shoot. The larger surface area means that the pressure of the bow is divided over a larger piece of skin. In the early days, comfort wasn’t a focus in archery. But these days, archers also consider comfort, because it helps you to shoot more relaxed and patiently.
Consistency
Another disadvantage of the high grip is that it’s harder to stay consistent. With the low grip, the full length of your hand touches the grip. Therefore, you do not have to think about what angle you keep your hand. With a high grip, you do have to think about how you keep your wrist.
The verdict: which is better
So, which is better the high or the low grip? If you ask me, I would say the low grip since it feels more comfortable and it’s easier to stay consistent. Some archers can shoot the high grip consistently without discomfort, but it might cause issues for others.
In most cases, I would say that the theoretical benefit does not outweigh the real issues of this grip. Especially for new archers, I would highly recommend the low grip. I for example can’t even shoot the high grip, because it hurts too much. But if you are curious you can of course always give it a try.
Differences between bow grips
There are a plethora of different bow grips available on the market. These different shapes influence how you hold the bow and where the pressure points are. So, the gripping technique is influenced by your grip and vice versa.
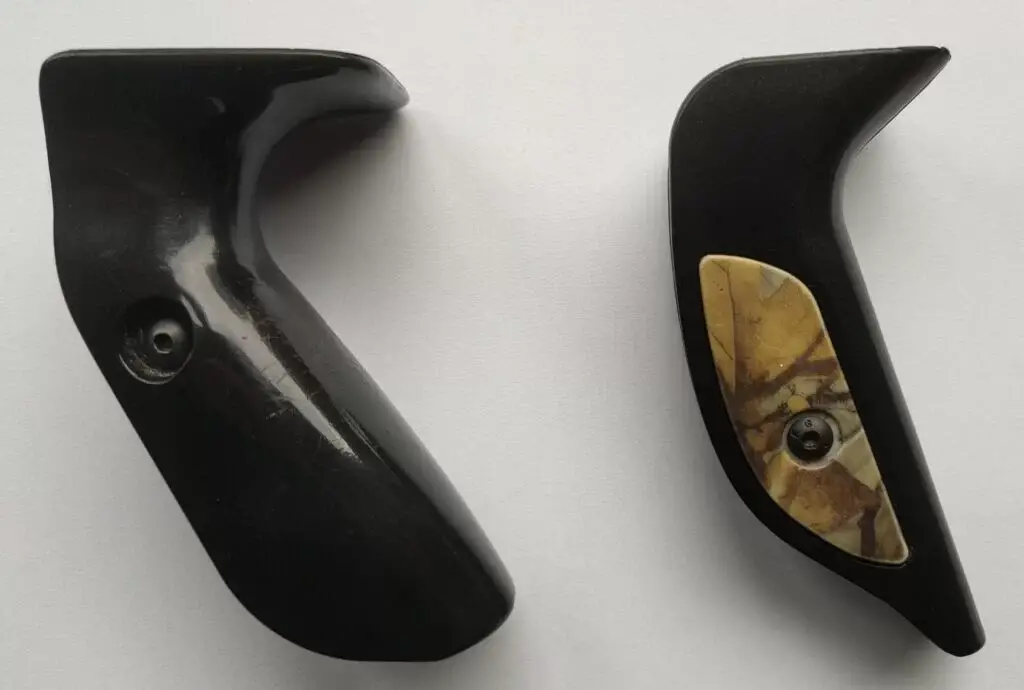
Steep vs flat grips
The first major factor that changes the feel of the grip is the steepness of the angle. Some bows have almost no angle, while others have a 70-degree angle or more. In general, the flat angled grips are designed for shooting with a high grip. You can often still shoot it with a low grip, but it’s less optimized for this technique.
Grips with a steeper angle allow you to keep your wrist straighter when you use the low grip technique. With more flat grips, you must bend your wrist farther, which tends to be less comfortable.
Skinny vs fat grips
Another factor that influences the feel of the grip is its width. Some grips have skinny scales while others are quite wide. The wider grips increase the surface area of the pressure points.
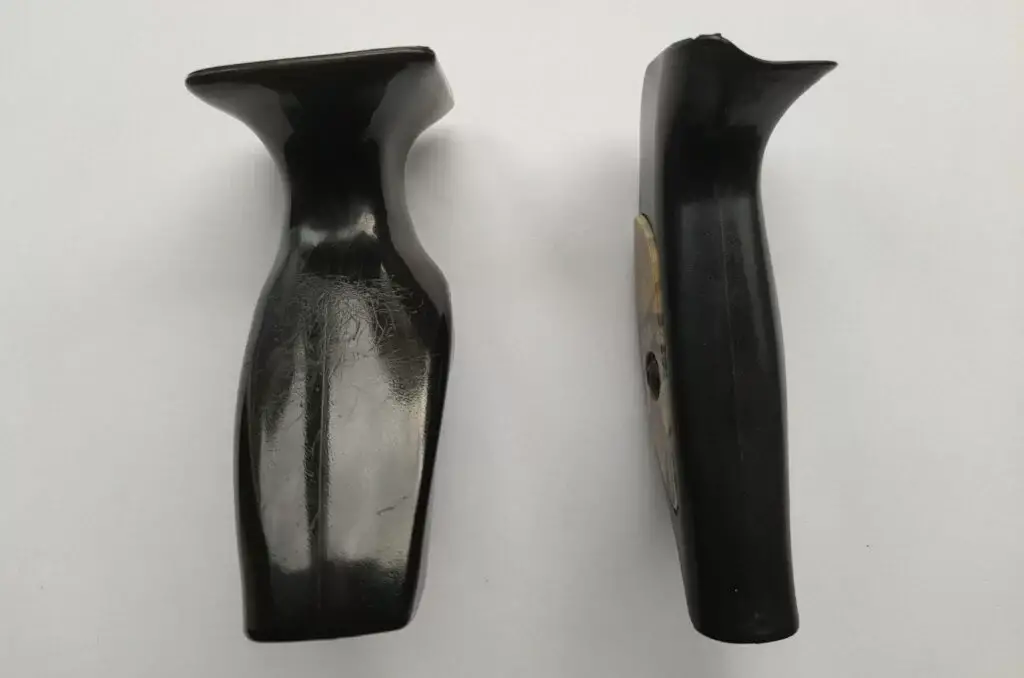
Skinny grips tend to work better for high grips while fat grips work better for low grips. Therefore, there almost all grips can be categorized into two groups.
The first group is optimized for the high grip technique. These grips have almost no angle and are rather skinny. Some archers even shoot their bow without a grip, which makes the grip even skinnier
The second group is optimized for the low grip technique. These grips have a steep angle and tend to be more fat. Some archers even make their own grips out of moldable materials to make it more comfortable.
Recurve and compound grips
When you look at the grips on compound bows, you will see that most of them all have a flat and skinny grip. Most recurve bows, on the other hand, have an angled fat grip. Therefore, you might wonder why that is the case. Although I can’t say it for sure, I will explain what I think the reason is.
Years ago, recurve archers used to shoot with skinny bow grips with a high grip technique. As I mentioned earlier, archers are getting more aware that comfort plays a big role. Especially when you are at full draw and try to aim your bow. Therefore, recurve archers shoot with a low grip because it’s more comfortable.
Since compound bows have a let-off it’s easier to keep the bow at full draw. Therefore, there is less for pushing in your bow hand while you keep the bow at full draw. I believe the discomfort is less of an issue with compound bows. That’s why you still see a lot of compound archers use the high grip technique.
I wouldn’t be surprised, however, if this changes soon. I think shooting a with the low grip technique also makes sense on a compound bow. I already see a lot of compound archers using this technique. Archers are constantly experimenting, and many old gear and techniques have fallen out of favor before.
Think for example of the upper and lower stabilizer. These fell out of favor when archers noticed that their effectivity was minimal, while they made the bow a lot more difficult to wield. Click here, if you want to read the full story.
Changing the bow grip
The grip of your bow has a great influence on how your bow feels. Luckily, you can easily change the grip of your bow if you don’t like it.
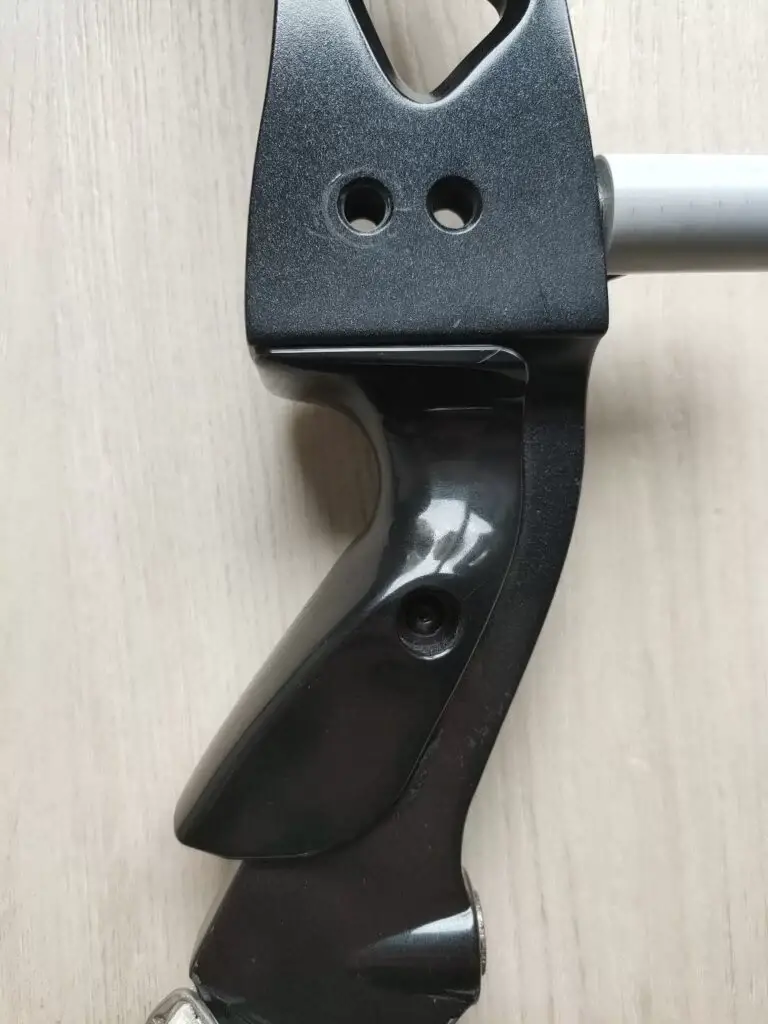
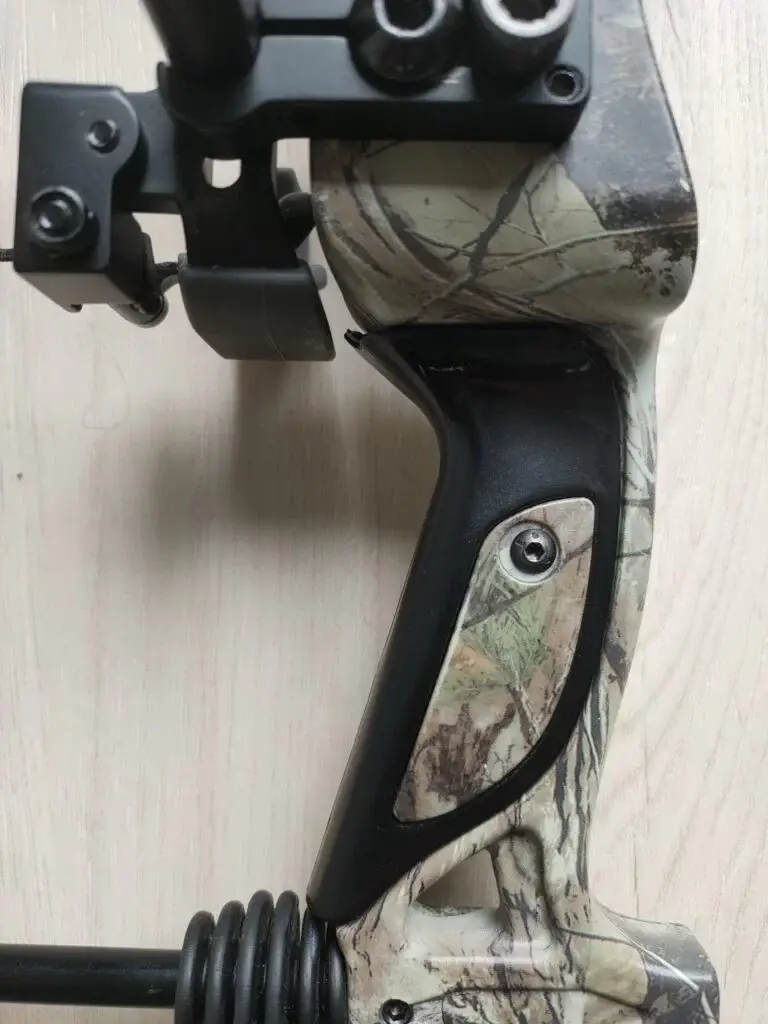
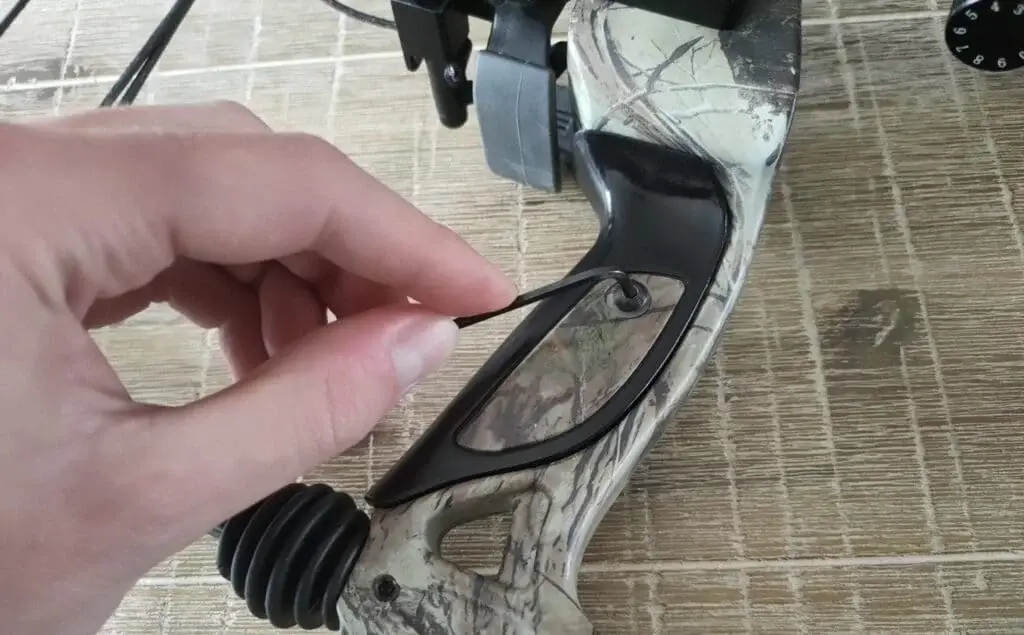
How to change the grip of your bow
On either side of the grip, you will have a hex screw, which you can undo to remove the grip. Once you have removed the grip, you can place another grip and retighten the screws. Luckily, the screws and the dimensions of the grip are standardized. Therefore, any grip you buy should fit on your bow.
Sadly, traditional and beginner’s bows don’t have removable grips. Therefore, I would recommend doing proper research before buying any of these bows. I have seen some beginner’s bows that have horrible grips.
Why you might change the grip of your bow
In general, it isn’t necessary to change your grip. Even when your grip type doesn’t match your grip technique as discussed earlier. In most cases, you can just shoot your technique with the grip even though it might not be ideal.
If you experience pain or have issues to find a consistent grip position. It might be worth trying a different grip. Otherwise, there are more important things to worry about.
Making a custom grip
Some archers want to customize the feel of their grip. Some use an old grip and some epoxy putty to do so. But you can also make one from a piece of wood. In my opinion, this looks and feels a lot better. In the video below, I will show you how to make a custom grip from a piece of wood.
Why you need a finger or wrist sling
Almost all archers shoot with a finger or wrist sling. Some experienced archers don’t wear an armguard because they notice that they never hit it. But especially experienced archers all tend to wear a finger or wrist sling. And this is with good reason.
Since you shouldn’t grip the bow tightly, it might fall because you couldn’t catch the bow after the shot. When your bow drops, it might be severely damaged, so you want to avoid this at all costs. You don’t want to be afraid of this happening because it might cause you to grip the bow tightly. So, a wrist or finger sling can give you peace of mind and help you improve your technique.
Read one of the articles below, for more information about wrist and finger slings:
The shot cycle
Gripping the bow is only one of the 10 steps of the archery shot cycle. To master the entire archery technique, make sure to check out the other articles too:
How to shoot a bow (an overview)
- Step 1: stance
- Step 2: nocking
- Step 3: grip the bow
- Step 4: grip the bowstring
- Step 5: maintain the right form
- Step 6: draw the bow
- Step 7: anchor
- Step 8: aim
- Step 9: release
- Step 10: follow through
Final words
There is so much to learn about archery especially about technique. All these minor things can greatly impact your scores. So click here, if you want to learn more, read one of my other articles on archery technique. I have written a full article about archery form and other specific techniques such as anchoring and mastering the clicker
Before you go, don’t forget to use the coupon code IYA if you are buying one of the courses from Online Archery Academy. As mentioned earlier, I highly recommend taking a structured course. As this will greatly deepen your archery knowledge and skill.
As I final remark I want to stress that shooting with a relaxed hand is by far most important. Although there is a lot of discussion on what the right gripping technique is, there is no discussion on the fact that a firm grip decreases your accuracy. It might feel counter-intuitive but it’s true.
If you have any questions, feedback, or personal stories you would like to share, please leave them down in the comments below. I will respond as soon as possible and send you an email with my reply. Let’s improve our gripping technique!

Tim van Rooijen
For as long as I can remember, I have always been fascinated by archery. First due to its historic significance but later because I like being outdoors. With this blog, I share my knowledge about Archery and how you can improve your shot. More about author…