If you buy your bow in a brick-and-mortar store, they will set it up for you. So, once you are back home, you can start shooting right away. But you do not get this luxury if you buy your bow online. You will have to completely tune the bow on your own. Sometimes you even must assemble it.
Although this might seem annoying, this is a great opportunity to deepen your skill in compound archery and get used to your bow. I have set up many compound bows, so I will explain how to do it step by step.
Assembling a compound bow – step by step
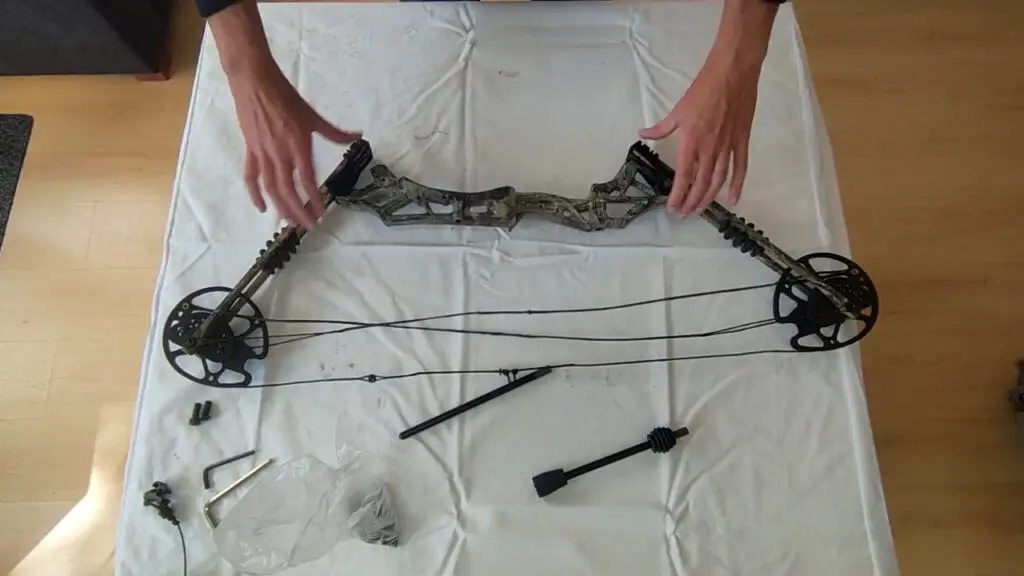
Some manufacturers and retailers ship their bow in parts, which means that you must assemble it yourself. This means that the bow arms are shipped dettached from the bow. The manufacturer should ship all the tools that you need with the bow. To assemble the bow, follow the following steps:
- Lay out the bow parts: put the bow parts roughly in the shape of the bow, see how they should be assembled, and check if you have all parts. Most compound bows have two cables and one string. So, make sure that you have them all ready.
- Attach the string and cables: put the string in the cam grooves and on the string post. Now attach the cable to the cable posts and make sure that they are not tangled.
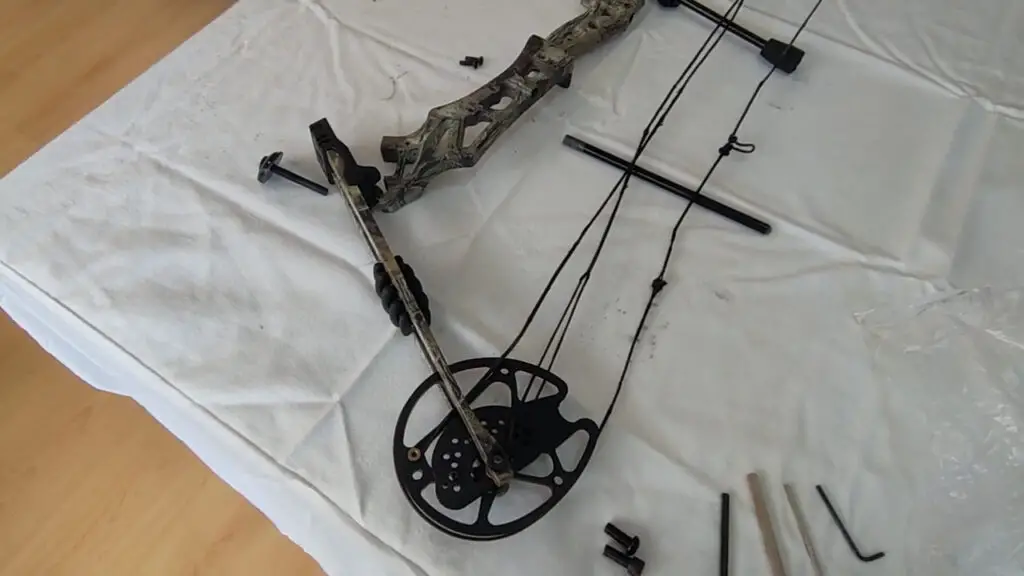
- Put the limb bolts in place: your bow should come with two large bolts which attach the limbs to the riser (the middle part of the bow). Screw those with a few turns in place
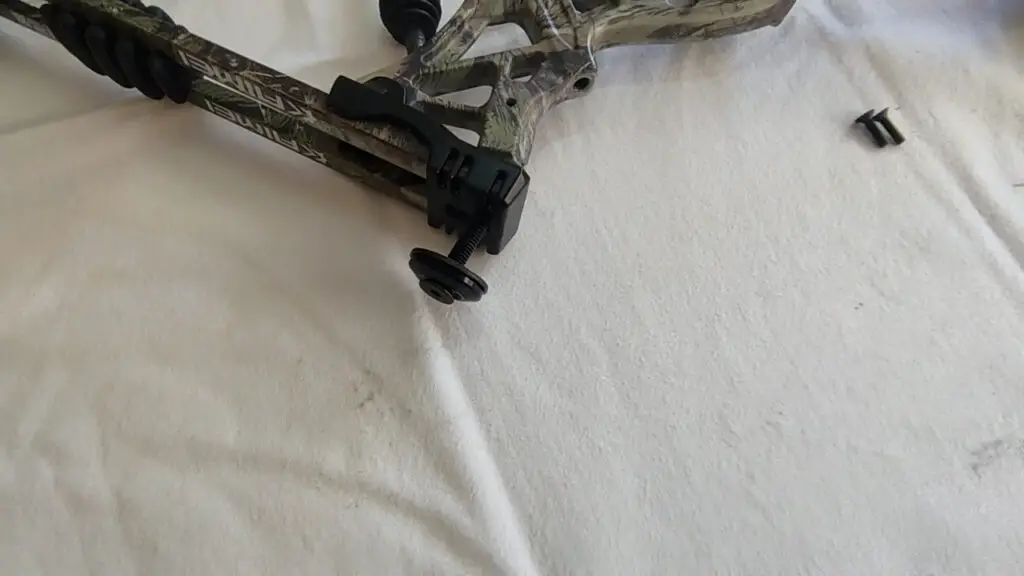
- Check if everything is in the correct place: before you start tightening the limb bolts, make sure to do another check to see if everything is in the correct position. Make sure that the string and cables are still on the string posts before you tighten the bolts.
- Tighten the limb bolts: very slowly tighten the limb bolts. Do 2 or 3 turns and move to the other limb. You will slowly see that the string and cables are getting under tension. Regularly check if everything is still in the correct position. Tighten the limb bolts until the string and the cables are fully straight and tensioned. There shouldn’t be any slack.
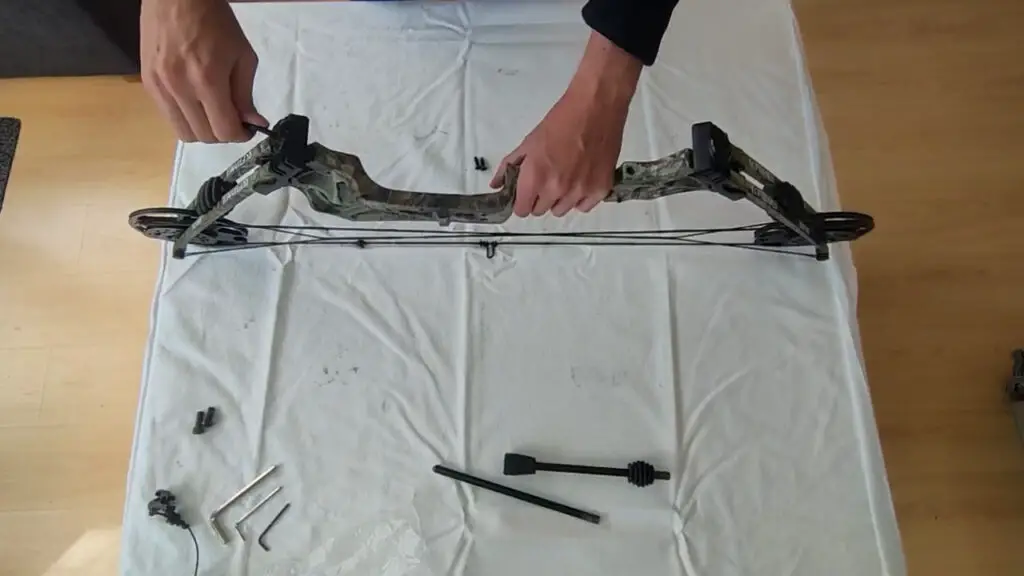
Now you have successfully assembled your bow, you can move to the next step. If you also want to learn how to dissemble a bow, you can read my detailed article below:
How to disassemble a compound bow
Tuning the draw weight
Some bows offer a huge range of draw weights, such as 30 to 70 LBS. If you already know the exact draw weight you want, you can read on. If you are not sure yet, I recommend starting with the lowest draw weight. This helps you to learn the technique and get used to the bow, without having to worry about your muscle strength. You can easily change it later.
If you know the exact draw weight you want, you can measure it with a bow scale. If you do not have a bow scale yet. I highly recommend buying one. Measuring the draw weight without one is extremely difficult. I can recommend this generic bow scale from Amazon. I bought it a few years ago and it works like a charm. Read this article for detailed instructions on measuring your draw weight with a bow scale.
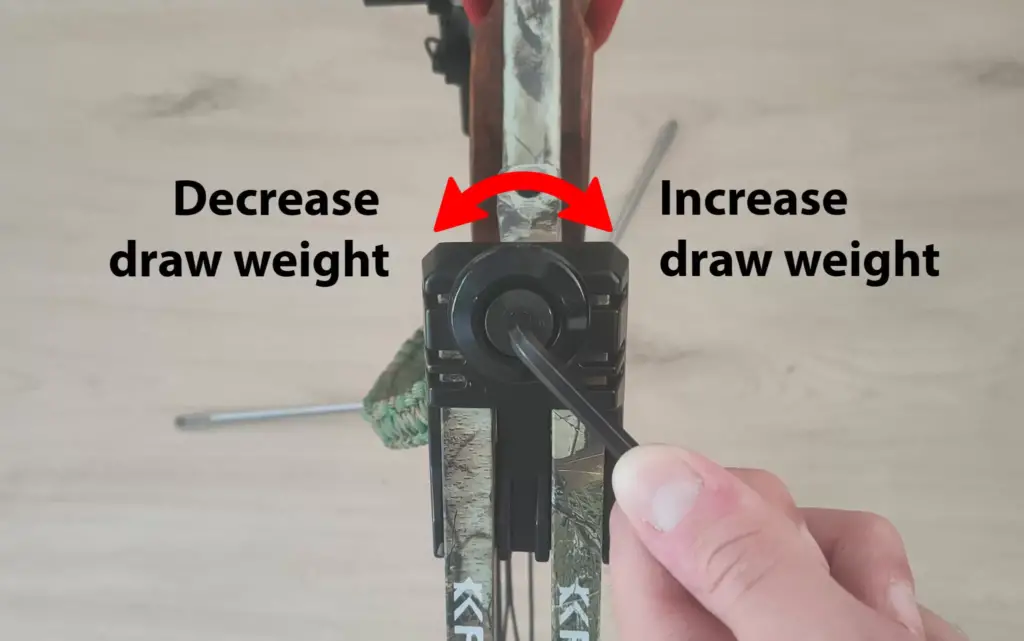
To adjust the draw weight, you turn the limb screw (also known as the tiller screw). To increase the draw weight, you must tighten the screw, to decrease the draw weight you must loosen the screw. Make sure to tighten or loosen both the upper and the lower screw equally. Otherwise, your tiller will be off.
I have written a detailed article on how to configure the draw weight where I give additional tips and explain some more technical details. So if you have enough time, it’s definitely worth a read:
Adjusting the draw weight on a compound bow – everything you need to know
Tillering
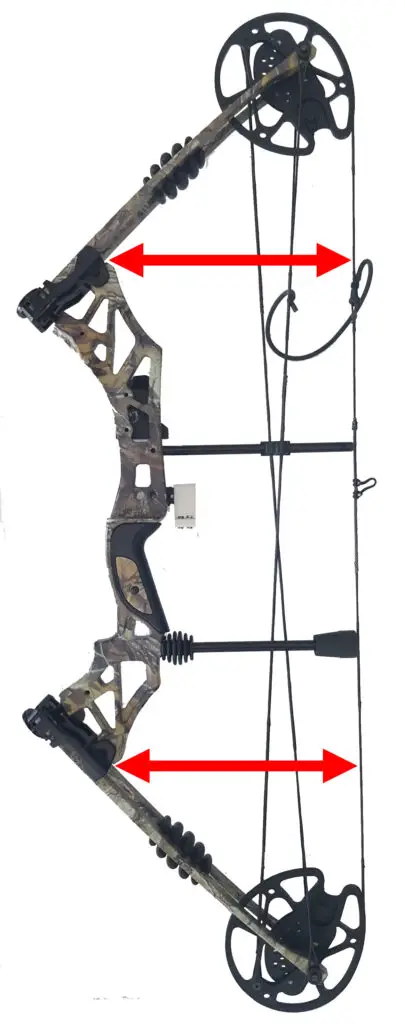
Setting the tiller on a compound bow is relatively straightforward. What we need to do is make sure that the tiller height of the upper and the lower limb are equal. The tiller height is the distance between the end of the limb and the riser. You can see that illustrated below:
The easiest way to measure the tiller height is to use a bow square. If you do not have a bow square yet, I can highly recommend this bow square from easton. With the bow square, you simply put the top of the T in the deepest part of the limb and hold it in a straight line to the string.
Take your measurements and check if they are equal. To increase the tiller height (the distance between the string and limb), you need to loosen the limb bolt. To decrease the tiller height, you need to tighten the limb bolt. Make your adjustments and check if it has the intended effect. It can take a few tries before you get it perfect.
Make sure to read my detailed article if you want to understand why configuring the tiller height is important. It’s worth a read if you want to deepen your archery knowledge.

Tuning the draw length
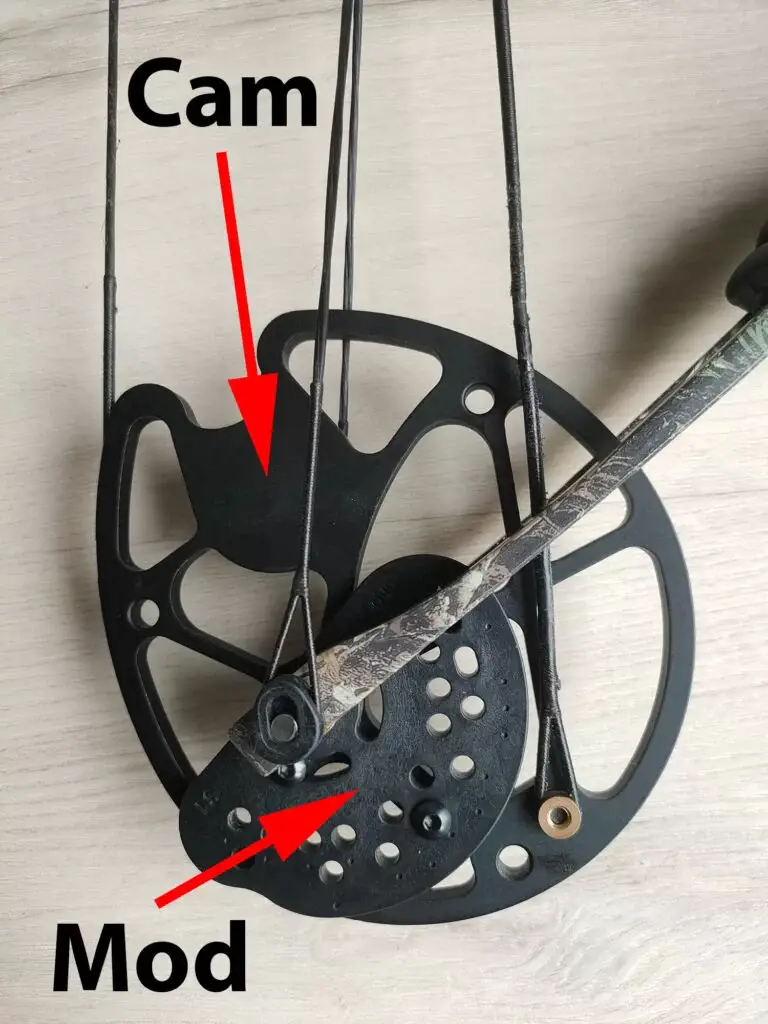
Depending on your bow, you can either change the draw weight, by configuring the mod, replacing the mod, or replacing the cam. If I would explain all three methods, this article would be way too long, so I will only focus on the most common system. If you discover that this doesn’t apply to your bow, make sure to read my detailed article listed below:
How to adjust the draw length of a compound bow
If your mod has a lot of precut holes and 2 adjustment screws, you can configure the draw length with the mod. The precut holes correspond to different draw lengths. Some manufacturers print the draw length per hole on the mod. Other manufacturers use labels that allow you to search which hole corresponds to which draw weight.
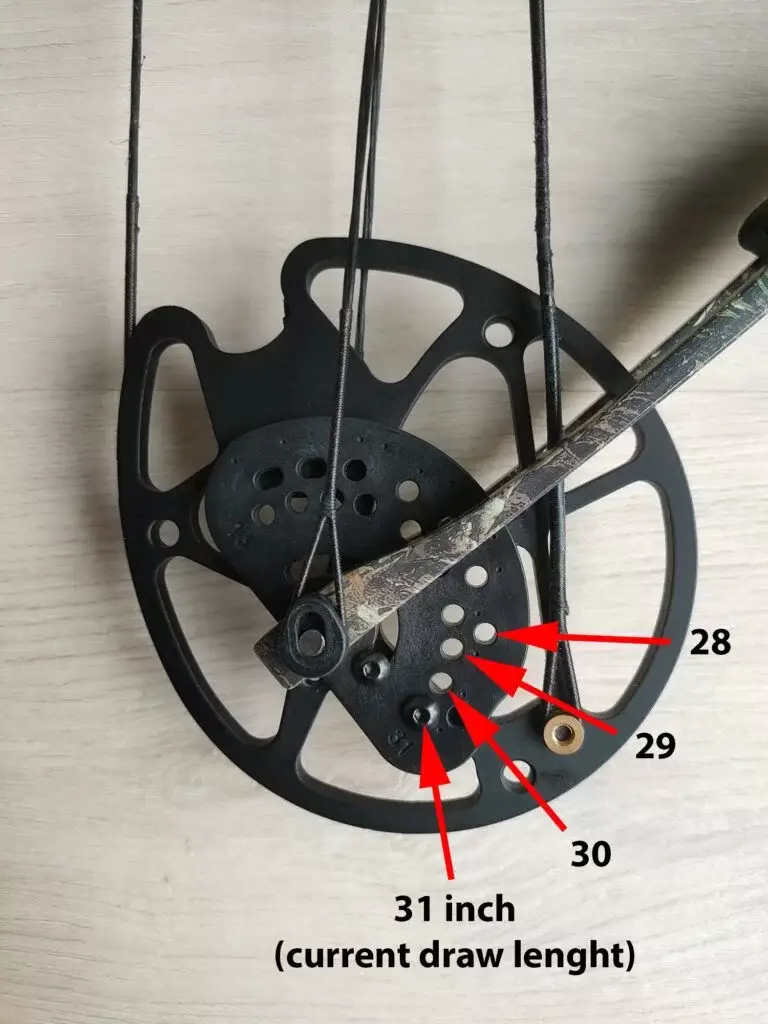
The exact configuration differs per bow, but what you need to do is loosen the screws and move the mod. Once it’s in the correct position, you can tighten the screws. Make sure that they are tight, they can fibrate loose if they are not screwed in properly.
If you have a mod on both your upper and lower limb (which is the case with most compound bows), make sure to configure them both! Otherwise, your bow will act erratically when you draw it.
Configuring the arrow rest
Regardless of the arrow rest you are using, the first step is always to center the arrow rest. This makes sure the arrow is straight behind the string.
Center shot
To make your arrow rest center shot, you follow the steps below:
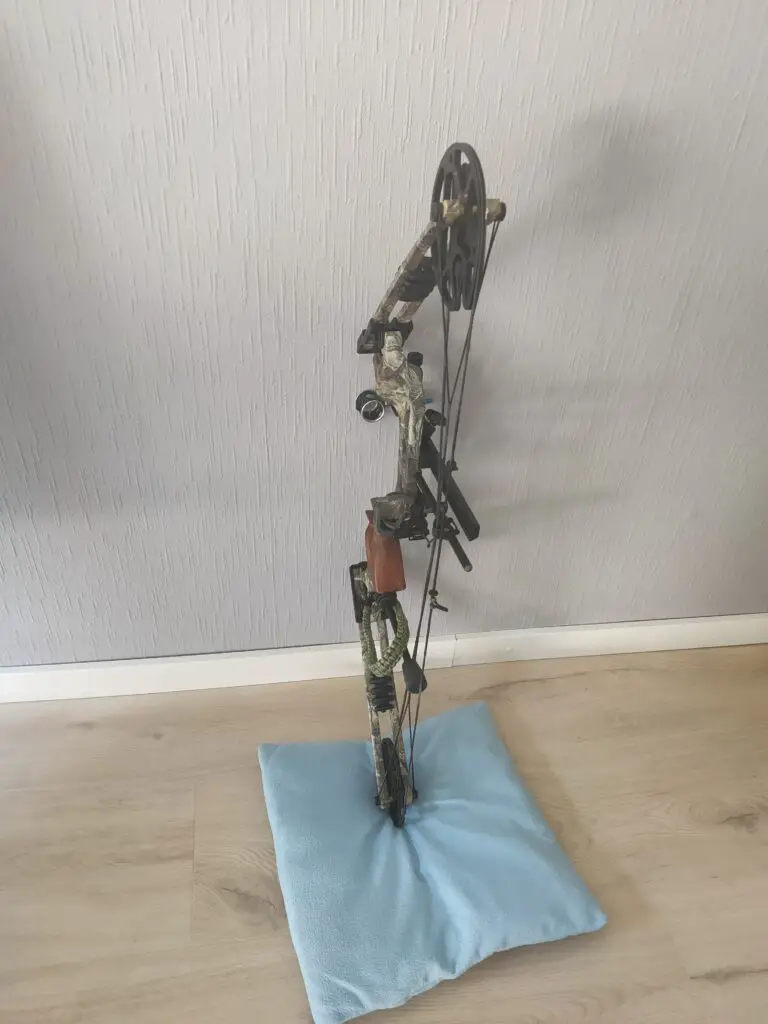
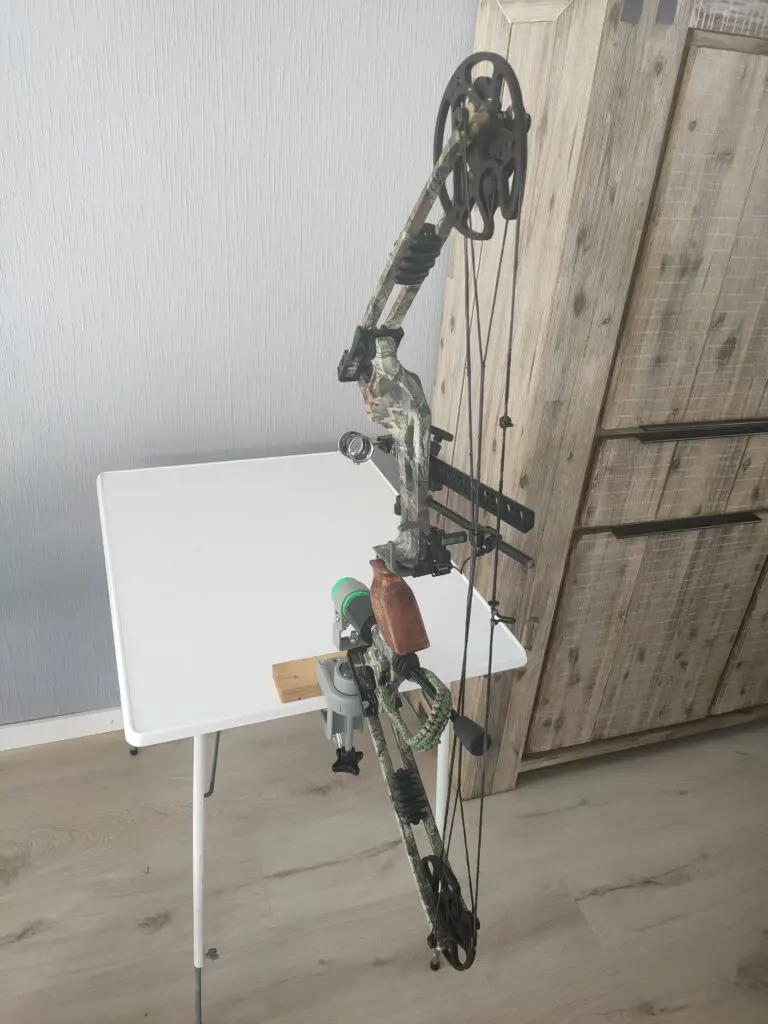
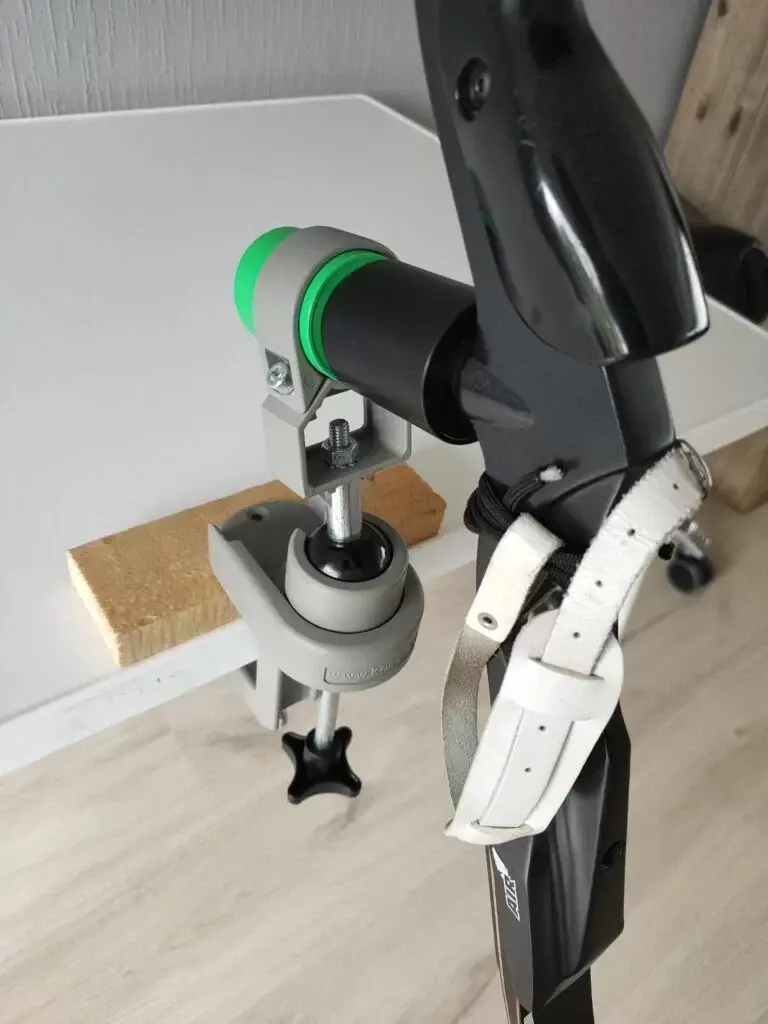
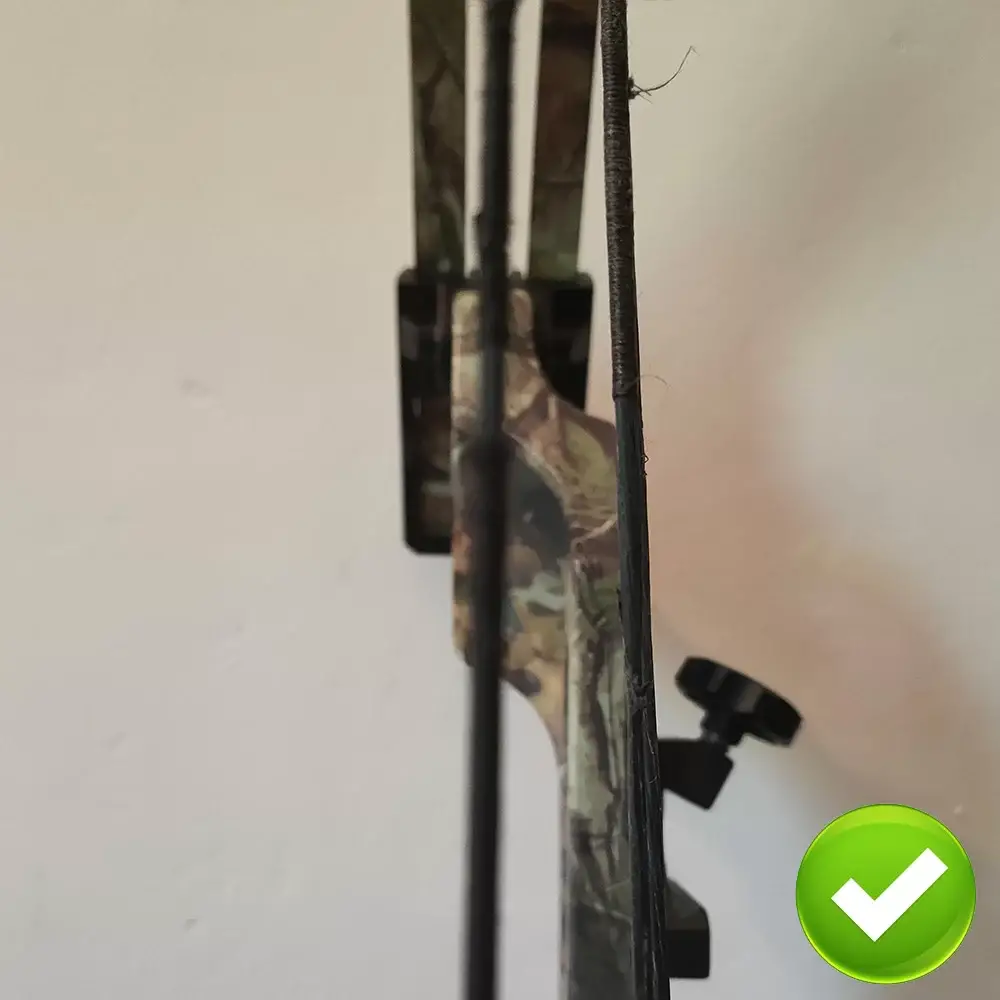
Step 1: find a way to prop up your bow vertically with an arrow on the arrow rest. You can either lean it against a wall, ask someone to help you, or use your knee. It’s important that the bow is relatively stable and that you can look at the arrow from a distance. If you are an archery nerd like me, you might want to buy a bow vice. This device allows you to clamp your bow to a table, which is useful for tuning, maintenance, and repair.
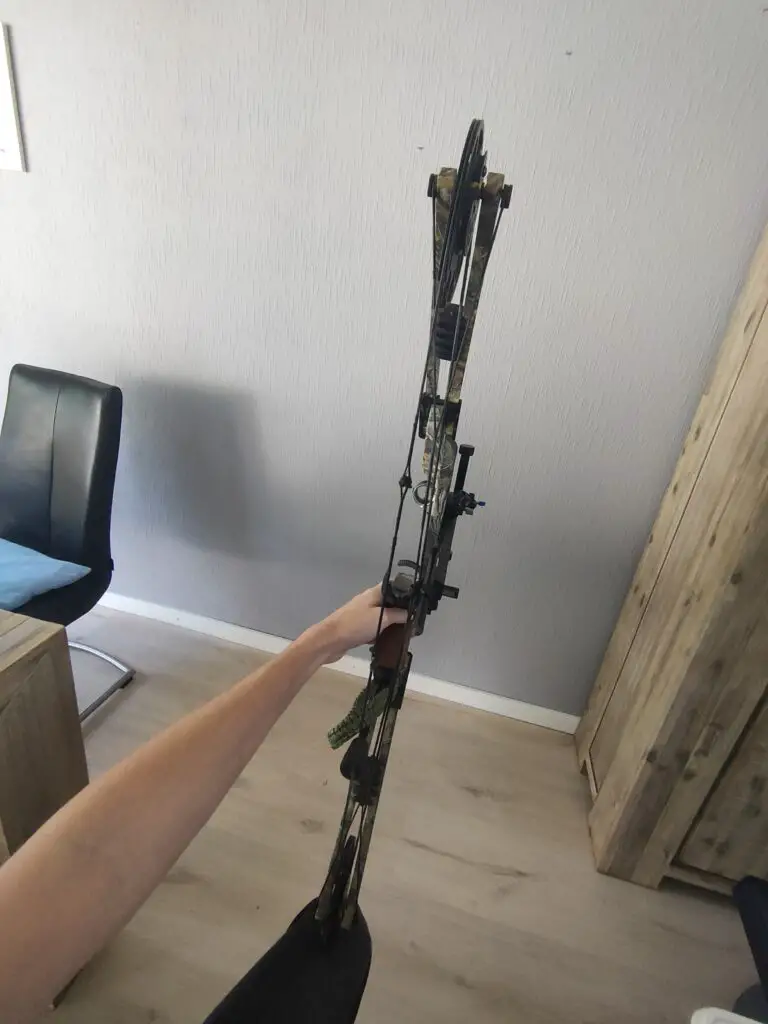
Step 2: take a few steps back and center the string on the limbs. Make sure to keep very still while moving to the next step.
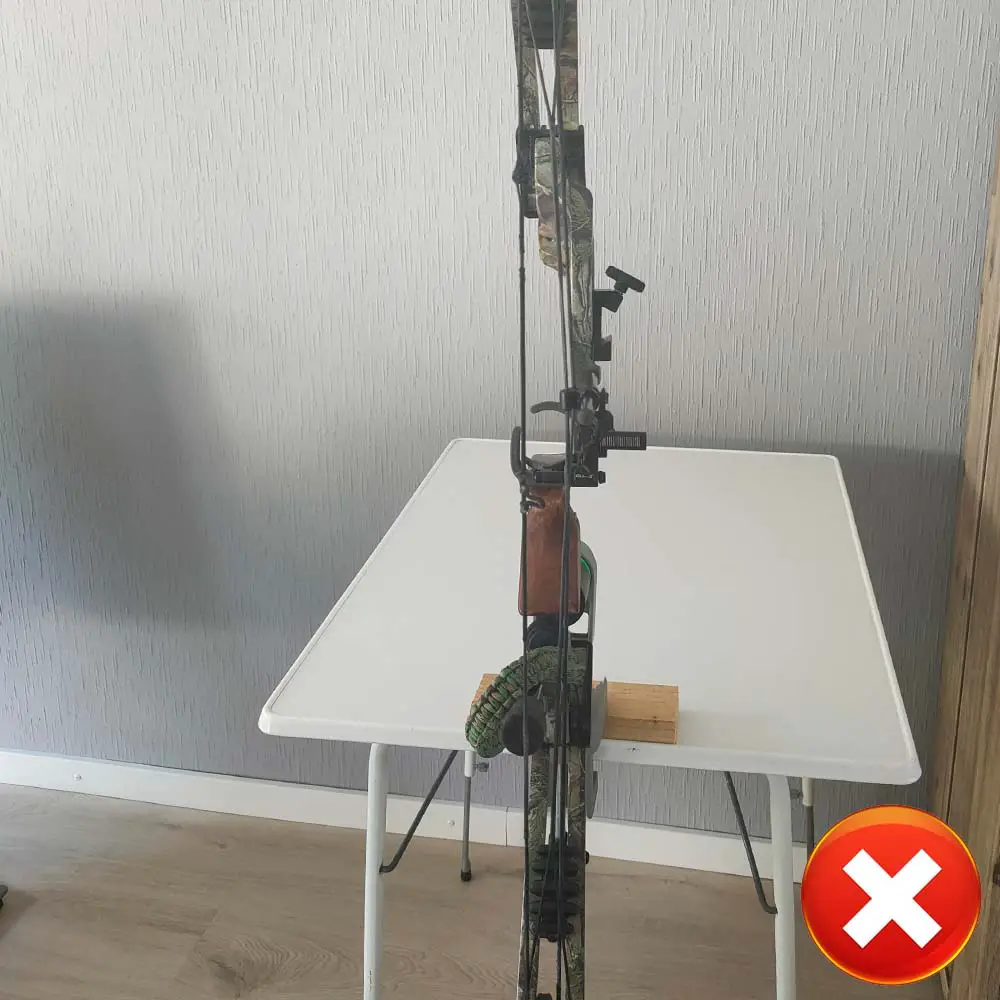
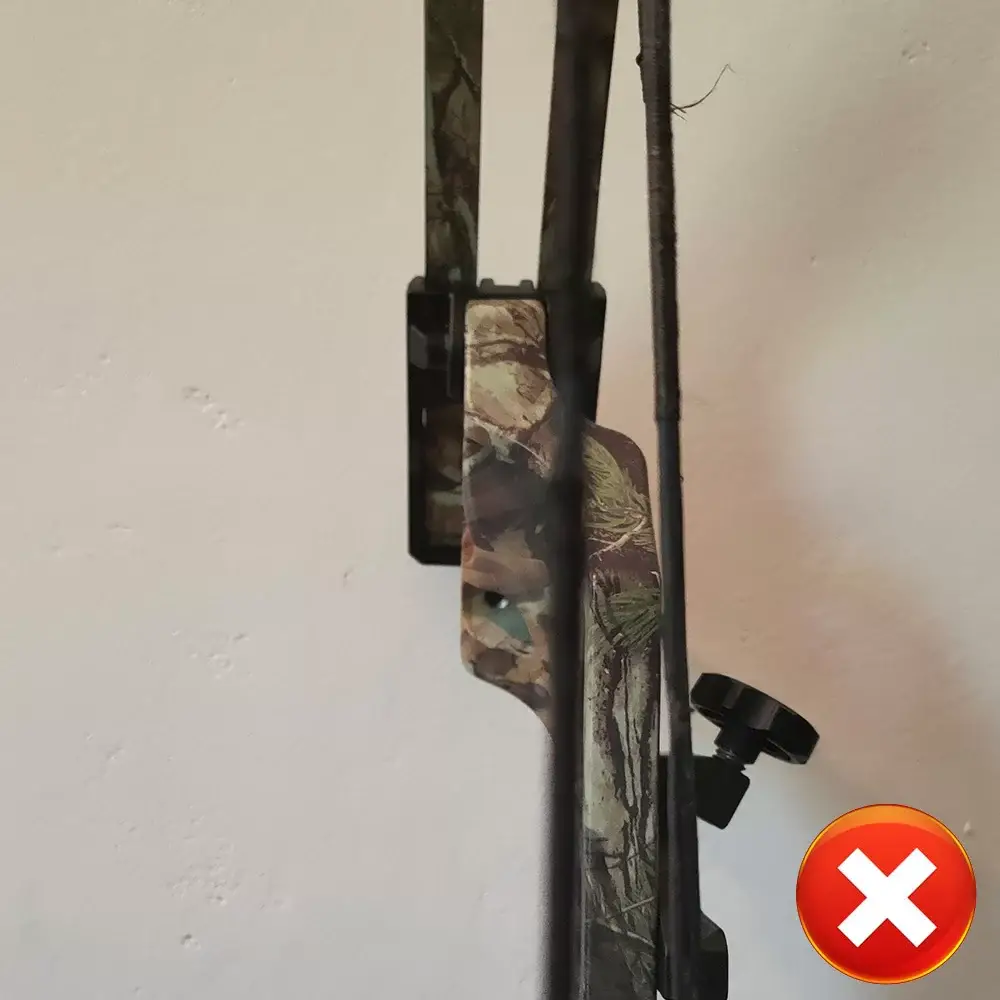
Step 3: now you can check the alignment of your arrow rest. If the arrow rest is correctly aligned, the arrow should be in the center of the string. It might even disappear completely behind the string. If that is the case, you know your arrow is center shot. If not, you should follow the next step.
Step 4: how you should change the left-right alignment on your arrow rest differs per arrow rest. Some advanced arrow rests have dials that allow you to change the left-right alignment by turning these dials. Most cheaper arrow rests, feature a locking screw. If you loosen this locking screw you can move the arrow rest by hand.

Step 5: once you made your adjustments you should repeat this guide from step 1, to make sure that the arrow is centered correctly.
Drop-away arrow rest
If you have a drop-away arrow rest, you also need to set the activator cord. This cord activates the arrow rest to go up and down. You need to make sure that the activator cord is configured in such a way that it’s up at full draw.
Drop-away arrow rests are quite complicated because there are two systems that work in opposite directions. Most arrow rests are down by default and need to be pulled up by the activator cord. But some more expensive models work exactly the other way around. You need to pull the activator cord to drop it down.
If you have a drop-away arrow rest, I highly recommend reading the article below. There I explain in detail how to attach the activator cord and make sure that the timing is correct.
Setting up and tuning a drop-away arrow rest
Tying the D loop
Once again, you will have to use your bow square. You can also improvise this with a ruler, but that will make it much more difficult to be precise.
Before you can tie the D-loop, mark the position where it should be. There is a very technical way to do this, extremely precisely. But to make it easier, I will discuss the simple way to do this. If you want to know all the technical details, make sure to read this article.
Here is a step-by-step guide on marking your D-loop positions.
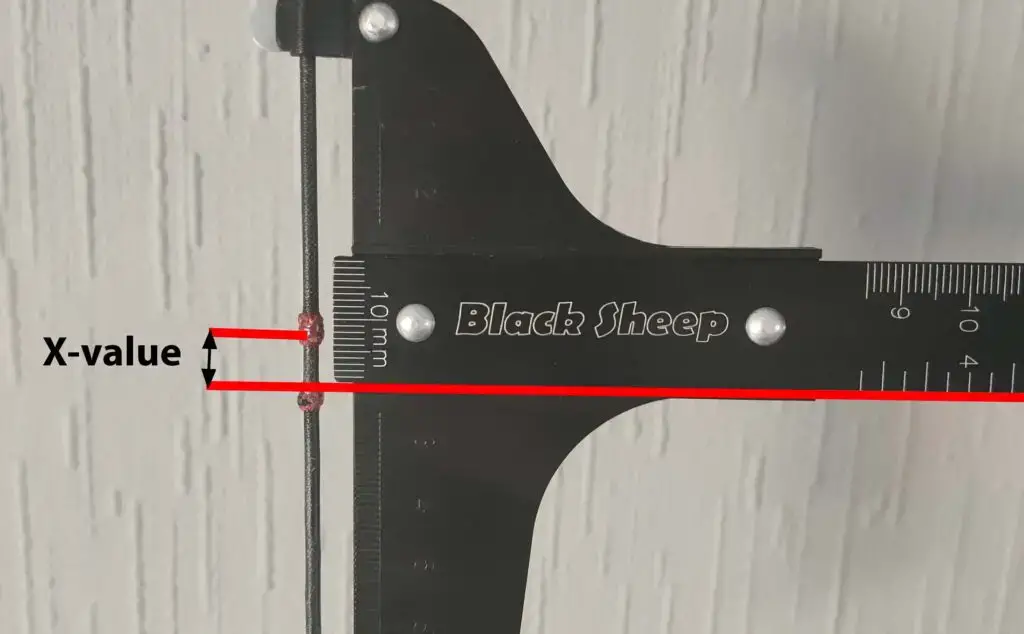
- Attach the bow square to the string and put it on the arrow rest: if you have a drop-away arrow rest, make sure that it is up. You will have to keep it up during the next steps.
- Put a mark on 5 mm of the x-value (.15 inches): this is the distance from the bottom of the arrow rest to the string in a vertical line
- Remove the bow square and attach a nock to the string: if you have a loose nock laying around, you can attach this to the string. This will make it much easier for the next step, but otherwise you can also use a whole arrow. Make sure to place the nock just below your marking.
- Put the second mark below the nock keeping ½ nock width distance: the D-loop should not pinch the arrow, therefore you must keep some distance between the two knots.
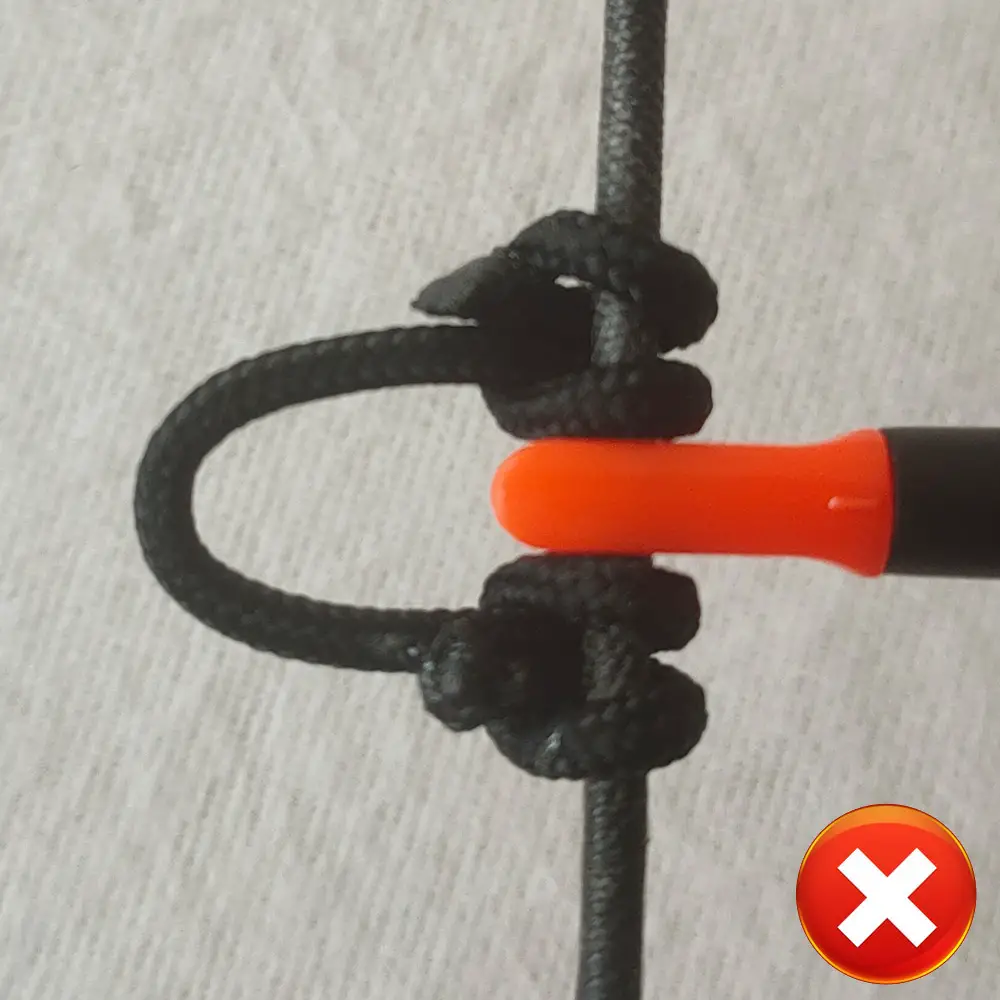

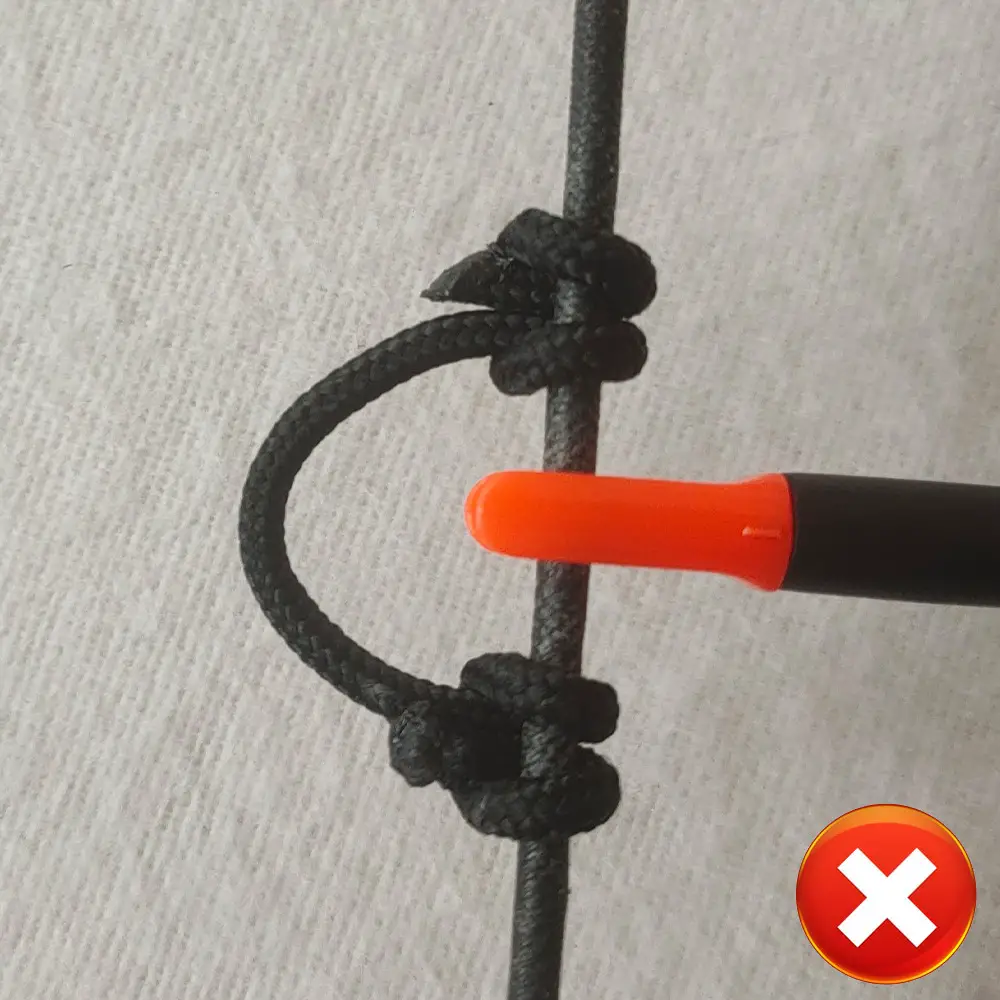
Your marks show the distance between the two knots that you should keep. So, you must tie your D-loop over these marks. To tie your D-loop follow the instructions from the video below:
Make sure to buy proper D-loop rope. Most other ropes are not the right thickness or stretch a lot. Some people try their luck with paracord, but this type of rope stretches a lot.
Setting up the sight
Depending on your sight, you might have to assemble it first and align it. This makes sure that the vertical axis of your sight is in line with the vertical axis of your bow. You can see how to do this in the video below:
Once you have assembled your sight and centered the vertical axes, you can start to center the sight, by following the steps below:
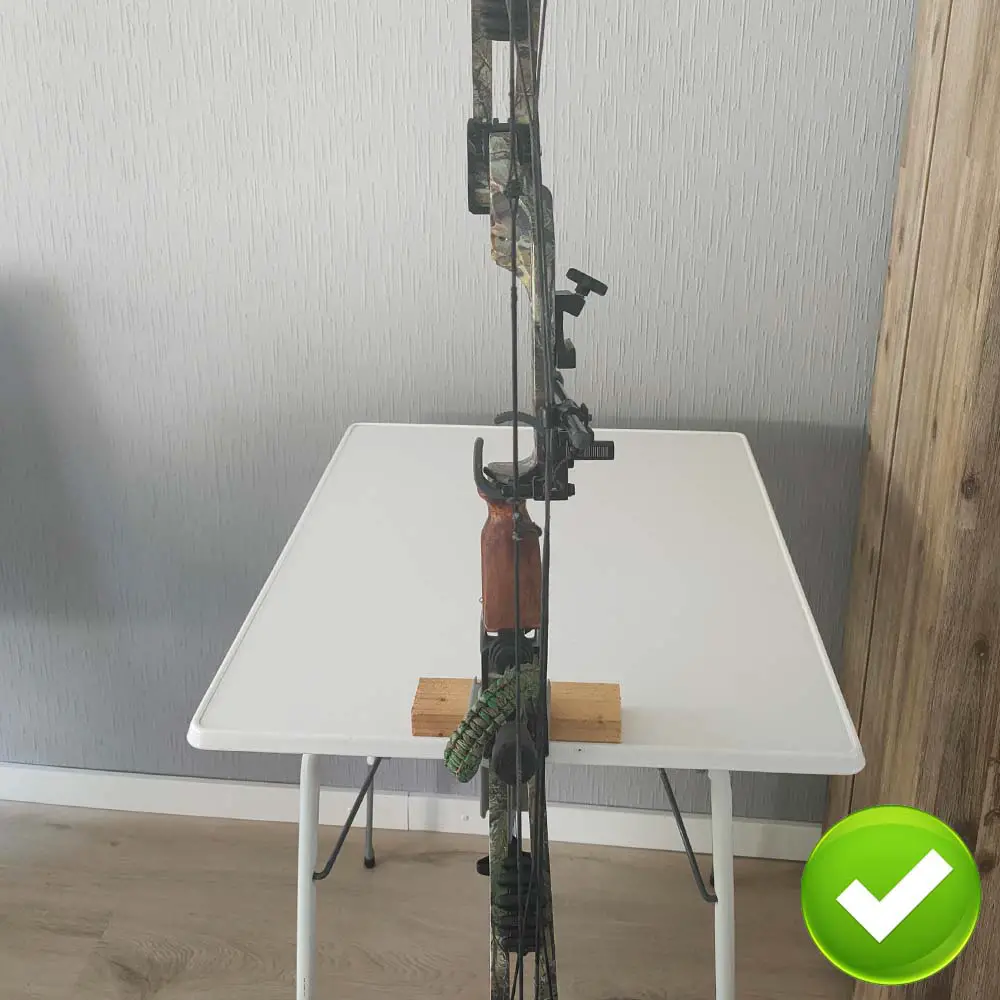
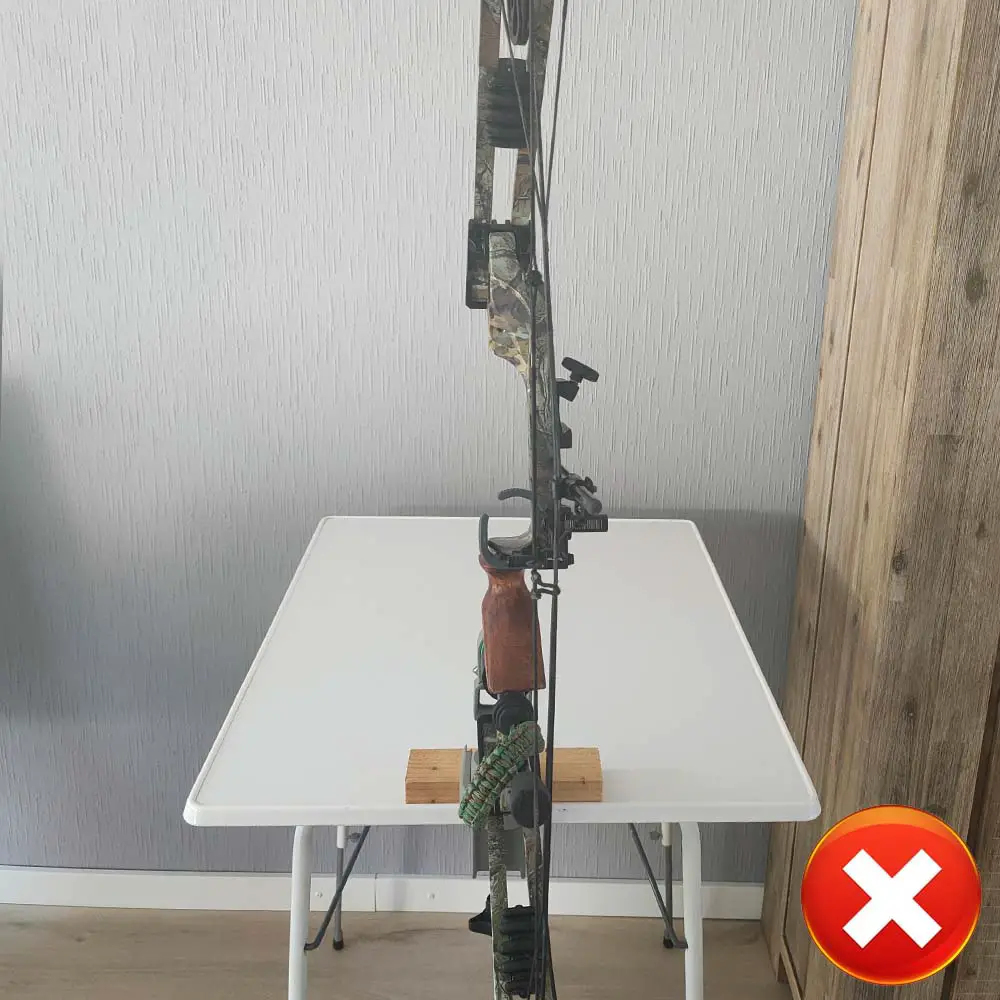
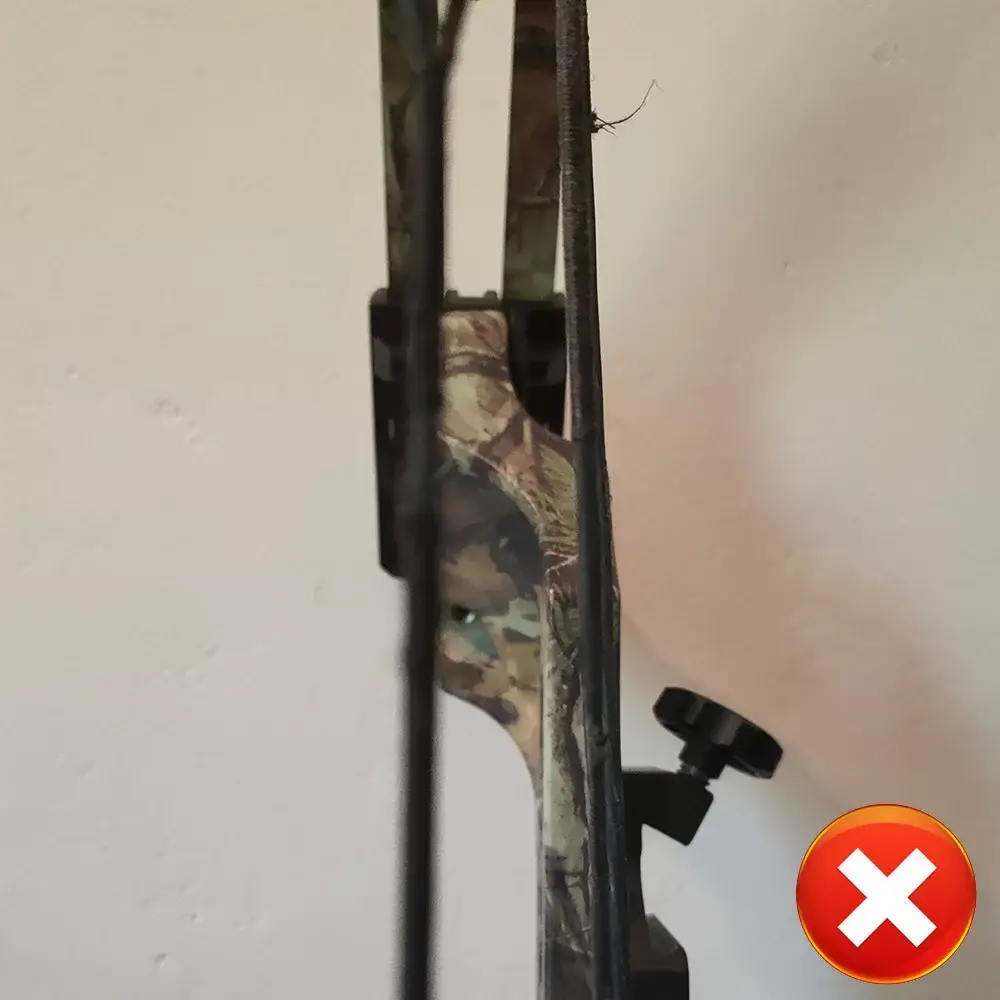
Step 1: prop up your bow, which allows you to look at your bow from a distance. You can use a bow vise for this, but if you are creative, you can also use other methods. For example, you can tape your stabilizer to the table to get the same effect. Or you can balance the bow against a wall. The bow must be stable when you are going to the next step. Therefore, you can’t ask a friend to hold it for you.
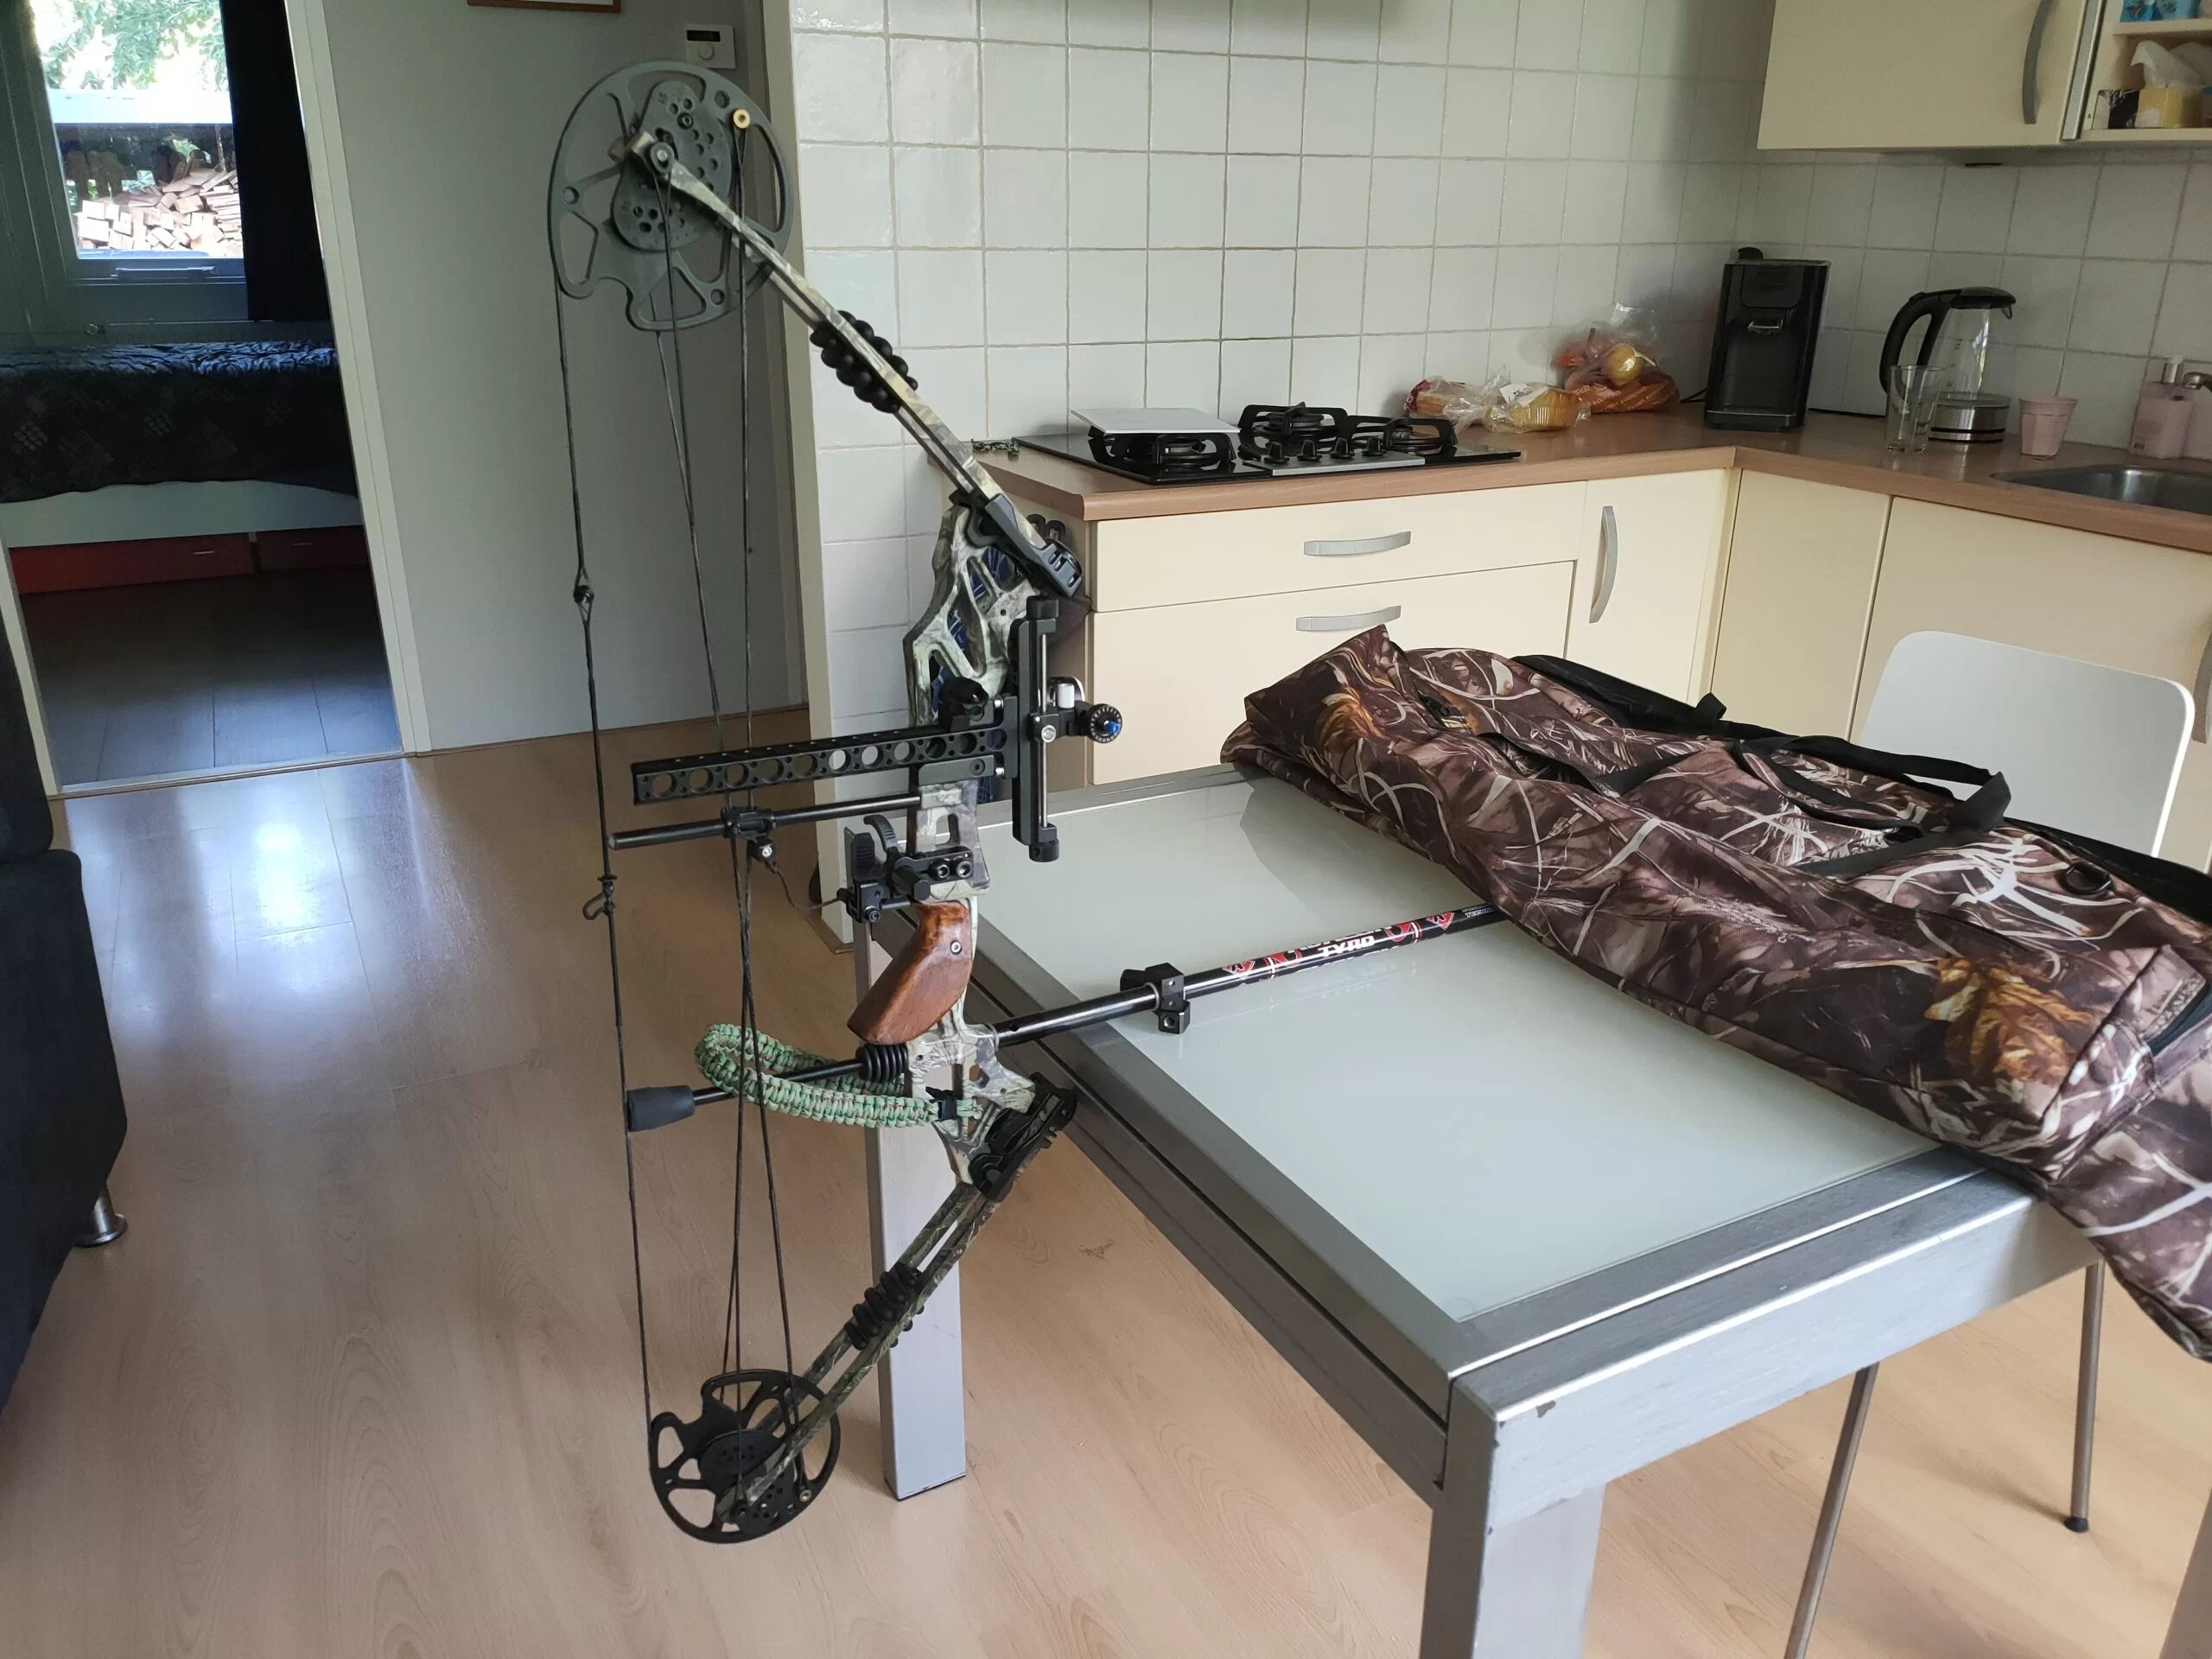

[bow in bowvice] [bow taped with stabilizer] [bow balanced on the floor] (similar to https://improveyourarchery.com/how-to-adjust-a-bow-sight-a-complete-guide/#How_to_set_your_sight_center_shot but with a compound bow)
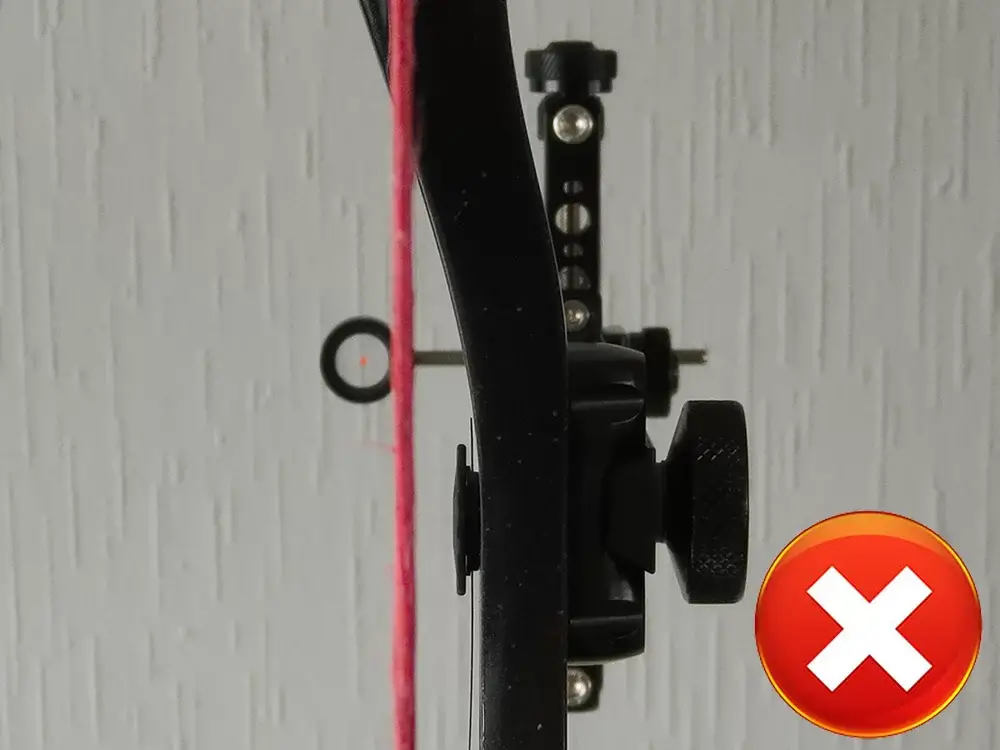
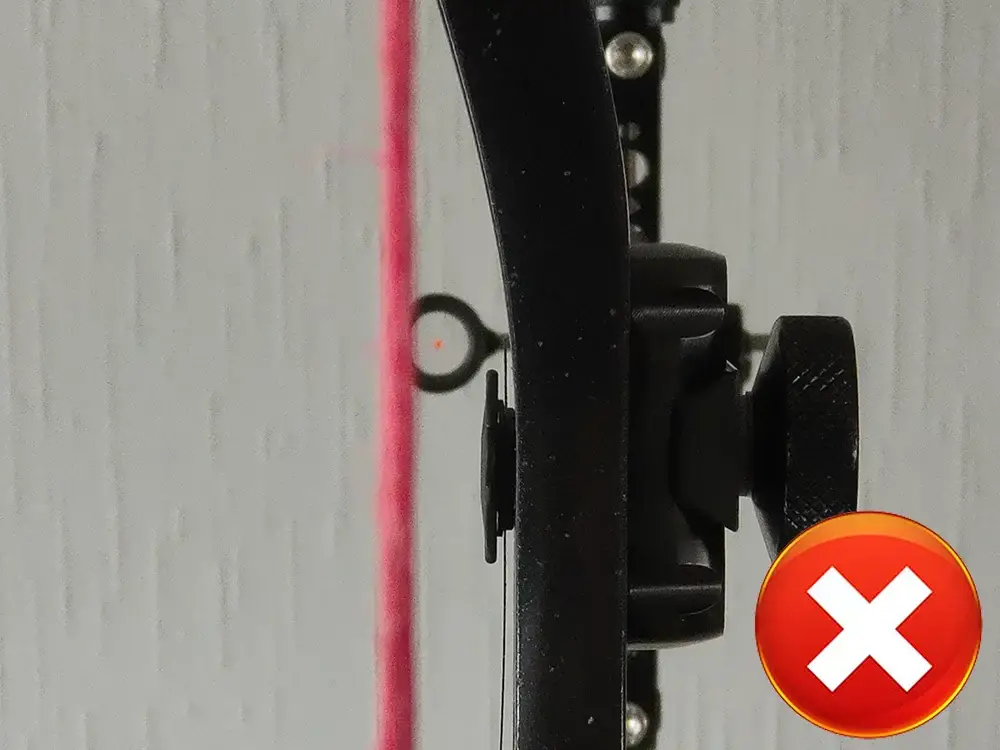
Step 2: stand a few steps away from the bow and look at the holes containing the limb bolts. You need to align these with the string by moving your head right and left. Once you find the correct position, you need to stay very still.
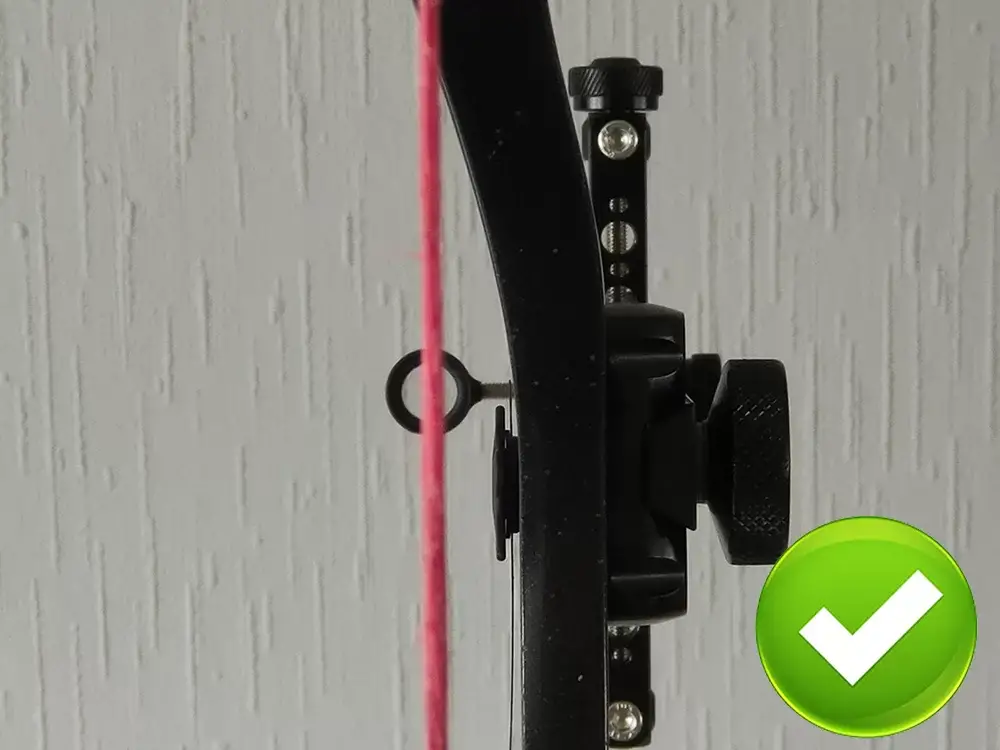
Step 3: look at the sight and check if it’s centered. The sight pin should be exactly in the center of the string. If this is not the case, you need to adjust the sight to get it in the center. This can take a few tries, before you get it just right.
If you have a single pin sight, this is all you need to do. If you have a multipin sight, this process becomes a bit more complicated. That’s why I have written a full guide on configuring and tuning a multipin sight, which you can read below:
How to sight in a multipin sight
Adding the peep sight
The final step is adding the peep sight to the string. Most compound bows you buy online already have a peep sight, but you will have to add one yourself on some bows. So, if that is the case for your bow, here is a step-by-step guide to set up your peep sight:
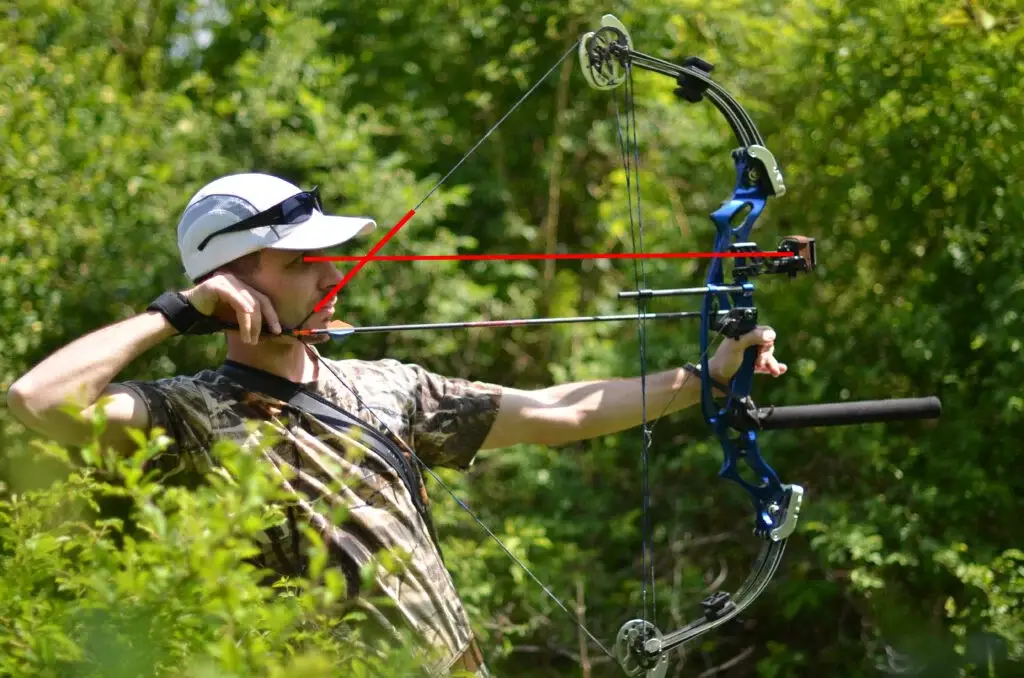
1. Determine the position of the peep sight: draw to your normal anchor point and use a piece of sticky tape where the sight meets the string in your field of view. It can take a few tries to get this right, but I recommend checking it a few times as it is difficult to adjust it later.
2. Release the tension from the string: if you have a bow that can be easily disassembled, you can use the limb bolts. But in most cases, you will have to use a bow press. Here is a link to the bow press I use, and you can read my full review here. In the video below, you can see how I am using the bow press.
3. Split the strands of the string: split the strands of the string evenly. There should be an exact even number of strands on each side.
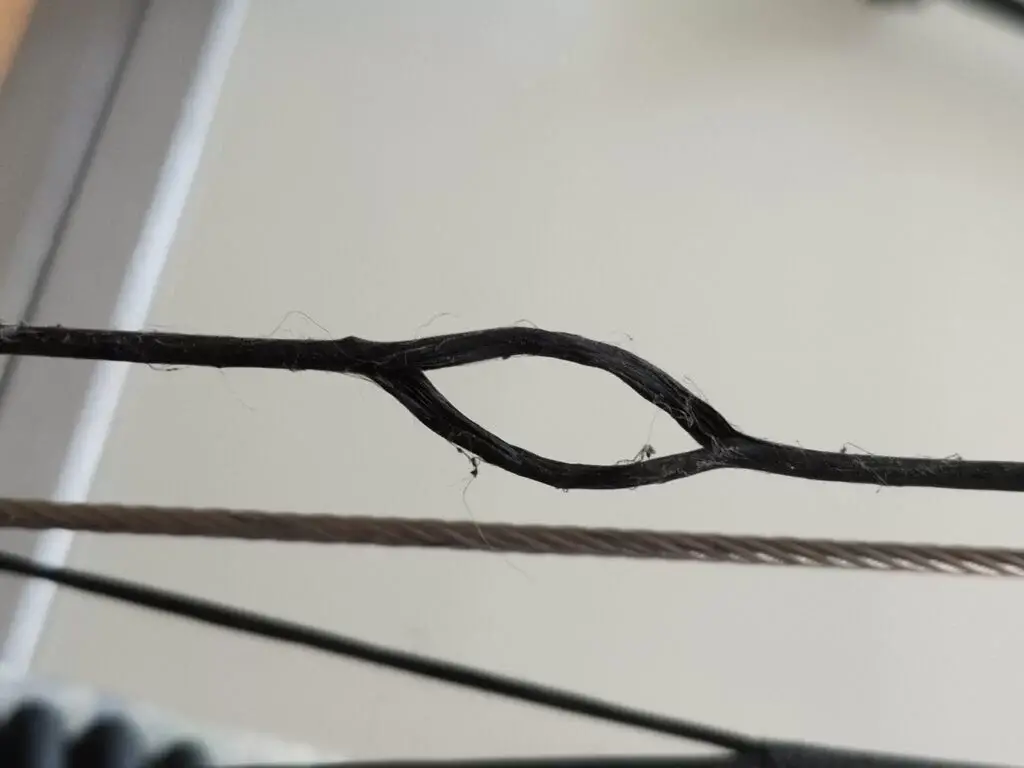
4. Put the peep sight in the gap of the string: make sure that the strands of the string are secured in the groves of the peep sight. You can pull on both sides of the string to keep the peep sight in place for the next step.
5. Tension the string: we need to put the string back under tension. So, tighten the limb bolts or remove the bow press.
6. Tie the peep sight down: although it might seem like we are done, we still must tie the peep sight down. There are multiple ways to do this, but I prefer the method you see in the video below:
7. Test your peep sight: draw your bow and check if the peep sight is oriented correctly. It could be that the peep sight rotates during the draw. If that is the case, you can read this article for additional guidance.
If you need more information on how to set up and tune the peep sight, make sure to read my detailed article below:
How to properly attach a peep sight
I also explain how to add an alignment tube, so I highly recommend reading that guide if you have an alignment tube on your peep sight.
Next steps: paper tuning
The steps we have taken in these articles ensure that your bow is tuned on a good baseline. From here you can finetune your bow. There are multiple ways to do this. For example, you can analyze the flight path of the arrow, or you can analyze the behavior of the bow. How does the bow move when the arrow is shot and does the arrow fly straight?
This is very complicated, which is why you can only do this when you are an expert. Also, to shoot at a lower competitive level, it’s also not necessary.
Another way you can tune your bow is with paper tuning. Also, this technique is quite advanced, and you must be very consistent with your shots before paper tuning makes sense. So, if you are just getting started, I would skip this step.
I haven’t written an article explaining paper tuning just yet. But if you want to give it a try you can read this article, which explains how to do this.
Q&A
Below I discuss some of the frequently asked questions I get regarding tuning a compound bow.
Is it important to tune a compound bow?
It is essential that your compound bow is configured to your length and strength. If the bow is not configured to the user, it will be extremely difficult for the archer to be accurate. Finetuning the bow is less important, if the archer shoots very accurately the difference will be notable but not extreme.
How do arrows affect the tuning of a compound bow?
Many people that are new to the sport of archery don’t know that the stiffness of the arrow needs to fit the bow. In short, a compound bow with a high draw weight needs a stiffer arrow than a compound bow with a low draw weight. Therefore, if you change the draw weight of the compound bow, you might also need to invest in some new arrows. For more information, on how to choose the right arrows, make sure to read my detailed article below:
How to select the right arrows for your bow
The sight doesn’t shoot straight when it’s center shot, is that a problem?
Some archers focus too much on keeping their sight center shot. It’s important to note that center shot is supposed to be a solid starting point of your sight. Ideally you want the sight as close to center shot as possible, but you might have to adjust. Since the conditions are different for each archer, having the sight center shot doesn’t always work.
Final words
I hope this article helped you to tune your bow. Make sure to read the other articles, I linked throughout this article to learn more about tuning your bow. I tried to keep this guide as short as possible, so there is much more to learn.
If you are just getting started, you might be overwhelmed by the technical complexity of a compound bow. That’s why I recommend taking small steps. When you have put your bow through basic tuning, you can start practicing. After a few months you can come back to this article to read the other in-depth articles to deepen your knowledge.
Also, if you would like to learn more about how a compound bow works, you might want to read the article below. Understanding the physics behind a compound bow, made it much easier for me to understand how to tune it:
How a compound bow works – the full explanation
If you have any questions or comments, please feel free to leave them down below. I will try to get back to you as soon as possible!

Tim van Rooijen
For as long as I can remember, I have always been fascinated by archery. First due to its historic significance but later because I like being outdoors. With this blog, I share my knowledge about Archery and how you can improve your shot. More about author…